How to add Border in C2C (corner to corner) Crochet Tutorial

Corner to Corner (C2C) crochet is a fantastic technique for creating stunning and intricate designs. Once you've completed your C2C project, it's time to give it that finishing touch by adding a border. A border not only frames your work beautifully but also provides a more polished and structured look to your project.
In this tutorial, we'll guide you through the process of adding a border to your C2C crochet masterpiece. Whether you're making a blanket, a scarf, or any other C2C creation, these steps will help you complete your project with finesse.
Step-by-Step Instructions:
Step 1: Select Your Border Yarn and Hook
- Choose a yarn color that complements your C2C project. You can go for a color that matches or provides a striking contrast, depending on your design preference.
- Select a crochet hook that corresponds to your chosen yarn weight. Refer to the yarn label for recommendations.
Step 2: Start in Any Corner
- Begin adding your border from any corner of your C2C project.
Step 3: Join Your Border Yarn
- Create a slipknot with your border yarn and attach it to your crochet hook.
- Insert your hook into the corner space of your C2C project.
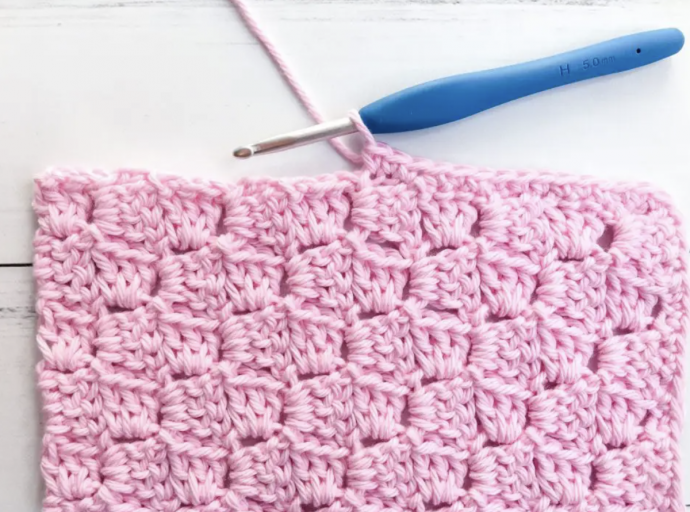
Step 4: Work Single Crochets (SC) Around the Edges
- Initiate the border by crocheting a single crochet (sc) into the corner space.
- Continue to work single crochets evenly along the edges of your C2C project.
- The exact number of single crochets will vary depending on the side, but the goal is to ensure that your border lies flat without puckering.
Step 5: Maintain Neat Corners
- When you reach a corner, maintain a flat appearance by working multiple single crochets, typically three, into the corner space.
- This extra reinforcement helps keep the square shape of your project intact.
Step 6: Continue Around the Entire Project
- Repeat steps 4 and 5 for all sides of your C2C project, including the corners.
- When you return to your starting corner, slip stitch into the first single crochet to complete the round.
Step 7: Additional Rows (Optional)
- You can choose to add more rows if you desire a thicker or more decorative border.
- Begin a new round by chaining one, crocheting a single crochet into the same stitch, and then follow the same process around the edges and corners.
- Keep repeating this step until your border achieves the desired width.
Step 8: Finishing Off
- Once you're content with the border, fasten off your yarn to prepare for sewing C2C panels together or continue adding more rows to the border.
Adding a border to your C2C project is an excellent way to give it a polished look and maintain a professional finish. Enjoy the creative process, and don't hesitate to experiment with different border colors and styles to achieve the perfect look for your design.
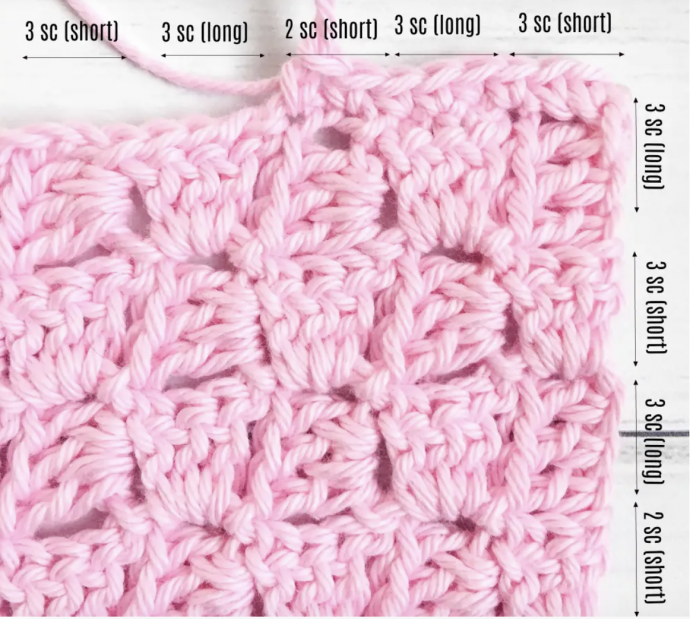
The number of sc stitches you will be working along your border edge will be dependent upon whether you are working a c2c project in hdc (half double) or dc (double crochet). My rule of thumb when working sc stitches along a dc c2c project is to work 3 sc stitches along a long pixel block and alternate 2-3 over a short pixel block. When I refer to a pixel block I am referring to 1 “set” or “block” of 3 dc stitches from your graph. A long pixel block is a block in which you are working into the bottom or top of the dc pixel block and a short pixel block is when you are working along the side of a dc stitch or a ch 3. An edge in c2c alternates long and short pixel blocks along the edge. See example below: