How to Crochet: Corner to Corner Diagonal Box Stitch

If you're looking for a fun and versatile stitch that creates stunning geometric designs, then the Diagonal Box Stitch is just what you need! The diagonal box stitch is one of many stitches that can be worked from “corner to corner” (c2c), and it’s everywhere right now. This wildly popular stitch is great for blankets, but can also be used for scarves, sweaters, or just about anything else! Because it’s worked diagonally across the fabric, it creates nice diagonal stripes when used with self striping yarns. It’s also made up of small boxes that can act as “pixels”, so works well for graphed images too. This unique stitch technique allows you to create captivating diagonal patterns that can be used in a wide range of crochet projects.
The Diagonal Box Stitch, also known as C2C, is a popular method that involves working from one corner of your project to the opposite corner, creating a series of squares or boxes along the way. This stitch pattern is not only visually striking but also offers a great opportunity to play with color combinations and gradients, resulting in eye-catching designs.
In this tutorial, we will guide you through the step-by-step process of mastering the Corner to Corner Diagonal Box Stitch. We'll show you how to increase and decrease stitches to create the diagonal shape, as well as how to change colors to achieve captivating color transitions. Whether you're interested in making blankets, scarves, shawls, or even home decor items like pillows or afghans, this stitch pattern will add a modern and dynamic touch to your creations.
With its versatility and endless design possibilities, the Diagonal Box Stitch is a must-have skill for any crochet enthusiast. So, grab your crochet hook, choose your favorite yarn, and get ready to embark on an exciting crochet journey. Let's learn together how to create stunning diagonal box stitch patterns that will impress everyone who sees your finished projects.
Get ready to unleash your creativity and explore the fascinating world of the Diagonal Box Stitch. You'll be amazed at the beautiful designs you can achieve with this technique, and you'll soon find yourself incorporating it into all of your future crochet endeavors. Let's dive in and discover the wonders of this captivating stitch pattern!
The Basic Technique
The C2C technique works a little differently than standard crochet: as the name implies, you start at one corner and work back and forth in diagonal rows until you reach the opposite corner.
Each diagonal row is made from several “tiles,” also called “squares” or “blocks.” And each tile is made from 3 double crochet stitches, plus their corresponding 3-ch turning chain.
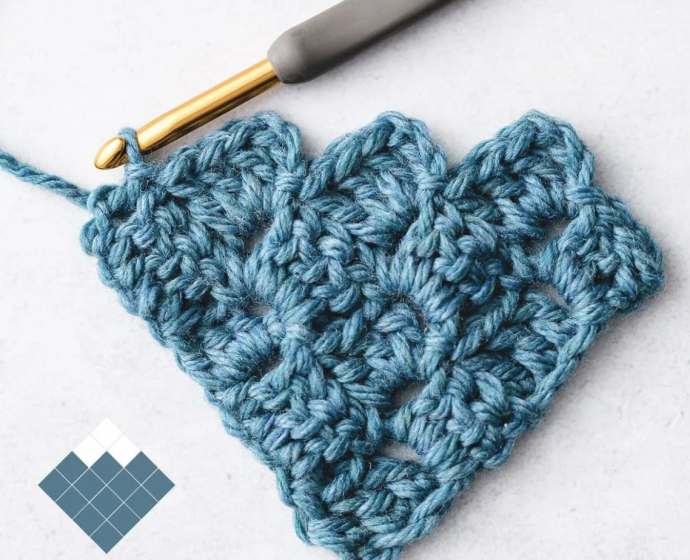
You’ll start by making the first tile, which will become the bottom-right corner of your project. Then, you’ll work back and forth in diagonal rows, increasing on each side until you reach the widest part of the project.
Then, you’ll start decreasing the number of tiles per row as you make your way to the top-left corner of the project.
Don’t worry if this seems a little confusing at first. The hardest part is figuring out the first two rows – after that, you’ll be flying.
Getting Started with C2C crochet
- Make your first swatch along with me, and you’ll get a good grasp of the basic concept. You’ll be ready for your first real C2C project with just a little practice.
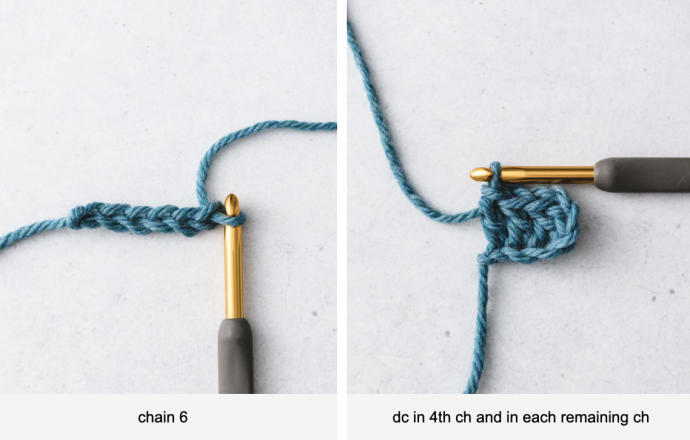
- Make the first tile: Chain 6. Dc in the 4th chain from the hook. Dc in each of the two remaining chains.
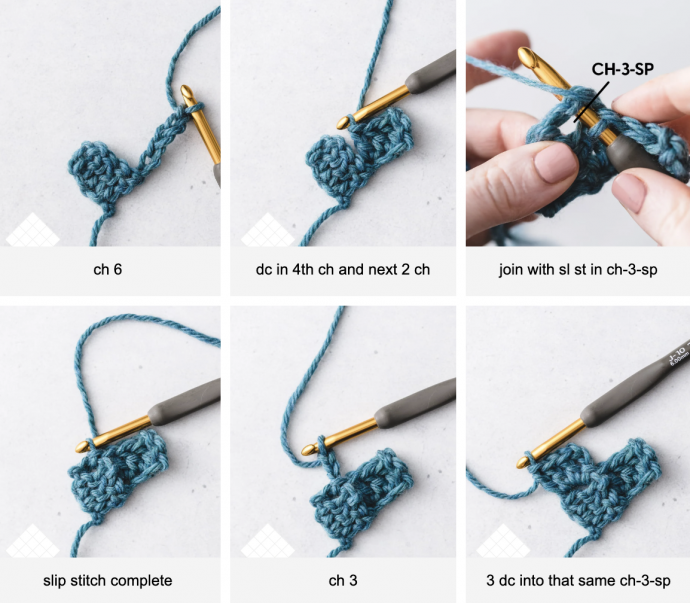
- Row 2: Turn. Chain 6. Dc in the 4th chain from the hook, dc in each of the two remaining chains. Slip stitch into the ch-3-sp from the previous row. Chain 3. Work 3 dc into that same ch-3-sp.
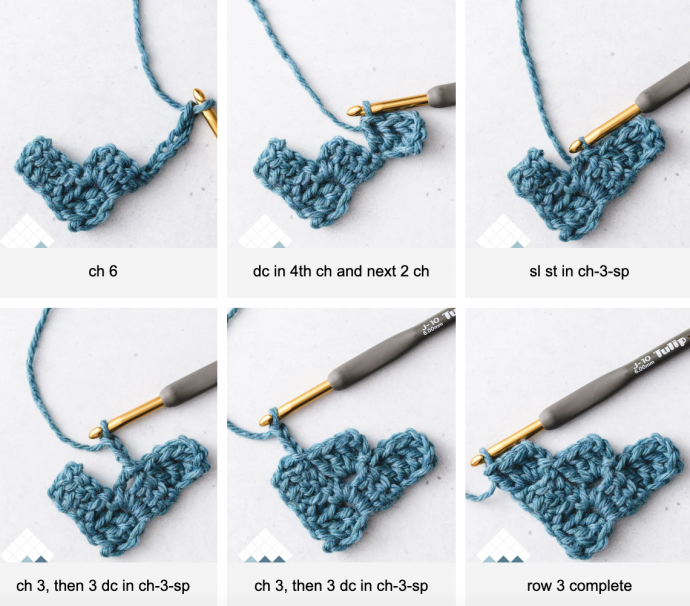
- Row 3: Ch 6. DC in the 4th chain from the hook, and in each of the 2 remaining chains. (1 tile complete.) Sl st into the ch-3-sp from the previous row. Ch 3, 3 dc into the same ch-3-sp. (2nd tile complete.) Sl st into the ch-3 sp from the previous row. Ch 3, 3 dc into the same ch-3-sp. (3rd tile complete.)
- Row 4. Ch 6. DC in the 4th chain from the hook, and in each of the 2 remaining chains. (1 tile complete.) Sl st into the ch-3-sp from the previous row. Ch 3, 3 dc into the same ch-3-sp. (2nd tile complete.) Sl st into the ch-3 sp from the previous row. Ch 3, 3 dc into the same ch-3-sp. (3rd tile complete.) Sl st into the ch-3 sp from the previous row. Ch 3, 3 dc into the same ch-3-sp. (4th tile complete.)
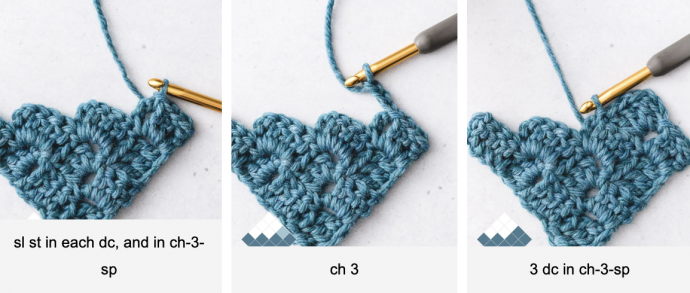
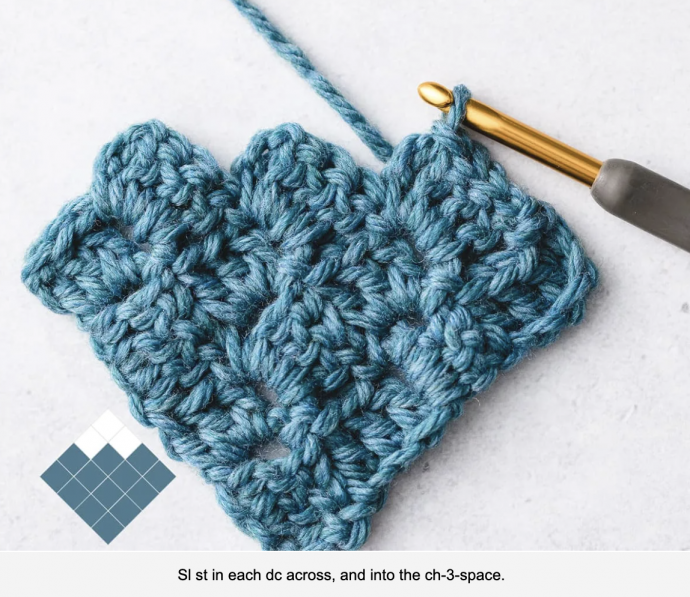
- Row 5. Decrease: Slip stitch in each dc across, and slip stitch into the ch-3-space. Chain 3, and work 3 dc into the ch-3-sp of the previous row. (This completes the first tile of this row.) Sl st into the ch-3-sp from the previous row. Ch 3, 3 dc into the same ch-3-sp. (2nd tile complete.) Sl st into the ch-3 sp from the previous row. Ch 3, 3 dc into the same ch-3-sp. (3rd tile complete.)
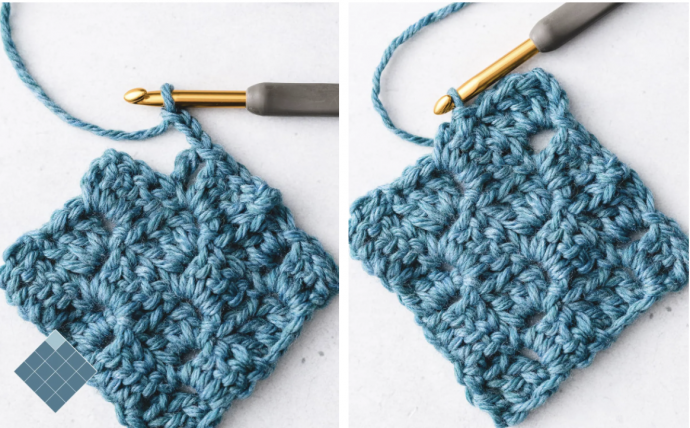
- Row 6. Decrease: Slip stitch in each dc across, and slip stitch into the ch-3-space. Chain 3, and work 3 dc into the ch-3-sp of the previous row. (This completes the first tile of this row.) Sl st into the ch-3-sp from the previous row. Ch 3, 3 dc into the same ch-3-sp. (2nd tile complete).
- Row 7. Decrease: Slip stitch in each dc across, and slip stitch into the ch-3-space. Chain 3, and work 3 dc into the ch-3-sp of the previous row. (This completes the only tile in this row.)
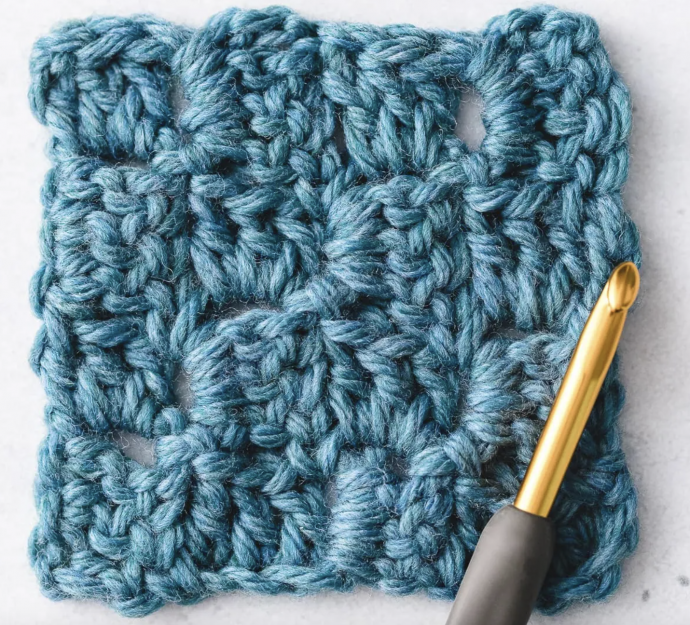
- Weave in the ends to complete.
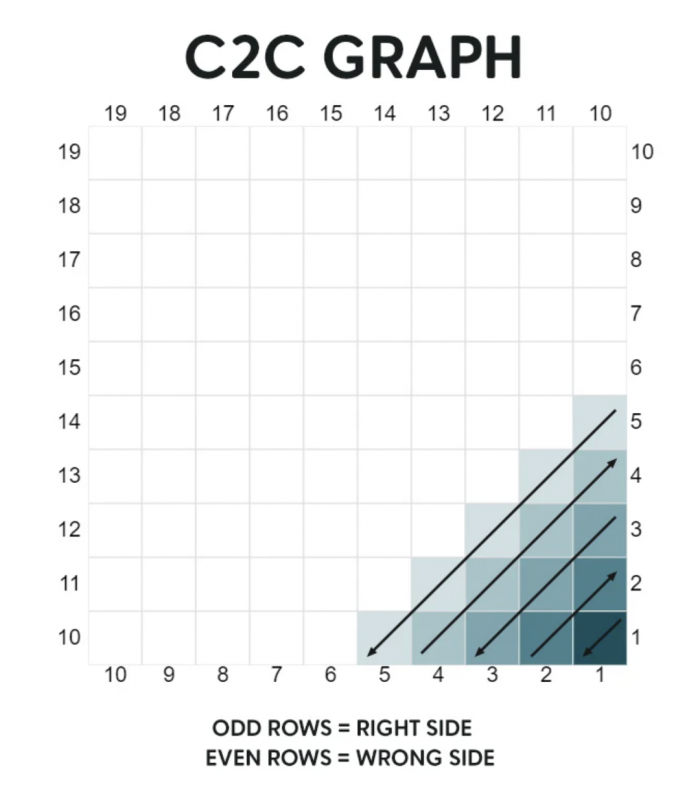
C2C graphs are most commonly worked from the bottom-right corner to the top-left corner. That means you’ll start your design with the bottom-right tile, and work your way across the chart in diagonal rows, until you reach the top-left tile.
The graph will have numbers along all four sides to help you keep track of what row you’re on. I like to draw diagonal lines through the chart as I finish each row to help me keep track of what I’ve already crocheted. Crossing off the rows helps me stay a little more organized so I don’t lose my place.