Cute Waffle Stitch Headband Crochet Pattern

What can you get when you combine an easy pattern with beautiful soft yarn? Many things, of course, we are crocheters after all, but in this instance, you can get a cozy waffle stitch headband perfect for cold weather temps.
Crochet ear warmers or headbands are a perfect project that you can quickly make for yourself, to give as gifts, or to sell at craft fairs.
Learn how to crochet the Waffle Stitch Headband with this photo tutorial.
Materials
- US size D/3, 3.25 mm crochet hook
- Yarn Bee Soft and Sleek DK (Category 3 Light Yarn, 100% Acrylic, 478 yds/4oz)
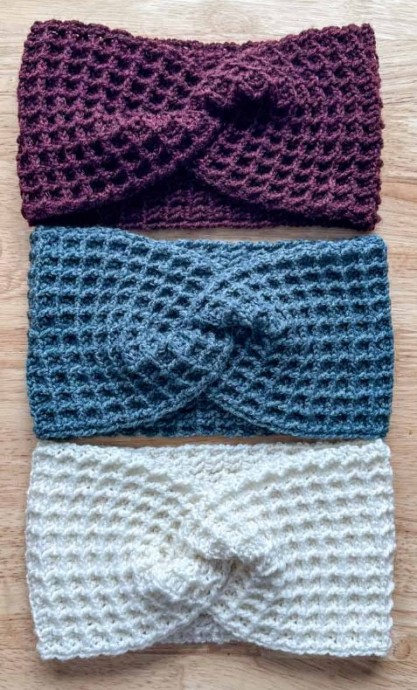
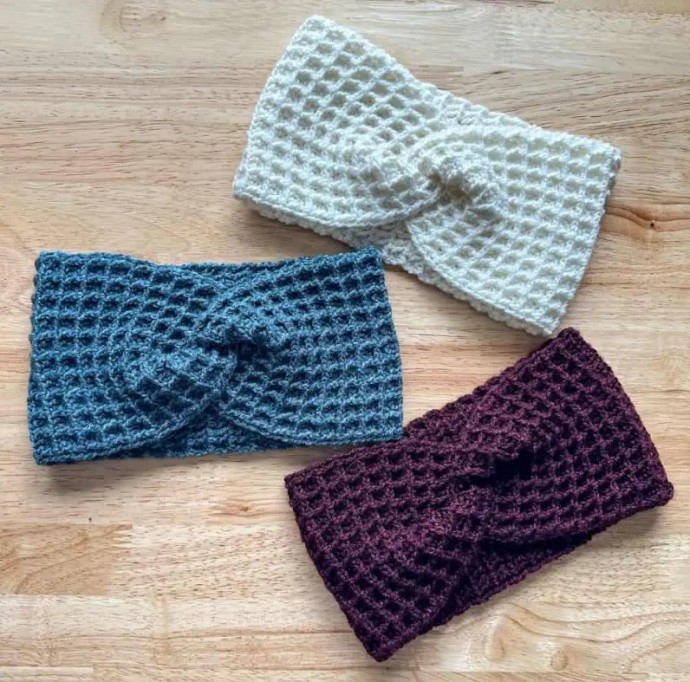
- Samples used approximately 203 yds. Colors pictured are Ivory, Oxblood and Pretty in Peacock
- Large Eye Yarn Needle
- Scissors
Gauge
- 4”x4” = 26 sts by 16 rows
Finished Size
- 19.5” around by 5” wide
Abbreviations
- ch: chain
- dc: double crochet
- st(s): stitch(es)
- fpdc: front post double crochet
Notes
- The chain 2 to start each row counts as a stitch.
- I tend to crochet with a tight tension so 2 chains gives me enough height to start a row of double crochets. If your tension is looser, you may want to chain 3 to start each row.
- If you’d like to make a different size, keep your starting chain a multiple of 3+2 and add or subtract rows
Instructions
Ch 35 (multiple of 3+2)
Row 1: dc in 4th ch from hook and in each st across, turn. (33)
Row 2: ch 2 (counts as first dc), *fpdc in next st, dc in next 2 sts, repeat from * until the last 2 sts; fpdc in next st, dc in top of ch, turn. (33)
Row 3: ch 2 (counts as first dc), *dc in next st, fpdc in the next 2 sts, repeat from *until the last 2 sts; dc in next st, dc in top of ch, turn. (33)
Repeat rows 2 and 3 until you’ve reached a total of 76 rows or your headband reaches the desired length. Leave a long tail end of at least 6”.
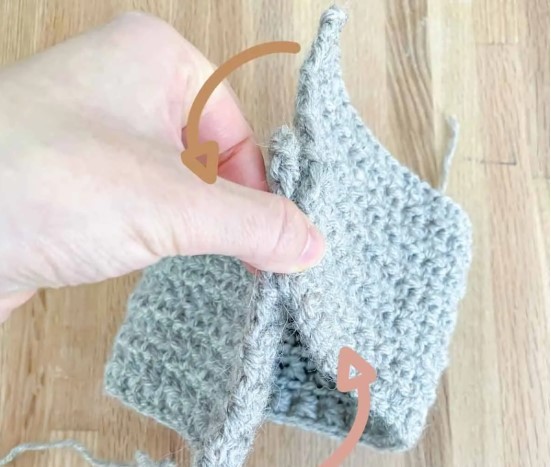
Creating the Twist
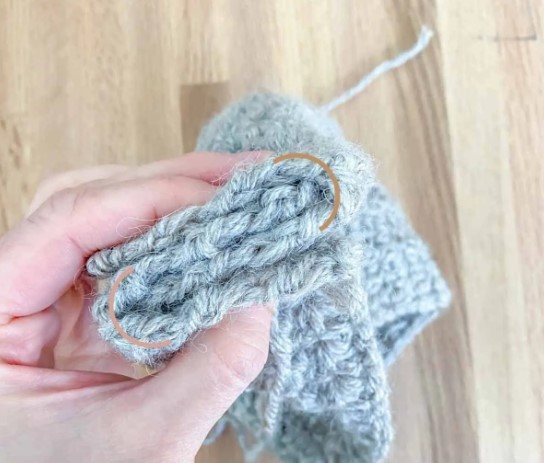
With the wrong side facing out, bring the ends of the headband together so half of one end is against half of the other end. (If you want the side with the boxes (right side) to be visible, make sure it is on the inside as you are sewing the twist.)
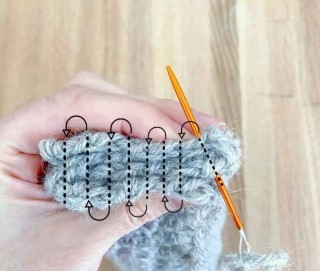
Wrap each side around the other side of the headband. Using the long tail end and a large needle, weave the yarn back and forth through all four layers. Weave in ends. Turn right side out and smooth down.