Crochet Tutorial: Textured Waffle Stitch

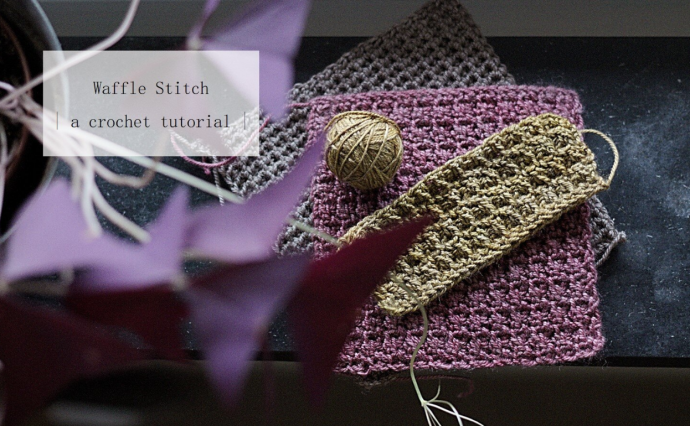
The Waffle Stitch is a wonderfully textured crochet pattern that resembles the delightful and familiar waffle pattern found on your breakfast plate. Its rich, raised squares create a thick, cozy fabric that's perfect for a variety of projects, from blankets and scarves to dishcloths and more. This stitch is a great choice when you want to add both warmth and style to your creations.
Now, let's dive into the step-by-step instructions to learn how to crochet the Waffle Stitch:
Creating the Standard Waffle Stitch:
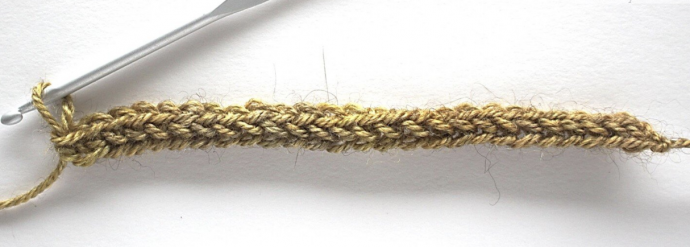
- The Waffle Stitch is worked over an odd number of stitches. For this sample, let's start with an FDC (Foundation Double Crochet) row of 25 stitches. If you prefer, you can also start with 26 chains, then DC 1 in each chain from the second chain onwards.
- FDC 25 OR ch 26, then DC 1 in each chain from the 2nd chain to the end. Turn.
- FDC 25 OR ch 26, then DC 1 in each chain from the 2nd chain to the end. Turn.
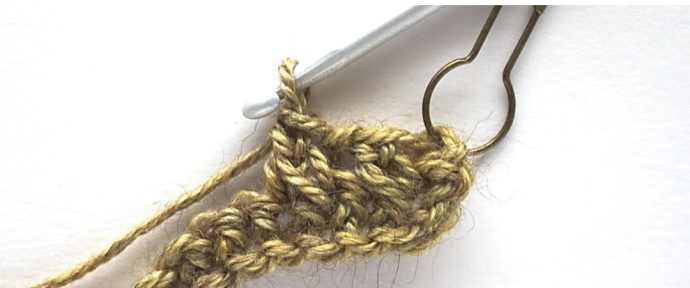
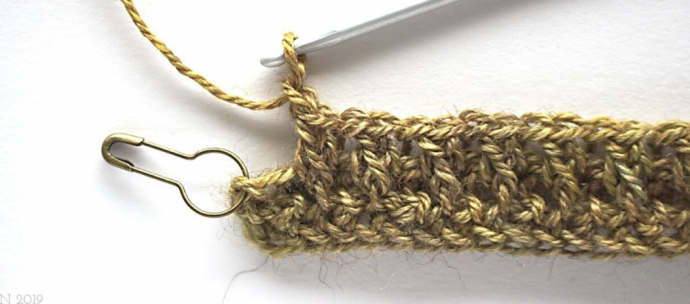
- After creating your foundation row, work a set-up row. Every stitch, including the starting chain, counts. You may want to mark the second starting chain of each row with a stitch marker.
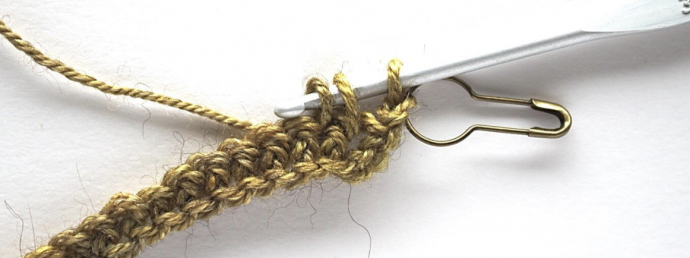
- Chain 2 (counts as 1 stitch, PM on the 2nd chain if desired), then follow these steps:
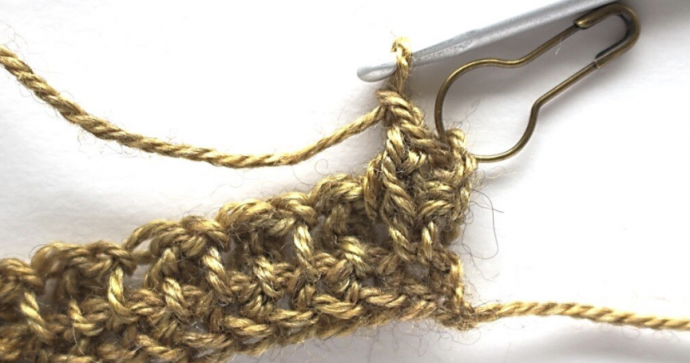
- Step 1: Insert your hook into the first stitch and PUL.
- Step 2: Insert your hook into the second stitch and PUL.
- Step 3: YO and draw through the first 2 loops on the hook only.
- Step 4: YO and draw through the remaining 2 loops on the hook.
- Step 5: Ch 1.
- Repeat steps 1-5 until only 1 stitch remains, then DC 1 in the last stitch. Turn.
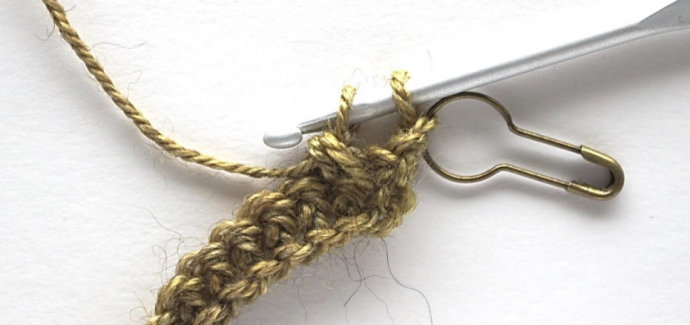
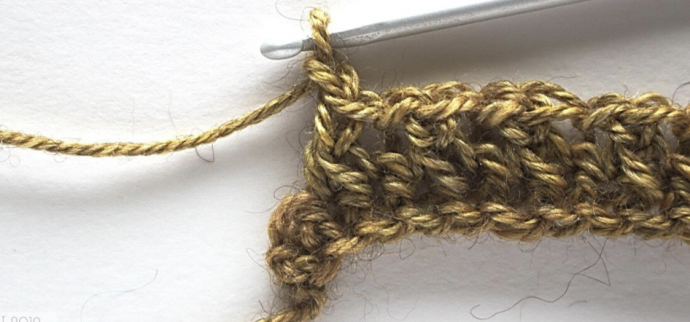
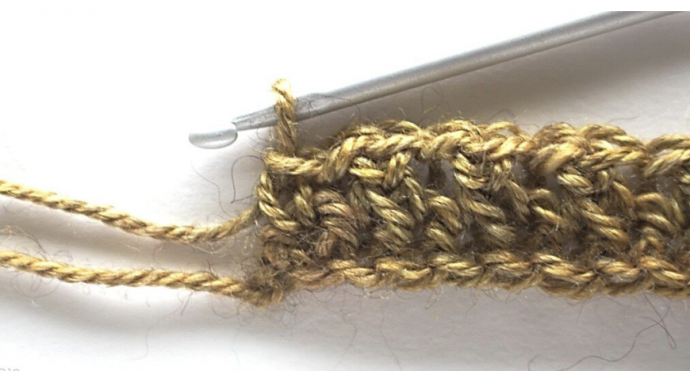
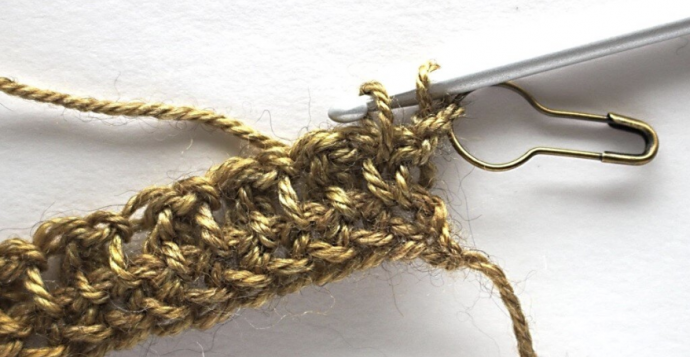
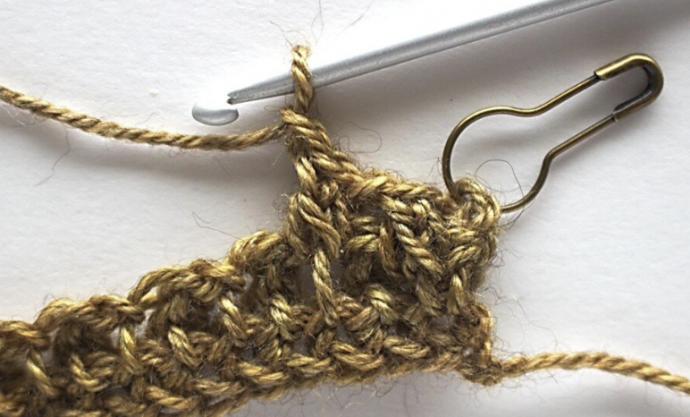
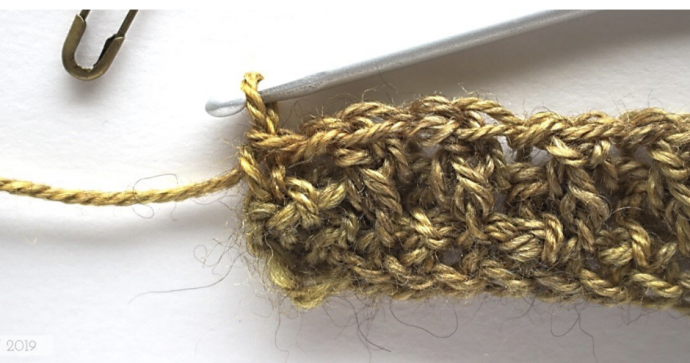
- For the rest of the sampler square, you'll be working standard Waffle Stitch rows. The first and last stitches of each row are slightly different, but the rest of the stitches remain the same.
- Chain 2 (counts as 1 stitch, PM on the 2nd chain if desired), then follow these steps:
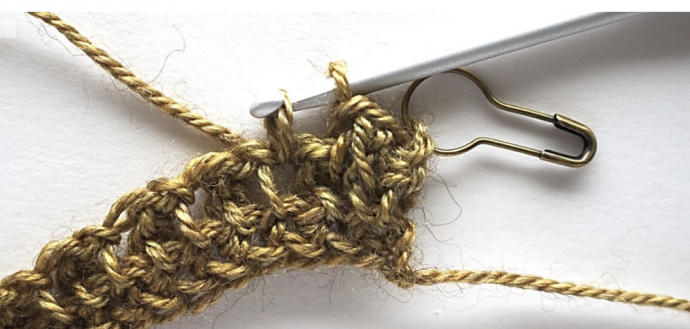
- Step 6: Insert your hook between the "V" of the DC of the previous row and PUL.
- Step 7: Insert your hook to the left of the DC of the previous row (i.e., into the chain space) and PUL.
- Steps 8-10: Same as steps 3-5 above.
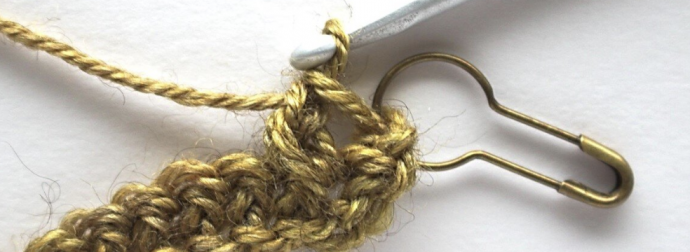
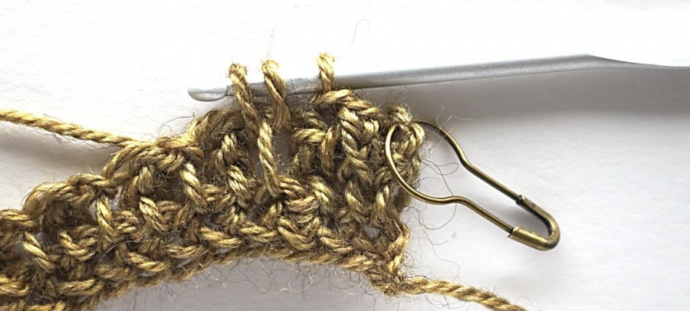
- Repeat steps 6-10 until 2 stitches remain (i.e., one ExtDC2-tog and the starting chain). Skip the last ExtDC2-tog, remove the stitch marker, and DC 1 in the 2nd turning chain. Turn.
- Continue working this last row until your piece reaches the required dimensions.
Increasing the Waffle Stitch:
In the Harvested Shawl pattern, the Waffle Stitch increases by 4 stitches per row. Here's how to achieve this:
- Follow the foundation row and set-up row instructions as you did for the standard Waffle Stitch. Turn.
- Chain 2 (counts as 1 stitch, PM on the 2nd chain if desired), then follow these steps:
- Step 1: DC 1 between the "V" of the DC of the previous row, then ch 1.
- Step 2: Insert your hook between the "V" of the DC of the previous row again and PUL.
- Steps 3-5: Same as steps 4-6 above.
- Work ordinary Waffle Stitch until only 1 stitch remains (i.e., the starting chain). Remove the stitch marker and DC 1 in the 2nd turning chain. Turn.
- At the start of the next row, chain 2 (counts as 1 stitch, PM on the 2nd chain if desired). Work as in the previous row until 2 stitches remain (i.e., DC and starting chain), then:
- Step 1: Insert your hook between the "V" of the DC of the previous row and PUL.
- Step 2: Insert your hook to the left of the DC of the previous row (i.e., between DC and starting chains) and PUL.
- Steps 3-5: Same as steps 4-6 above.
- Repeat steps 11-15 until 2 stitches remain (i.e., one ExtDC2-tog and the starting chain). Skip the last ExtDC2-tog, remove the stitch marker, and DC 1 in the 2nd turning chain. Turn.
Continue increasing the Waffle Stitch by repeating these steps, and work the final row as you did for the standard Waffle Stitch to complete your piece. Enjoy crocheting this delightful stitch!