Diamond Waffle Crochet Stitch Photo Tutorial

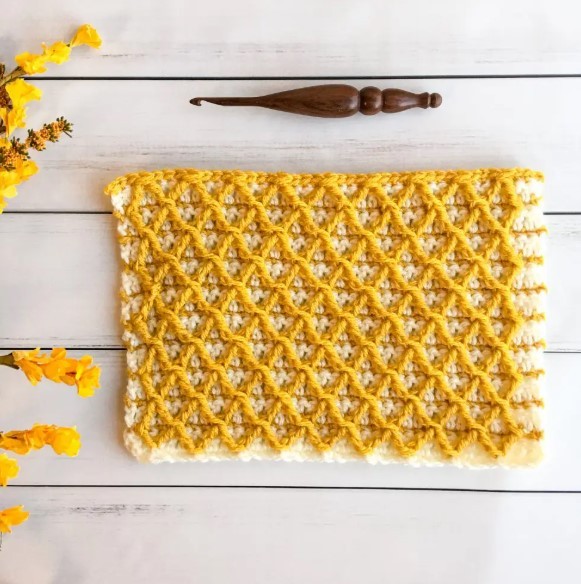
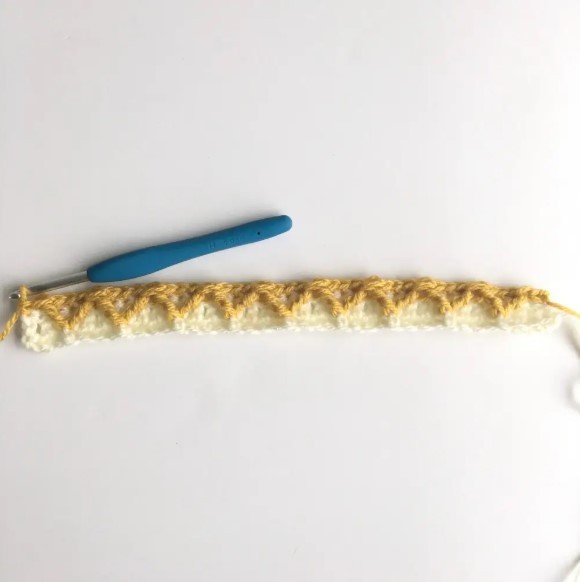
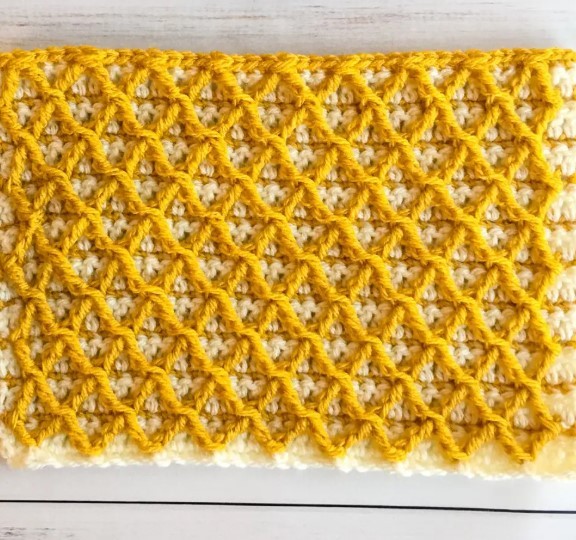
The Diamond Waffle Stitch is absolutely amazing – and I love how dramatic it is when using 2 different contrasting colors.
If you have never worked this stitch, it may seem really intimidating – but don’t worry I will break down every step so you can feel confident of success.
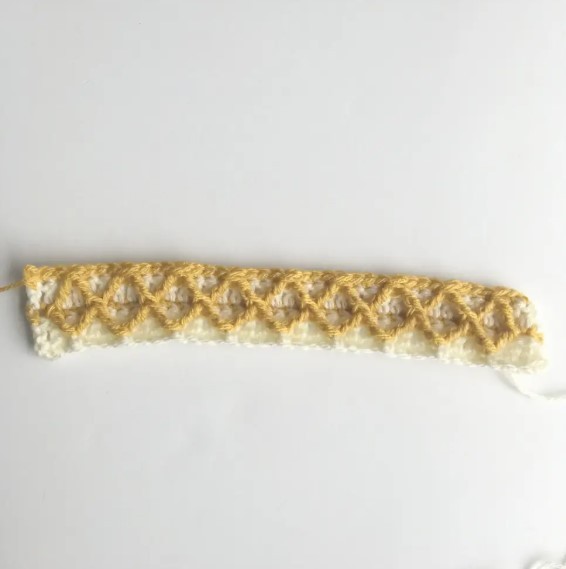
Learn how to crochet the Diamond Waffle Stitch with this photo tutorial.
Materials
- Lion Brand Basic Stitch Yarn in Cream & Saffron
- Furl’s Streamline Swirl in Cookies & Cream Size H/8 (5.0 mm) crochet hook
Abbreviations
- RS = right side
- ch = chain
- sc = single crochet
- dc = double crochet
- FPtr = front post treble crochet
- yo = yarn over
- sk = skip
- st(s) = stitch(es)
- FPtr2tog = FPtr 2 together
Special Stitches
FPtr (front post treble crochet): yo twice, insert hook around post of stitch indicated below, yo, pull up a loop (4 loops on hook), yo, pull through 2 loops on hook (3 loops on hook), yo, pull through 2 loops on hook (2 loops on hook), yo, pull through remaining 2 loops on hook.
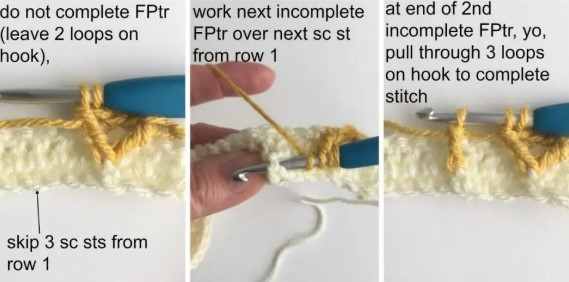
FPtr2tog (front post treble 2 together): make your first incomplete FPtr by yo twice, insert hook around post of stitch indicated below, yo, pull up a loop (4 loops on hook), yo, pull through 2 loops on hook (3 loops on hook), yo, pull through 2 loops on hook (2 loops on hook) leave remaining 2 loops on hook and make 2nd incomplete FPtr by yo twice, insert hook around post of stitch indicated below, yo, pull up a loop (5 loops on hook), yo, pull through 2 loops on hook (4 loops on hook), yo, pull through 2 loops on hook (3 loops on hook), yo, pull through remaining 3 loops on hook.
Notes
- To resize pattern start with a foundation chain in multiples of 4
Instructions
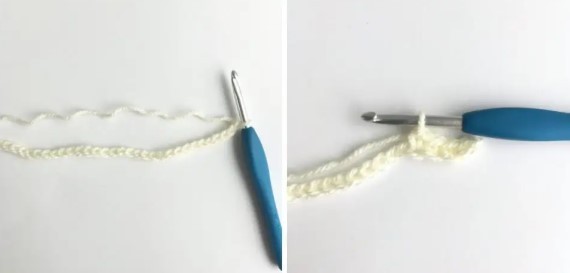
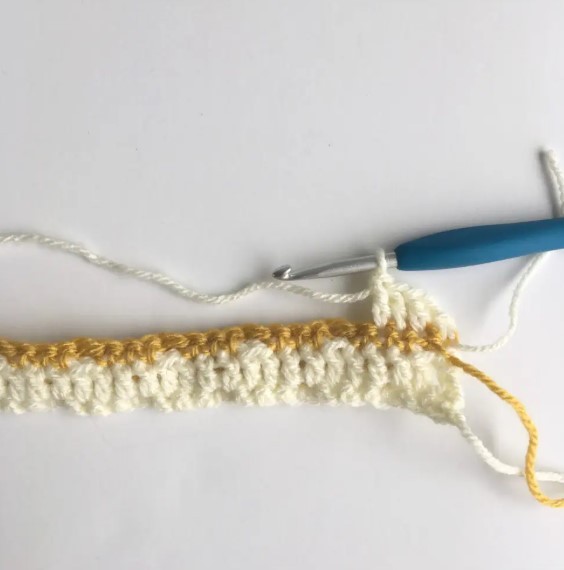
Row 1: With Color A (RS) 1 sc in 2nd ch from hook and in each ch to end. Turn.
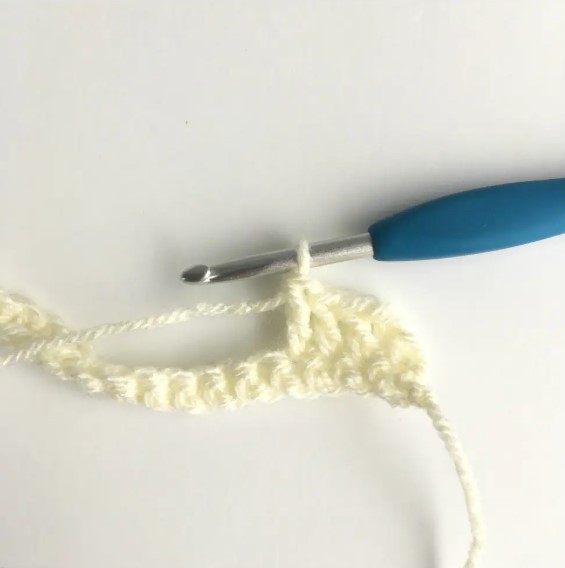
Row 2: ch 3 (counts as first st), 1 dc in each st to end. Turn.
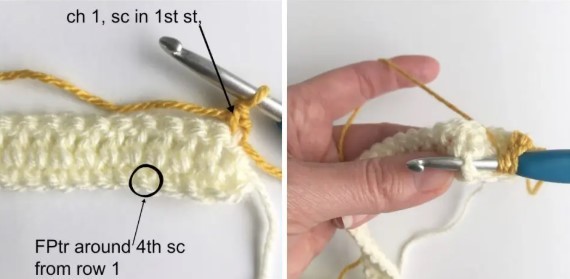
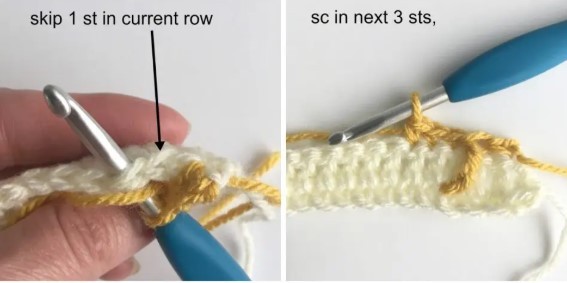
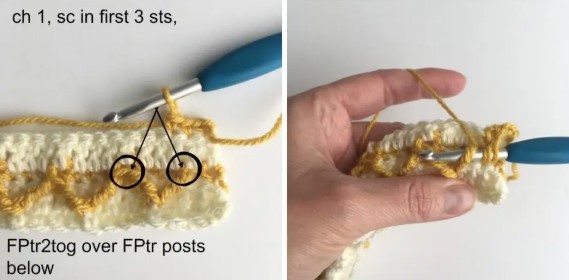
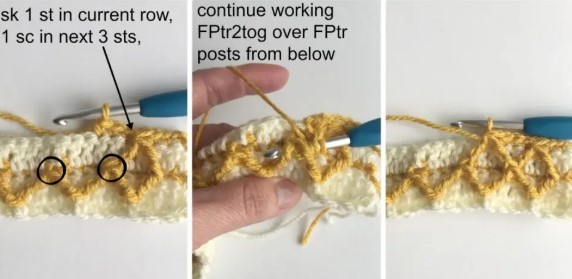
Row 3: With Color B, ch 1, 1 sc in first st, FPtr around 4th sc from 2 rows below,
sk 1 st on current row, 1 sc in next 3 sts,
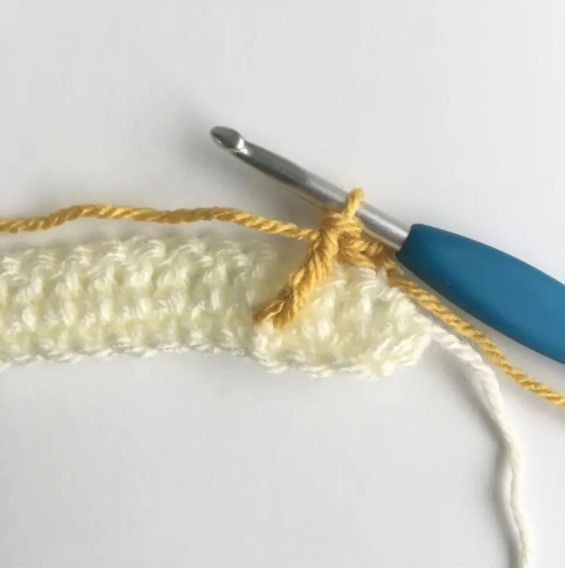
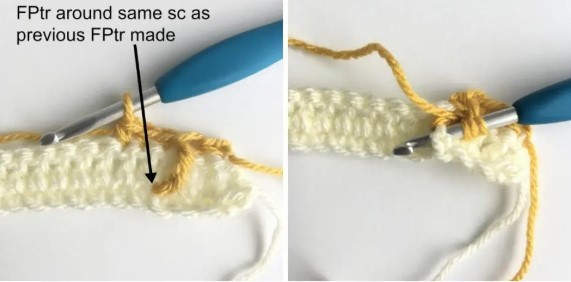
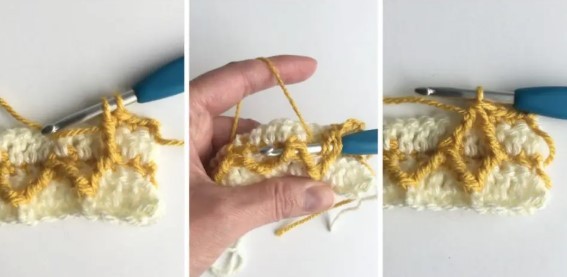
*FPtr2tog (work 1st incomplete FPtr around post of same sc as previous FPtr, sk next 3 sc st from 2 rows below and work 2nd incomplete FPtr around next sc from 2 rows below)
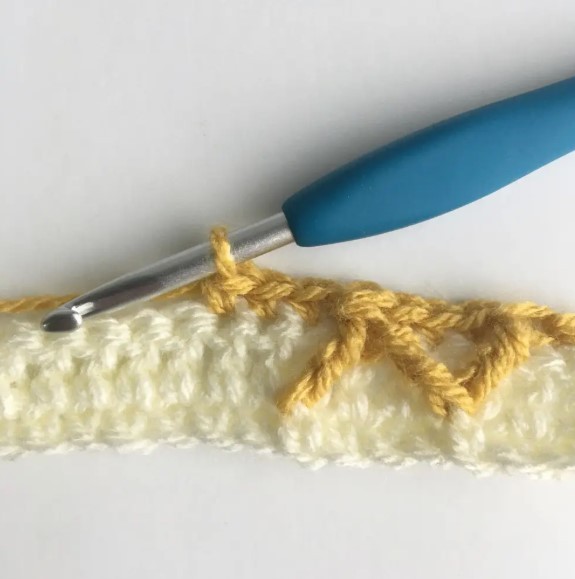
sk 1 st in current row, 1 sc in next 3 sts,* repeat between * * to last 2 st, 1 FPtr around last sc st worked in row 1, sk next st in current row, 1 sc in last st. Turn.
Row 4: With Color A, ch 3, 1 dc in each st to end. Turn.
Row 5: With Color B, 1 sc in first 3 sts, *FPtr2tog (work 1st incomplete FPtr around FPtr from 2 rows below, work 2nd incomplete Fptr around next Fptr),
sk 1 st in current row, 1 sc in next 3 sts,* repeat between * * to last 4 sts, FPtr2tog over last 2 FPtr sts from 2 rows below, sk 1 st in current row, 1 sc in last 3 sts. Turn.
Row 6: With Color A, ch 3, 1 dc in each st to end. Turn.
Row 7: With Color B, ch 1, 1 sc in first st, FPtr around FPtr2tog posts of the row from 2 rows below, sk 1 st on current row, 1 sc in next 3 sts, *FPtr2tog (work 1st incomplete FPtr around the same FPtr2tog posts from 2 rows below, work 2nd incomplete Fptr around next Fptr2tog), sk 1 st on current row, 1 sc in next 3 sts,* repeat between * * to last 2 sts, FPtr around the last FPtr2tog posts from 2 rows below, sk 1 st on current row, 1 sc in last st. Turn.
Continue repeating rows 4 – 7 to size desired.