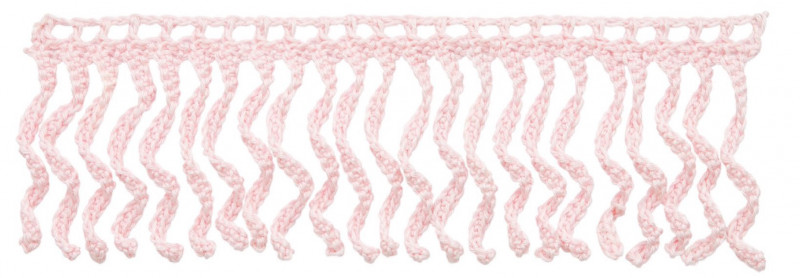
Crochet Basics: Twisted Fringe

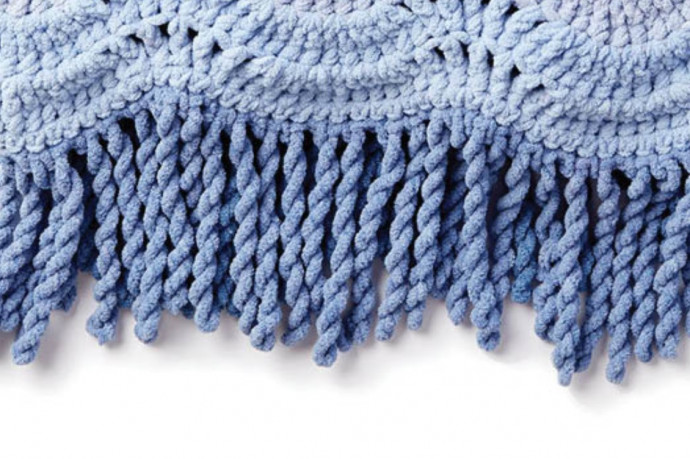
Do you guys love fringe? I always want to decorate my crochet projects with fringe because it adds a special touch. Recently I came across a twisted fringe and thought you might like to know how to make a twisted fringe too! It's so easy and you do not need scissors to cut off a million pieces of yarn. So let us get started right away so you can learn to add fringe to your next crochet project! Enjoy!
Instructions
Note: The fringe will twirl naturally; do not press out the twirls.
Step 1:
Slip stitch to your project at a corner or where you want to begin.
Step 2:
Pull the yarn away from your project for the desired amount. The twisted fringe will be just less than half of this height.
Step 3:
Place your finger onto the loop on the crochet hook so it stays in place for the first spin. Rotate your hook clockwise about 15-17 times. The loop will now look very twisted.
Step 4:
Place your left index finger in front of the twisted loop and bring the hook down and over your finger to your project edge. Slip stitch in the next space.
Step 5:
Take your left finger out of the fringe and watch it snap into its twist. If it needs adjusting, gently tug so that it’s straight without any knots.
And that’s it! Repeat these steps along the edge of your project for some awesome-looking fringe!
Sorry, I cannot picture in my mind how to do this, even with the instruction. Is there a tutorial anywhere? I would really like to try this!
Can you add a tutorial please for us visual learners? Thank you