Twisted Up Tunisian Simple Stitch Photo Tutorial

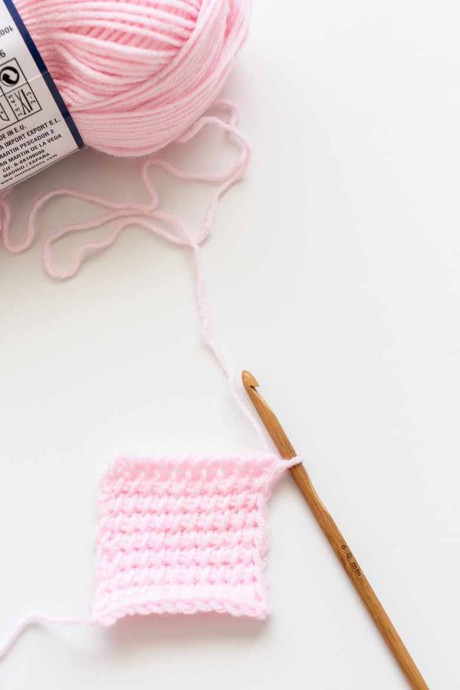
If you like Tunisian crochet and want to increase your skills, take a look at this easy stitch pattern the Twisted up Tunisian simple stitch pattern.
Yes, it is a variation of the Tunisian Simple Stitch but this stitch is much tighter compared to the simple stitch.
This stitch pattern is very beginner-friendly but it requires a different movement with the hook. When you try this technique a couple of times it is very easy to use.
TOOLS
- Tunisian hook or Tunisian hook with a cord
- Scissors
- Needle
- Measuring tape
MATERIAL
- 1 skein of yarn
Tunisian crochet is prone to curling edges.
To solve this it is recommended to increase the hook size by at least 2 or even 3 sizes.
STITCHES USED IN THE TUNISIAN TWISTED UP TSS
To crochet this stitch you need the following basic stitches:
Slip Knot
Use the crochet hook to draw the yarn through the loop and pull the loop until tight
Chain (CH)
Wrap the yarn over the hook from back to front.
Pull the hook with the yarn, through the loop that is on your hook
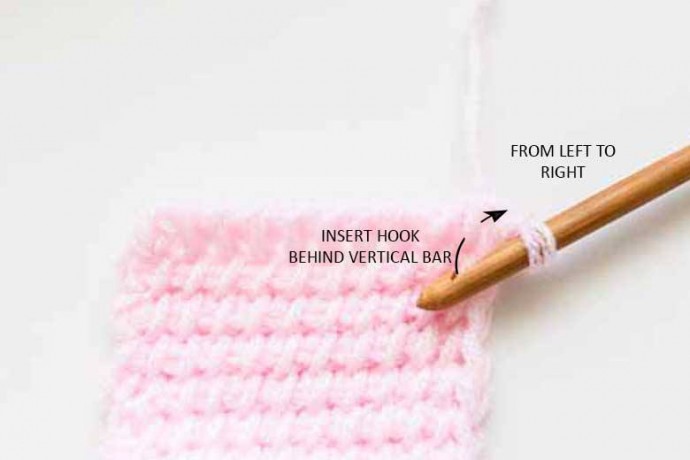
Single Crochet (SC) Twist Up
Start with one loop on your hook
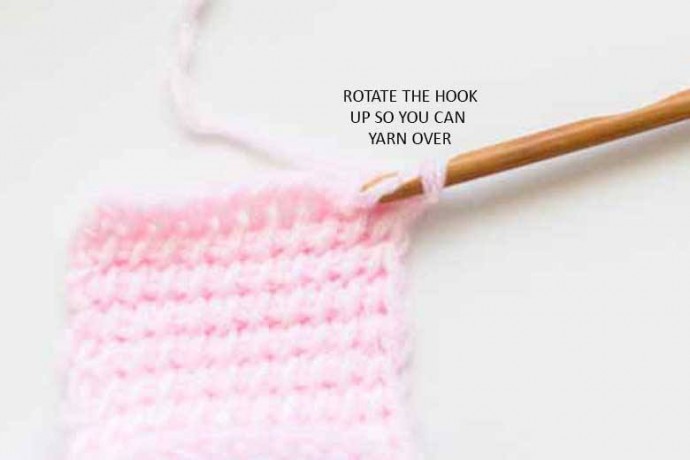
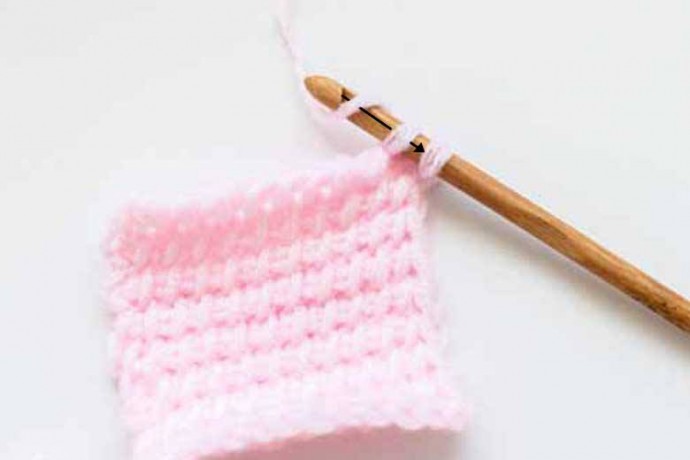
Insert your hook from left to right of the next vertical bar in the row below and rotate the hook upwards. YO and draw up a loop through the vertical bar. You have 2 loops on the hook. Repeat until the end of the row
Slip Stitch
Slide the hook through a stitch you want to crochet a slip stitch
Yarn over the hook
Draw up a loop and pull it through the loop on your hook
HOW TO MAKE A TUNISIAN TWISTED UP TSS
To make a swatch for the Tunisian Twisted up Tunisian Simple Crochet
Starting Row: Chain your preferred number of chains. Start with at least 12 chains
You are going to pull and leave loops on your hook which is why you need a starting chain/foundation chain as well
Row 1: Insert your hook in the 2nd chain from your hook. * Yarn over (YO) the hook and draw up a loop through the chain stitch. Leave the loop on the hook so you have two loops on your hook. Insert your hook in the next chain and repeat from the * all the way across your starting chain.
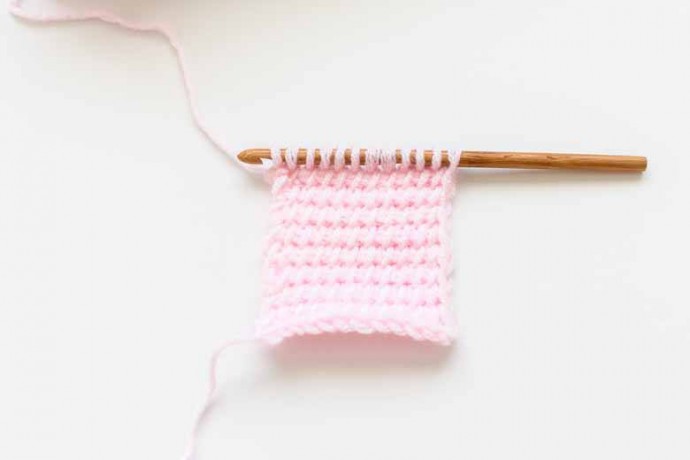
You now have a hook full of loops. If you started with 12 chains you now should have 12 loops on your hook. Your forward pass is completed
Row 2: Yarn over (YO) again and draw your yarn through 1st loop on your hook (this is the last loop you added or cast on your hook). * YO and pull up a loop through the next 2 loops on your hook. Repeat from * all the way across the row until 1 loop remains on the hook. Your reverse pass is now complete
One loop remains on your hook and it is the first stitch of the next row.
Row 3: Instead of sliding the hook underneath the bar you approach the vertical bar over the bar. Hook the yarn while you move the hook from left to right and then push the hook underneath the bar and rotate the hook upwards. Yarn over and pull up a loop.
Row 4: Yarn over (YO) again and draw your yarn through 1st loop on your hook. * YO and pull up a loop through the next 2 loops on your hook. Repeat from * all the way across the row until 1 loop remains on the hook.
Repeat row 3 and 4 for as many rows as you like until you feel comfortable using this stitch pattern.