Crochet Fringe Edging Tutorial

Welcome to our Crochet Fringe Edging Tutorial! Adding a fringe edging to your crochet projects is a wonderful way to enhance their beauty and give them a touch of elegance and flair. Whether you're working on a cozy blanket, a stylish scarf, or any other crochet creation, this tutorial will guide you through the steps to create a delightful fringe edging.
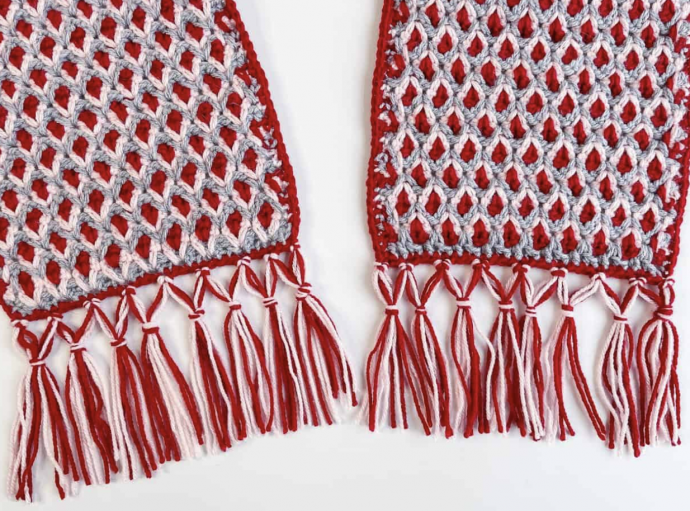
Fringes not only add decorative charm but also offer versatility in terms of style and customization. You can choose the length, color, and spacing of your fringe to match your project's overall look and feel. In this comprehensive tutorial, we will walk you through each step of the process, from selecting your materials to attaching the fringe, ensuring that you can achieve the perfect finishing touch for your crochet masterpiece.
So, gather your yarn, crochet hook, and enthusiasm, and let's embark on a journey to create beautiful crochet fringe edgings that will elevate your projects to a new level of craftsmanship and artistry. Whether you're a crochet novice or an experienced enthusiast, you'll find this tutorial valuable in your creative endeavors. Let's get started!
How many strands of yarn are needed for each fringe? The answer depends on the thickness of the yarn you're working with and your desired finished fringe thickness. For a uniform and evenly knotted fringe, you'll need an even number of strands.
- Start by deciding on the length of your yarn strands and cut several strands to that specified length.
- Take four strands and fold them over; this creates a fringe with four strands of yarn, resulting in a specific thickness. Experiment with different quantities of strands, always starting with an even number, such as 4, 6, 8, or 10 strands, until you achieve your desired thickness.
- Add the fringe to your project evenly along the edge, with the desired length and an even number of yarn strands.
- Don't worry about trimming the fringe at this stage. Wait until after you've knotted the fringe to trim it to the desired length.
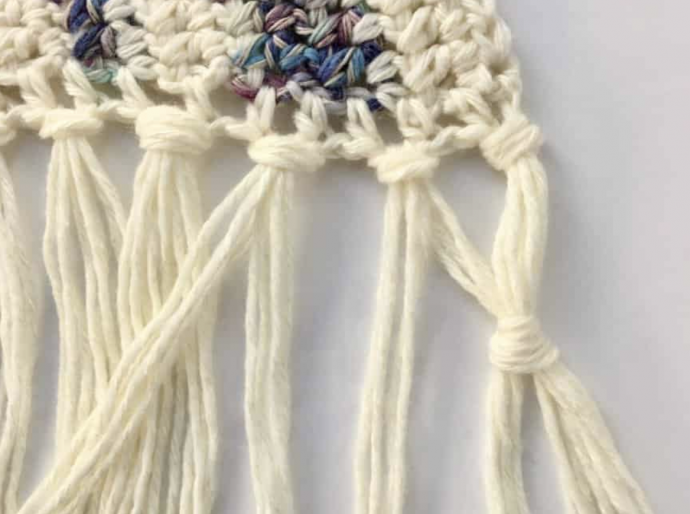
- You can start working on your knotted fringe from either corner, whether left or right. The corner fringe requires a slightly different approach compared to the remaining fringe.
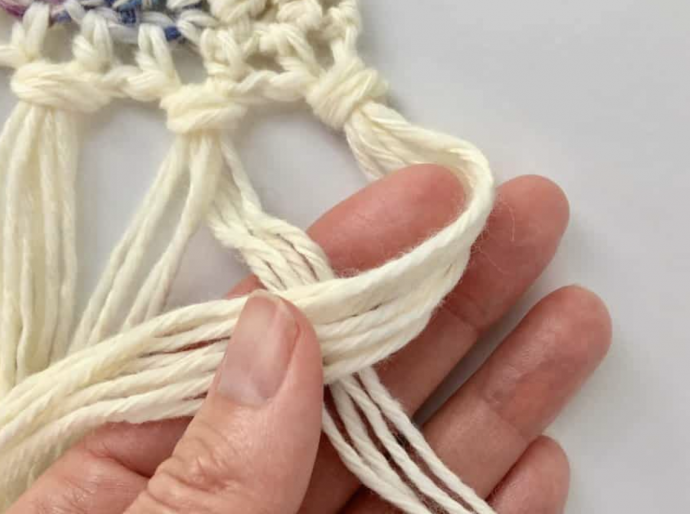
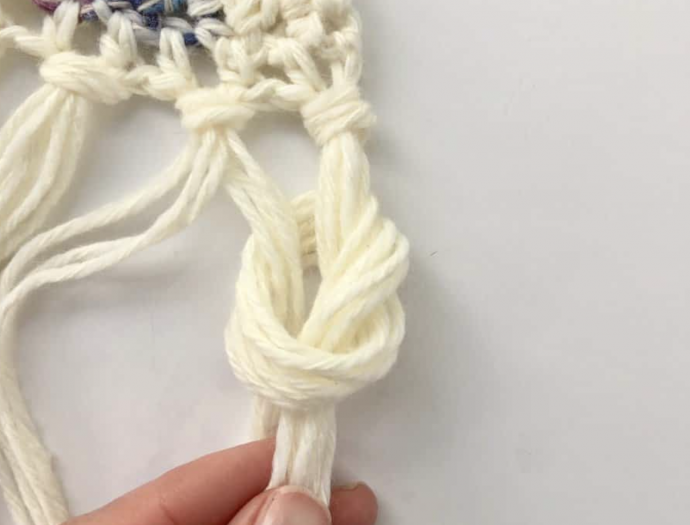
- For the corner fringe, you'll use all the strands in the fringe to begin. Next to it, separate the fringe into two, ensuring you have an even number of yarn strands. For example, if you have 8 strands of yarn, split the fringe into 4 strands on each side.
- Hold the 4 strands on the left with your left hand. Then, fold the 8 strands from the corner fringe over the top of the 4 strands on your hand, keeping a finger or fingers in the center of the fringe.
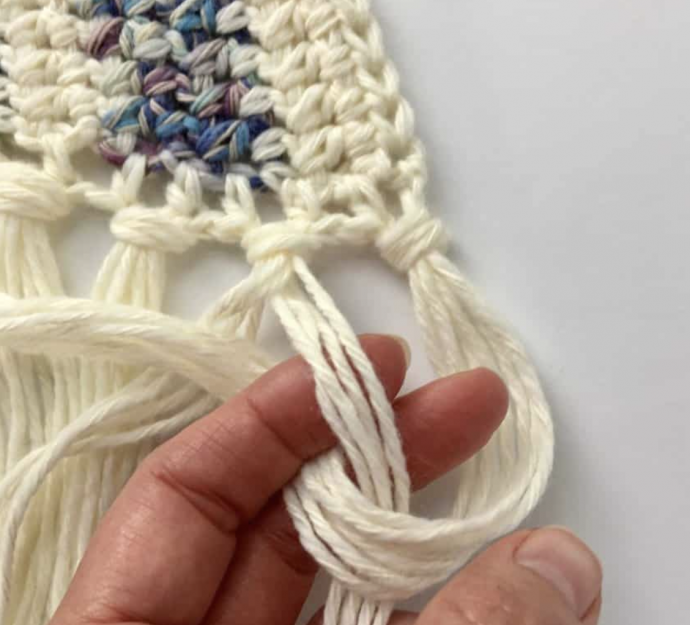
- With your right hand, grasp the bottom end of the 8 strands, bring them around to the front, and push the end of the 8 strands down into the center of the loop created, where your fingers are placed.
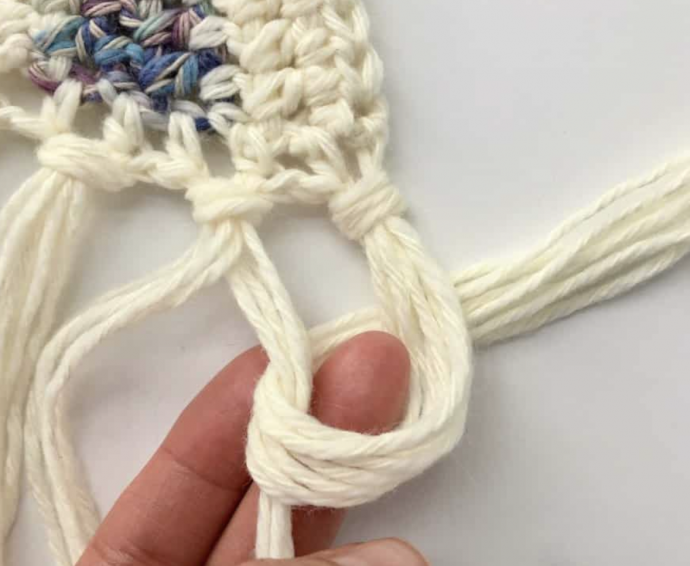
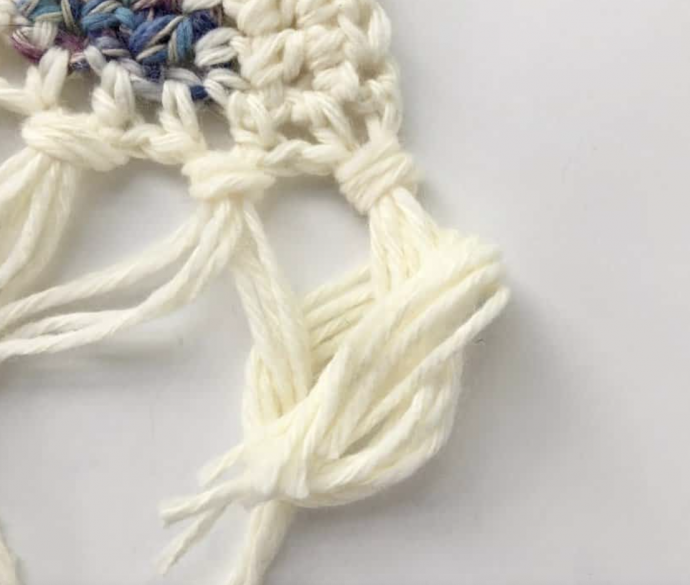
- Gently pull the 8 strands to create a knot, and adjust the knot to your desired location before fully tightening it. Congratulations, you've created your first knot!
- For the second knot, take the remaining 4 yarn strands from the second fringe, separate the third fringe into two, and repeat the same steps to create a consistent knotted fringe.