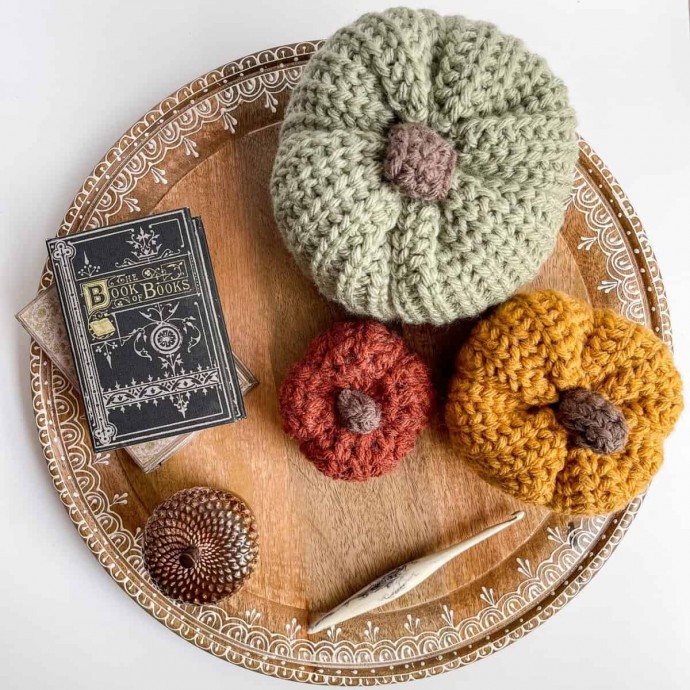
Chunky Pumpkin Crochet Pattern in 3 sizes

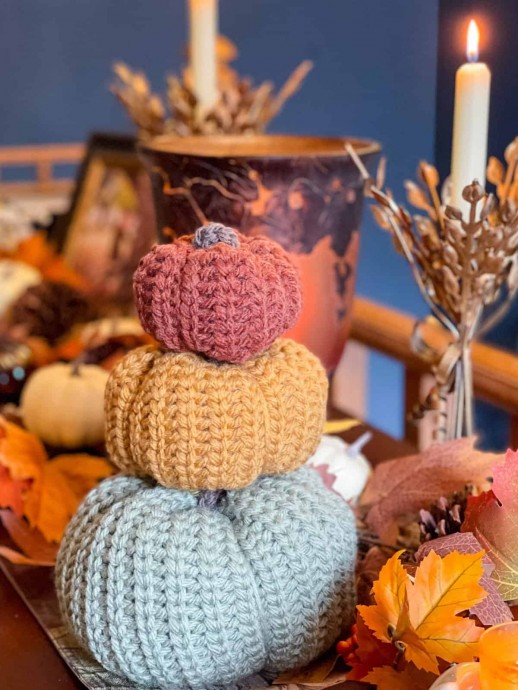
A fun and easy Chunky Pumpkin Crochet Pattern in 3 sizes is the perfect way to cozy up your fall decor!
As the leaves start to turn and the air gets crisp, there’s nothing quite like adding a touch of handmade warmth to your home. Enter these adorable chunky crochet pumpkins – the perfect quick project to celebrate the season! Made from the bottom up in the round using an innovative knit-like crochet stitch, these stuffed beauties come in three versatile sizes and whip up super fast with bulky yarn. Whether you’re a crochet newbie looking for an easy win or a seasoned maker stocking up on fall decor, this chunky pumpkin crochet pattern is fun and oh-so-satisfying!
Materials
- Hue + Me, Weight 5 Bulky (80% acrylic, 20% wool)
- Small: Color Spicy 1.0 oz / 32 yards (MC)
- Medium: Color Mustard 2.0 oz / 64 yards
- Large: Color Artichoke 4.4 oz / 137 yards (MC)
- Stem: Color Terra (BR)
- Crochet hook size K (6.5 mm)
- Scissors
- Tapestry Needle
Approximate finished size
- Small: Approximately 5” width x 4” height
- Medium: Approximately 7 1/2” width x 6 1/2” height
- Large: Approximately 10” width x 9” height
Gauge
- 12 sts in pattern x 11 rounds = 4” x 4”
Abbreviations
- MC = main color
- RS = right side
- Rnd(s) = round(s)
- ch(s) = chain(s)
- sl st = slip stitch
- sc = single crochet
- sk = skip
- csc = center single crochet
Special Stitches
csc = center single crochet: single crochet stitch is worked between the legs of the single crochet stitch from the previous round.
Notes
- Pumpkin is worked from bottom up, leaving long tails for cinching bottom and top of pumpkins together.
- Worked in the round without joining or turning.
- Instructions are written for size S with sizes M, L in parentheses as S (M, L).
- Resize width of pumpkin smaller or larger by chaining in multiples of 2. Resize height by adding or subtracting rounds.
- To adjust proportions — measure the base width after the first round and subtract 1″ for the ideal height. Ex. 5″ wide after first round: 5” width – 1” = 4” in height before cinching closed.
Instructions
With MC and leaving a long tail for cinching bottom of pumpkin, ch 30 (46, 60) and without twisting ch, sc in first ch to form a ring.
Rnd 1: Sc in each ch around. Do not sl st join at end. 30 (46, 60)
Rnd 2: *Ch 1, sk next st, csc in next st,* repeat from * to * around.
Rnd 3. *Ch 1, sk ch-1, csc in next st,* repeat from * to * around.
Rnds 4 – 11 (20, 25): Repeat round 3.
Leaving a long tail for cinching top of pumpkin together, fasten off and weave in ends not left for sewing.
Stem
With BR, ch 8 (11, 13).
Row 1: Sc in second ch from hook and in each ch to end. Turn. 7 (10, 12)
Small size: Fasten off.
Continue to row 2 for medium and large sizes.
Row 2: Ch 1, sc in each st. Turn.
Medium size: Fasten off.
Continue to row 3 for large size.
Row 3: Repeat row 2.
Fasten off.
Assembly
With long length of yarn left for sewing, use a gathering stitch to gather bottom of pumpkin together. Pull tightly; sew the bottom of the pumpkin shut. Weave in end. Stuff pumpkin – do not overstuff!
With long length of yarn, use a gathering stitch to gather top of pumpkin together. Pull tightly; sew the top of the pumpkin shut.
Create pumpkin segments by inserting needle from top of pumpkin through bottom 4-8 times evenly spacing these long stitches apart. Tighten each ridge stitch to desired look. Once complete, knot yarn and weave in end.
Fold short ends of stem together and using lengths of yarn from beginning and end, sew to top of pumpkin.
Weave in any remaining ends.