Crochet Pumpkin Garland Pattern

Fall is in the air, and what better way to embrace the cozy vibes than with a touch of handmade pumpkin charm? If you’ve already fallen in love with my Chunky Rustic Crochet Pumpkin pattern, get ready for a delightful mini fall home makeover with this adorable crochet pumpkin garland!
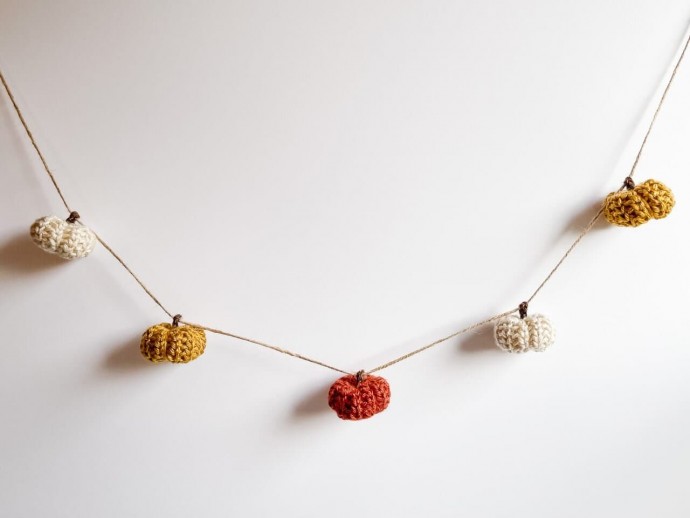
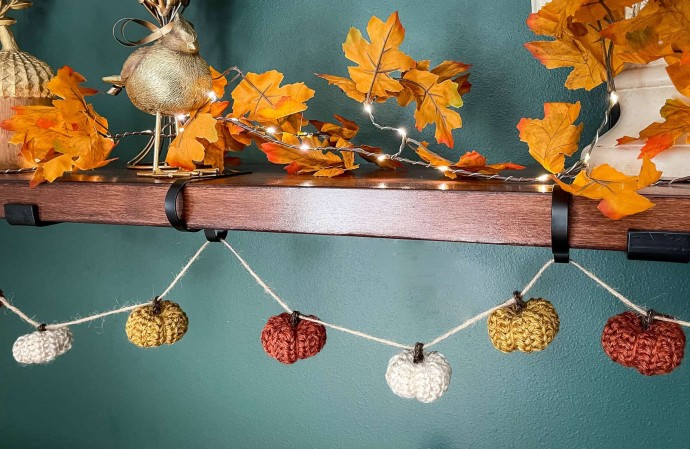
Today, I’m thrilled to share my adaptation: a whimsical Crochet Mini Pumpkin Garland that’s perfect for draping across your mantel, window sill, or even as a festive addition to your autumn table scape. These adorable bite-sized pumpkins capture all the rustic texture and warmth of the original chunky version but in a smaller, quicker-to-crochet scale. Using simple stitches and a palette of earthy yarns in creams, mustards, terracottas, and rusts, you’ll whip up a string of these cuties in no time.
Strung on natural twine, they add that effortless, farmhouse-inspired glow to your seasonal decor. Whether you’re a crochet newbie or a seasoned pro, this project is all about fun, customization, and celebrating the harvest season.
Materials
- Lion Brand Heartland Weight 4 / Medium (100% acrylic)
- Color Acadia 0.6 oz / 31 yards (MC)
- Color Canyonlands 0.6 oz / 31 yards (MC)
- Color Yosemite 0.6 oz / 31 yards (MC)
- Stem: Color Sequoia (BR)
- Crochet hook size J (6.0 mm)
- Scissors
- Tapestry Needle large enough to get twine on needle
- Twine
- Poly-fil
Approximate finished size
- 2 1/2” wide x 2” height before cinching
Abbreviations
- MC = main color
- RS = right side
- Rnd(s) = round(s)
- ch(s) = chain(s)
- sl st = slip stitch
- sc = single crochet
- sk = skip
- csc = center single crochet
Special Stitches
csc = center single crochet: single crochet stitch is worked between the legs of the single crochet stitch from the previous round.
Notes
- Pumpkin is worked from bottom up, leaving long tails for cinching bottom and top of pumpkins together.
- Worked in the round without joining or turning.
- Resize width of pumpkin smaller or larger by chaining in multiples of 2. Resize height by adding or subtracting rounds.
- To adjust proportions — measure the base width after the first round, double it, and subtract 1″ for the ideal height. Ex. 3″ wide after first round: 3×2=6 – 1” so your finished measurement = 3″ wide x 5″ tall before cinching closed.
Instructions
Pumpkin (make 9 total – 3 in each color)
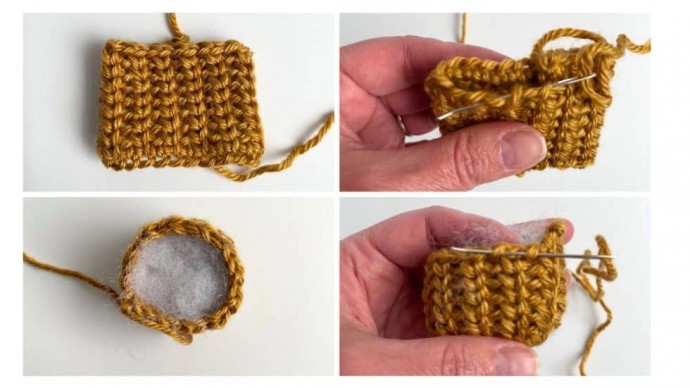
With MC and leaving a long tail for cinching bottom of pumpkin, ch 24 and without twisting ch, sc in first ch to form a ring.
Rnd 1: Sc in each ch around. Do not sl st join at end. 24
Rnd 2: *Ch 1, sk next st, csc in next st,* repeat from * to * around.
Rnd 3. *Ch 1, sk ch-1, csc in next st,* repeat from * to * around.
Rnds 4 – 8: Repeat round 3.
Leaving a long tail for cinching top of pumpkin together, fasten off and weave in ends not left for sewing.
Stem
With BR, ch 4.
Row 1: Sc in second ch from hook and in each ch to end.
Fasten off.
Assembly
With long length of yarn left for sewing, use a gathering stitch to gather bottom of pumpkin together. Pull tightly; sew the bottom of the pumpkin shut. Weave in end. Stuff pumpkin – do not overstuff!
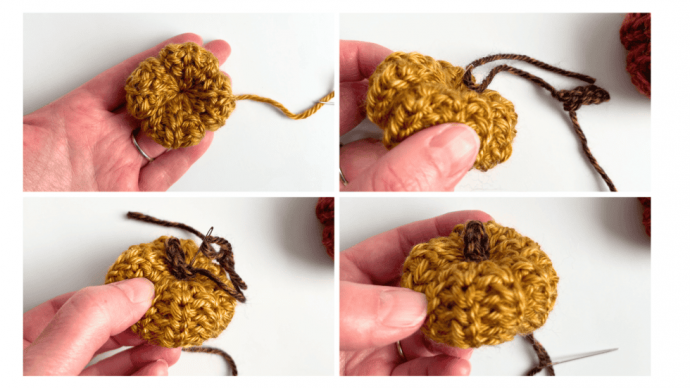
With long length of yarn, use a gathering stitch to gather top of pumpkin together. Pull tightly; sew the top of the pumpkin shut.
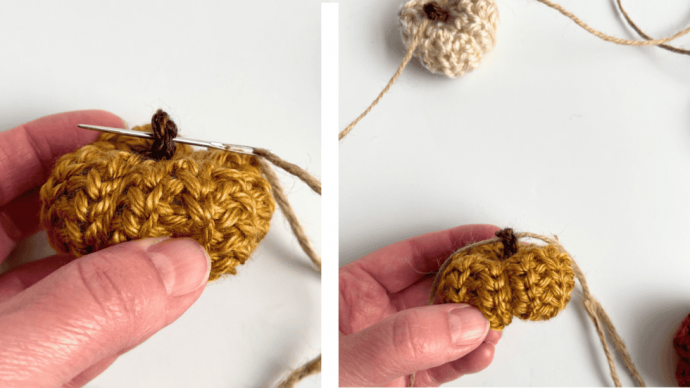
Create pumpkin segments by inserting needle from top of pumpkin through bottom 4 times evenly spacing these long stitches apart. Tighten each ridge stitch to desired look. Once complete, knot yarn and weave in end.
Repeat above steps for each pumpkin.
With long length of yarn, sew stem to top of each pumpkin.
Weave in any remaining ends.
Cut a length of twine long enough for your desired garland size, plus extra for hanging loops or ties at the ends (e.g., 2-3 feet for a short garland like the one in the image). Thread one end of the twine through the eye of the needle.
Insert the needle through the top center of the stem. Pull the needle and twine all the way through until the pumpkin slides freely along the twine. Push the pumpkin down toward the unthreaded end of the twine, leaving some space at the starting end for a hanging loop if desired.
Add Remaining Pumpkins: Repeat the threading process for each additional pumpkin. Work the needle through the top of the stem, pull the twine through, and then push the pumpkin down along the twine to position it next to the previous one. Space the pumpkins evenly for a balanced look—aim for 4-6 inches between each one, depending on your garland length.
Secure and Finish: Once all pumpkins are threaded, adjust their positions as needed. Tie knots or loops at both ends of the twine to prevent the pumpkins from sliding off and to create hanging points. You can also add decorative elements like beads or leaves between pumpkins if you want to customize further.