How to Crochet the Granny Stitch in Flat Rows

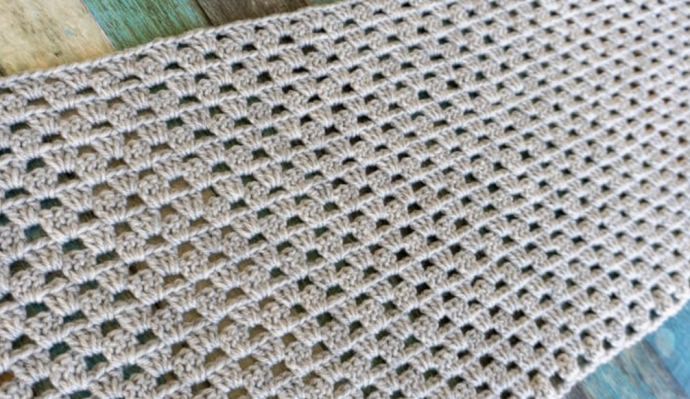
Traditional granny squares are a great way to crochet small, quick projects that can be compiled into one, larger piece. But sometimes we don’t feel like seaming all of those squares (that would be me) and sometimes we just want a fast, easy project to get our cro-jo back, or to get over a summer slump.
The Flat Granny Stitch (the granny worked in rows back and forth instead of in a square) is the perfect solution.
Instructions
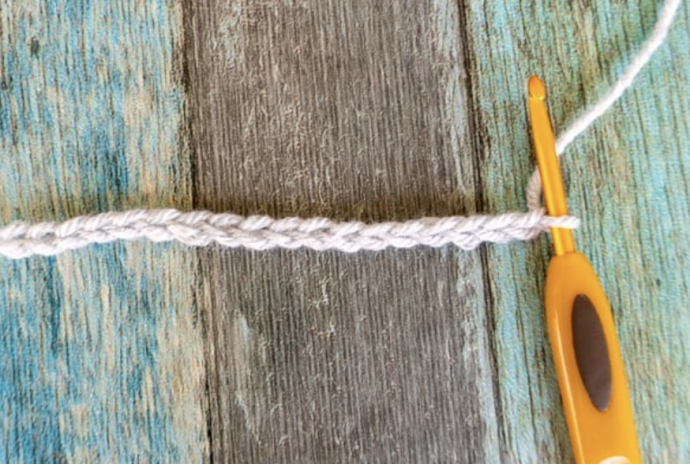
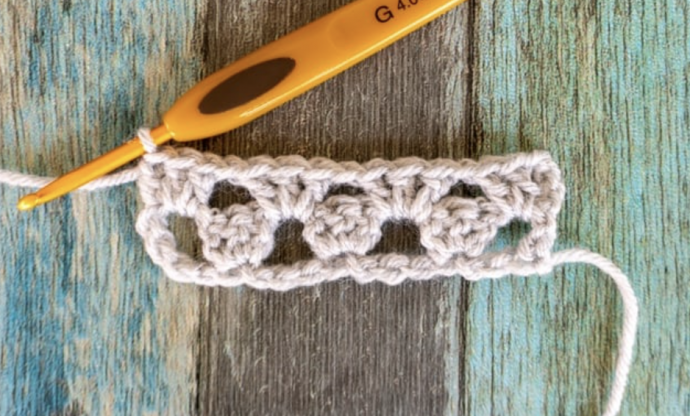
In this example I am starting with a chain of 12 + 6 = 18 chains.
1. Chain a multiple of 4 + 6. In these photos I am starting with 18 stitches.
2. 3dc in 7th ch from hook.
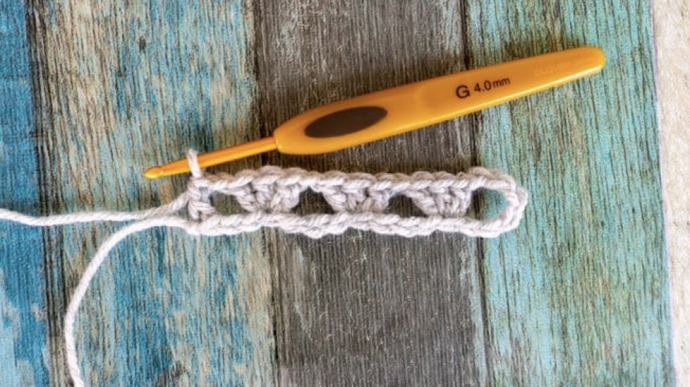
3. Chain 1, skip 3 chains, 3dc in next chain.
Repeat step 3 until only 3 chains remain.
4. Chain 1, skip 2 chains, dc in final the chain.
First row complete!
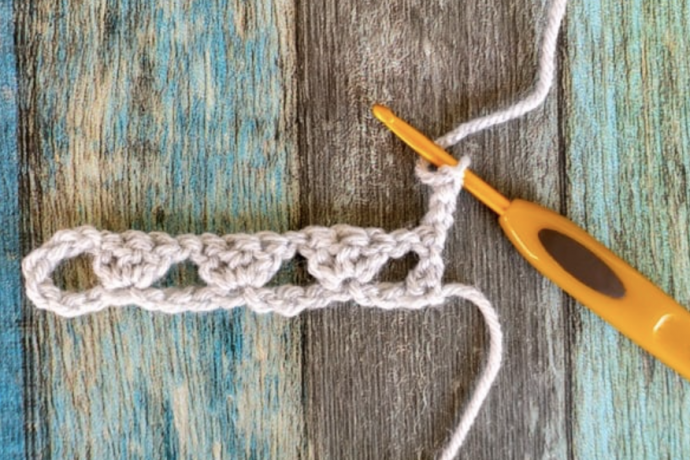
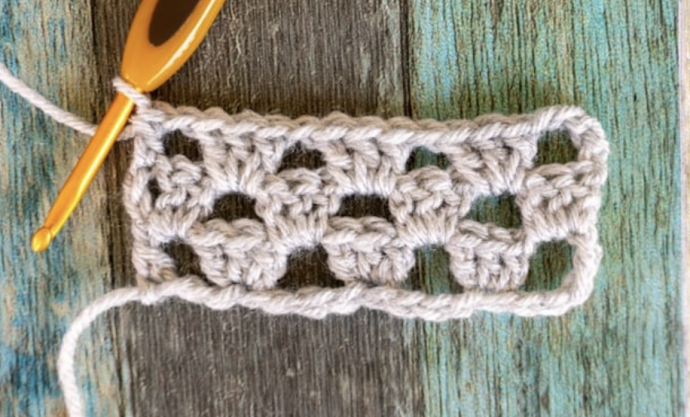
5. Ch-3 (counts as a double crochet), turn, 2dc in that very first chain space.
6. Chain 1, skip 3 stitches, 3dc in next chain space.
Repeat step 6 to the end of the row.
7. Place 2 double crochets in the final chain space, then double crochet in the top of the chain.
Second row complete!
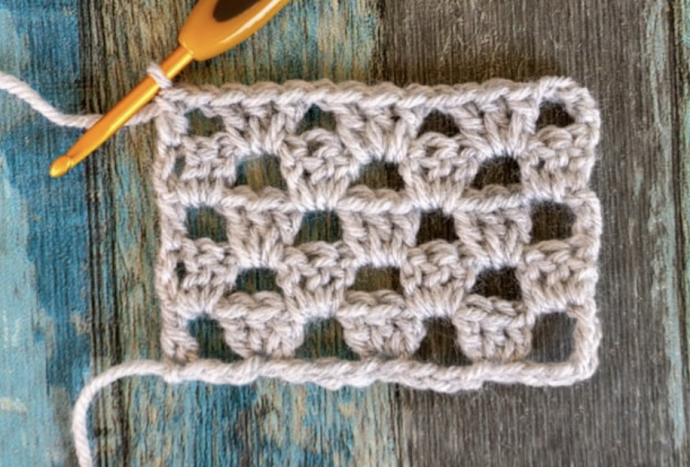
8. Ch-4 (counts as a double crochet + ch-1), turn.
9. Skip three double crochets, and place 3dc in the next chain space. Chain 1.
Repeat step 9 to the end of the row. When you get there…
10. Skip the last 2 double crochets and place one double crochet in the top of the chain 3.
Third row complete!
Start over with step 5 and repeat steps 5 – 10 until the desired height is reached.
All these crochet hacks are brilliant
If I'm lost as to what to do
This is my rescue page
Thank you