Houndstooth Stitch Crochet Tutorial

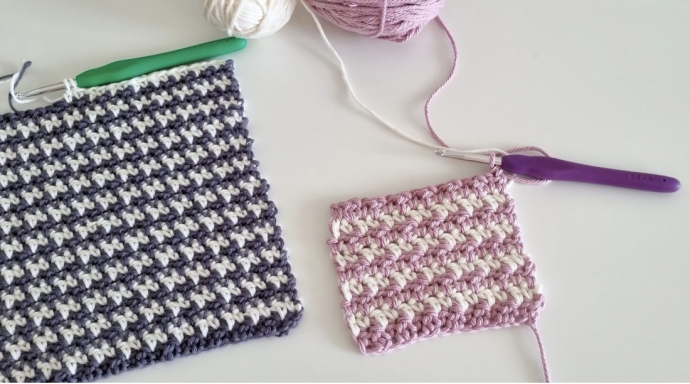
The Houndstooth Stitch is a classic and timeless crochet pattern that resembles the well-known houndstooth fabric used in fashion and textiles. This elegant stitch creates a striking checkerboard design with two contrasting colors, making it perfect for adding sophistication and style to various crochet projects.
By using simple color changes and basic crochet stitches, you can achieve the iconic houndstooth look, which is characterized by its distinct and eye-catching pattern. The Houndstooth Stitch is versatile and can be used to create beautiful scarves, blankets, bags, and even garments with a touch of vintage charm.
In this step-by-step tutorial, we will guide you through the process of crocheting the Houndstooth Stitch, taking you from the initial setup to mastering the color changes and creating a polished houndstooth fabric. With a little practice, you'll be able to crochet this captivating pattern and add a touch of classic elegance to your crochet projects.
So, grab your crochet hook, choose your favorite colors, and let's dive into the art of crocheting the Houndstooth Stitch. Get ready to create stunning and stylish pieces that will stand the test of time!
Instructions
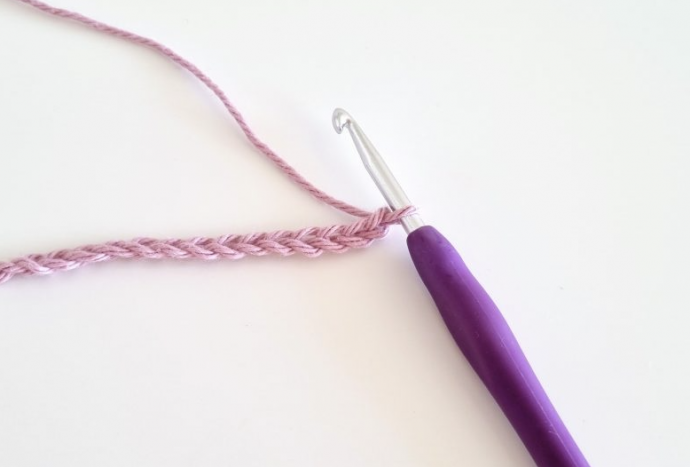
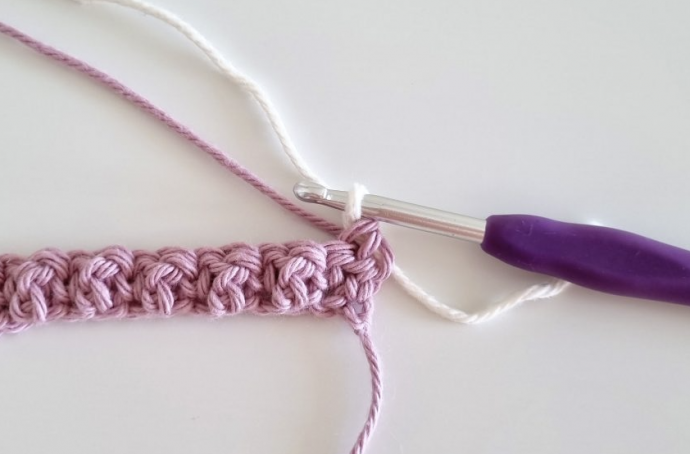
Chain any odd number. For this demonstration, I chained 15.
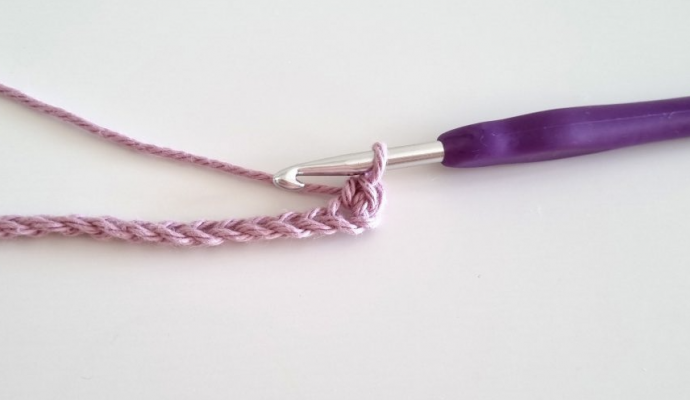
Row 1: SC in second chain from hook, *DC in next, SC in next, repeat from * across the row. DC in last St. Change to your contrasting colour in the last stitch.
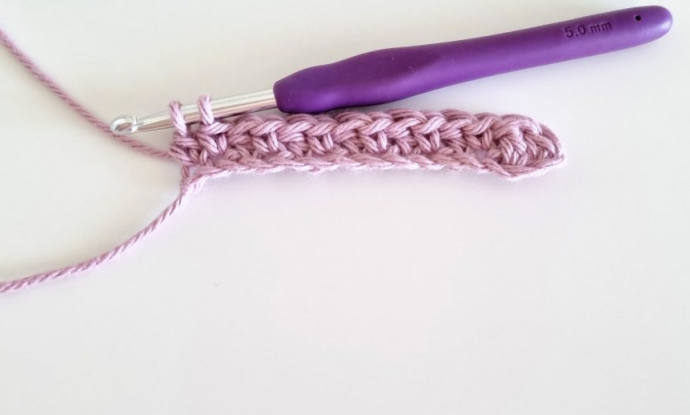
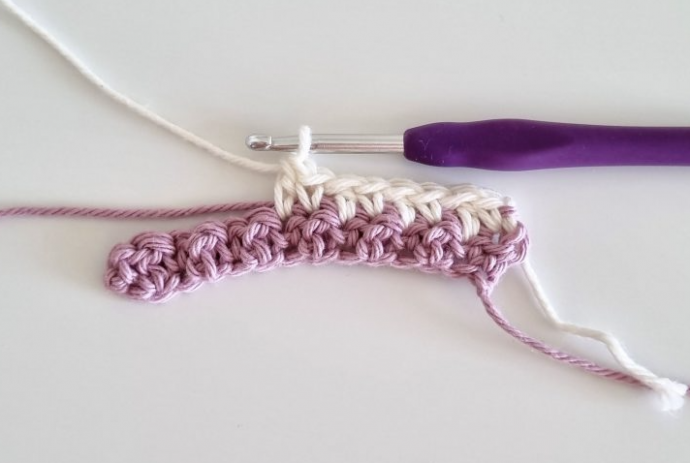
Row 2: With the new colour, Ch 1 and turn. SC in first St (on top of DC in previous row, see photo tutorial below), DC in next (on top of SC in previous row), *SC in next, DC in next, repeat from * across the row.
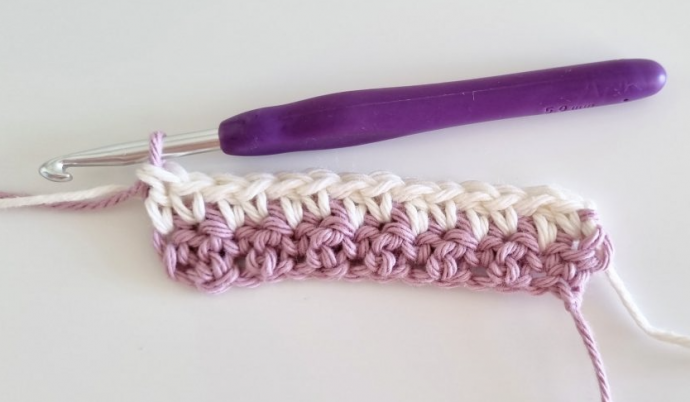
Row 3- until your desired size: repeat row 2
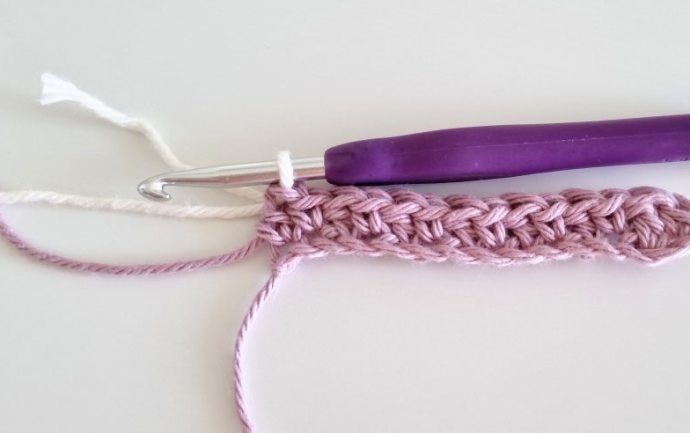
When working with the Houndstooth stitch, there are a few key things to keep in mind. First, you should always start a new row with a single crochet and finish with a double crochet stitch. Additionally, it’s important to change colours in the last double crochet stitch of each row and carry the non-working yarn across.
Make sure the non-working yarn is not too tight and not too loose. If it’s too tight, your tension and edges will not be straight. After I finish one row, I gently pull the non-working yarn to tighten the first stitches where the colour was changed. Then I straighten the rest of the row so the yarn is loosely spread inside and the rest of the crochet project can stretch a little.