Broomstick Lace Stitch Crochet Tutorial

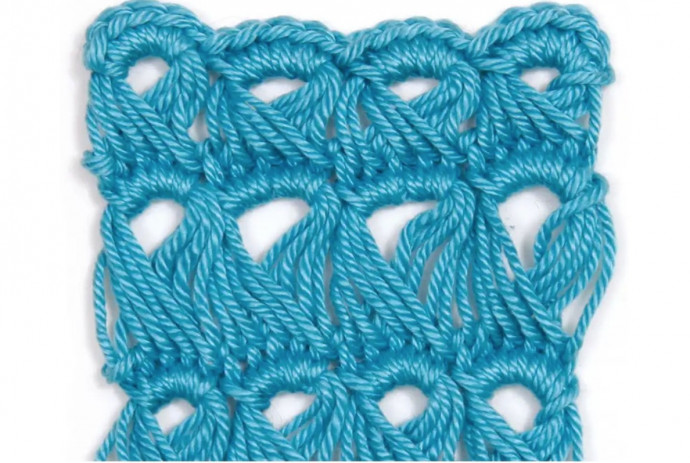
The broomstick lace crochet stitch is one of the most unique and beautiful of crochet stitches. It’s open and airy, making it great for fall and spring projects.
Broomstick crochet is easy to learn and a great way to create all sorts of lacy fabrics. Traditionally, the technique was worked using a crochet hook and the handle of a broomstick (hence the name), but nowadays there are plenty of other options. Find out how to create supersized broomstick lace crochet with this simple guide to this quick and fun crochet technique.
Instructions
Foundation Row
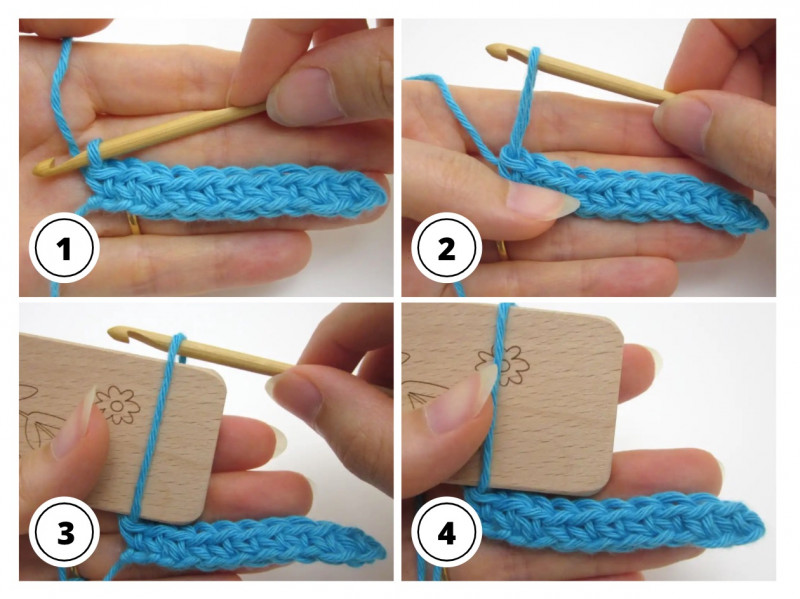
Step 1
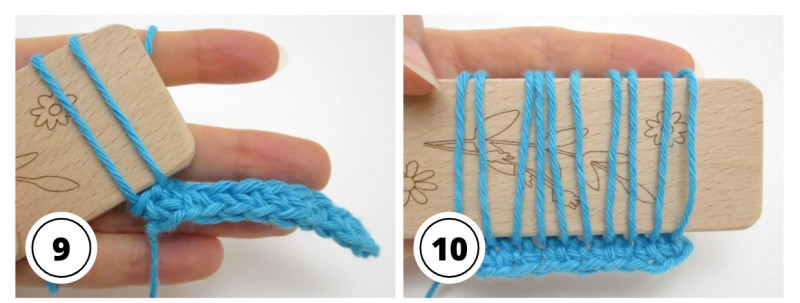
In order to work broomstick crochet rows, you’ll need to start with a foundation chain or a foundation row (or rows) of stitches. To start our fabric, we’ve worked a foundation row of 10 dc stitches (to do this, ch11, dc in 2nd ch from hook and in each ch to end), but you could work any number of stitches you like.
Broomstick Row
Step 2
Once you have a foundation chain or row(s) of stitches, you can begin your first ‘Broomstick Row’, which involves placing long loops onto your broomstick. At the start of a Broomstick Row, you don’t usually turn your work. Instead, use the hook to elongate the active loop.
Step 3
Insert the broomstick into this large loop, as shown. You’ll find it easier if you keep a fairly loose tension at this stage, so you can easily insert the broomstick.
Step 4
Remove the hook from the loop and restore your tension on the yarn to make sure the loop sits fairly snugly on the broomstick. Try to make sure the loop isn’t too tight, but also not too loose.
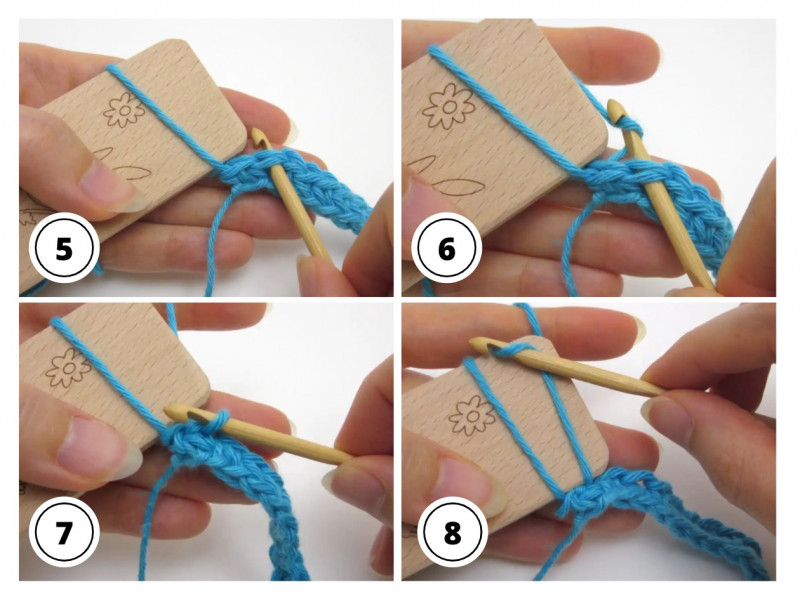
Step 5
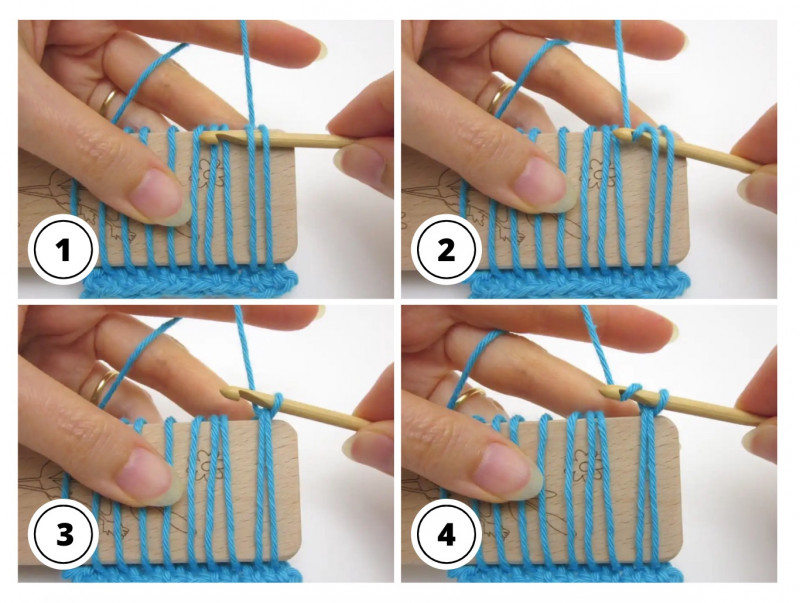
Insert your hook into the top of the next stitch (or into the next chain if you’ve started with a foundation chain instead). You might find it helps to tilt the broomstick slightly.
Step 6
Work yrh. Feel free to tilt the fabric in order to see what you’re doing.
Step 7
Pull up a loop at the front of the fabric.
Step 8
Use the hook to lengthen this new loop and guide the loop onto your broomstick. Be careful not to twist the yarn of your loop. Remember to keep your tension loose at this stage so you can easily move the yarn loop with the hook and take it over the broomstick.
Step 9
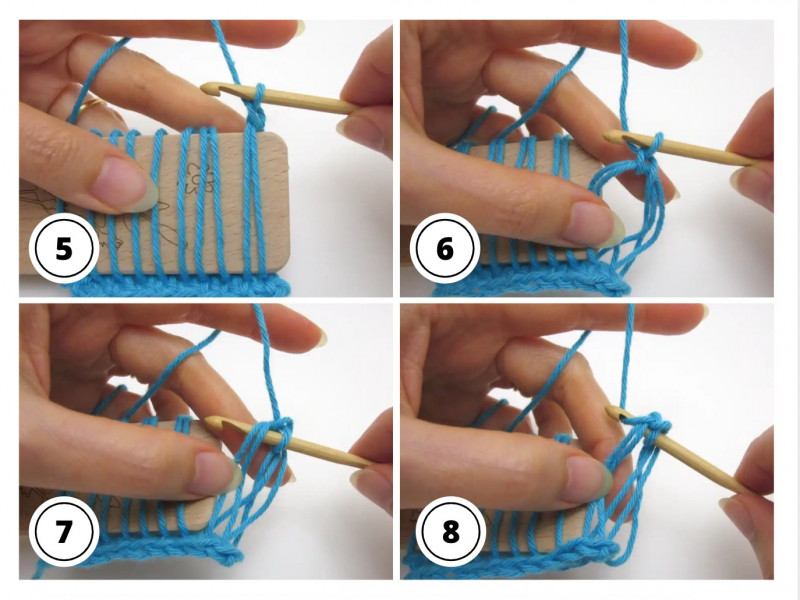
Remove the hook from the loop and restore your tension to make sure the loop sits fairly snugly on the broomstick. Remember to keep your loop tension consistently fairly snug – not too tight and not too loose.
Step 10
Repeat Steps 5-9 to pull up a loop in all the stitches (or chains) from the row below. This is the end of the Broomstick Row and your work should look something like this. If you had 10 stitches in your foundation row (or chain) then you should now have 10 loops on the broomstick.
Stitch Row
Step 1
Once your Broomstick Row is complete, you can begin your first ‘Stitch Row’, which involves working stitches into the broomstick loops to secure them. At the start of a Stitch Row, you don’t usually turn your work. Instead, insert the hook into the first two loops, as shown. Be careful not to pull on the working yarn, which will shorten the final loop – instead, try to keep the two loops at the same height.
Step 2
Work yrh, and pull up a loop. This process brings the yarn up to the height of the loops, a bit like a turning chain.
Step 3
Now you need to work an actual turning chain for the stitches you want to work on this row. We’re going to work a row of dc stitches, which is standard for most broomstick fabrics, but you could use any crochet stitch you like. We’re going to work dc stitches so we need to ch1 – to do this, yrh…
Step 4
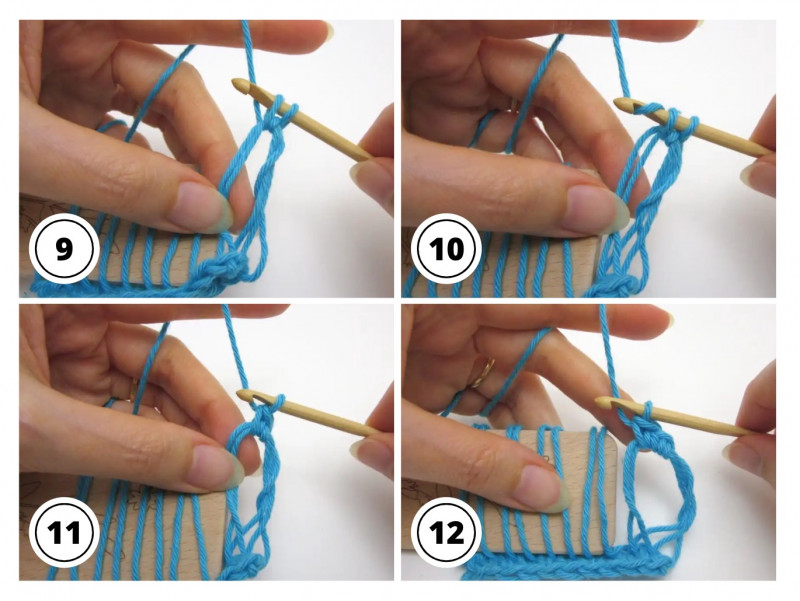
…and pull through the loop on the hook to make one chain. If you’re planning to work stitches taller than double crochet, work more chains at this stage.
Step 5
The first two broomstick loops will now be secure, so you can slide them off the broomstick, which will make them easier to work into. Use your fingers to angle the large loops so that they form an ‘O’ shape, to make the next stages.
Step 6
Now we’re going to work 2dc into the first two broomstick loops. To do this, insert your hook into the first two loops as before.
Step 7
Work yrh, and pull up a loop.
Step 8
Now yrh, and pull through the two loops on the hook to complete your first dc.
Step 9
Repeat the process in Steps 17-21 to work a second dc in the same place, as shown here. You should now have 2dc worked into the first two broomstick loops.
Step 10
Repeat the process in Steps 17-21 to work a second dc in the same place, as shown here. You should now have 2dc worked into the first two broomstick loops.
Step 11-12
To continue, you need to work 2dc into the next two broomstick loops. To do this, insert the hook into the next two broomstick loops as before. They should be secure so slide them off the broomstick if you like.
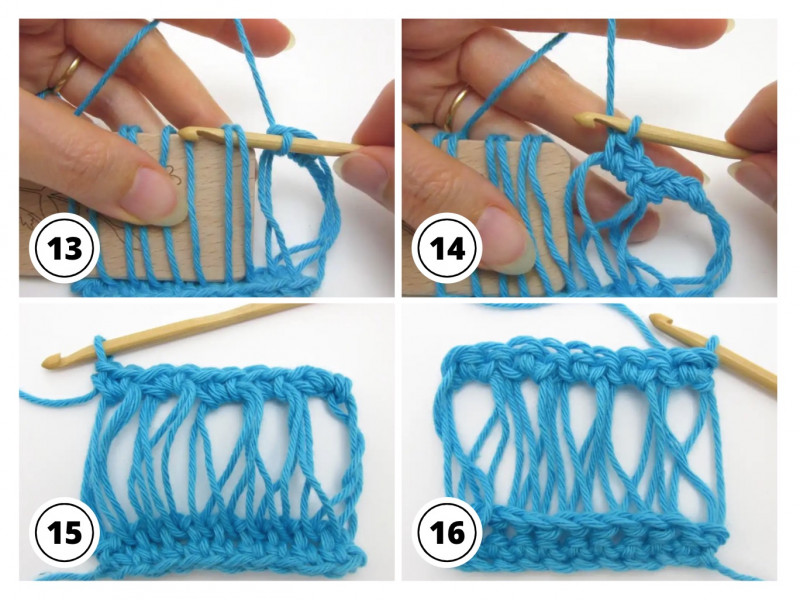
Step 13-14
Now make a dc as usual by working yrh, pull up a loop, yrh and pull through two loops on hook. Insert the hook in the same place and make a second dc. You should now have 2dc in the next two broomstick loops.
Step 15-16
Repeat Steps 23-24 to work 2dc into each pair of broomstick loops across the row. You should have created five broomstick ‘O’ shapes, with 10 dc at the end of the Stitch Row. This is the right side of the fabric, which you can tell because you can see the right side of the double crochet stitches.
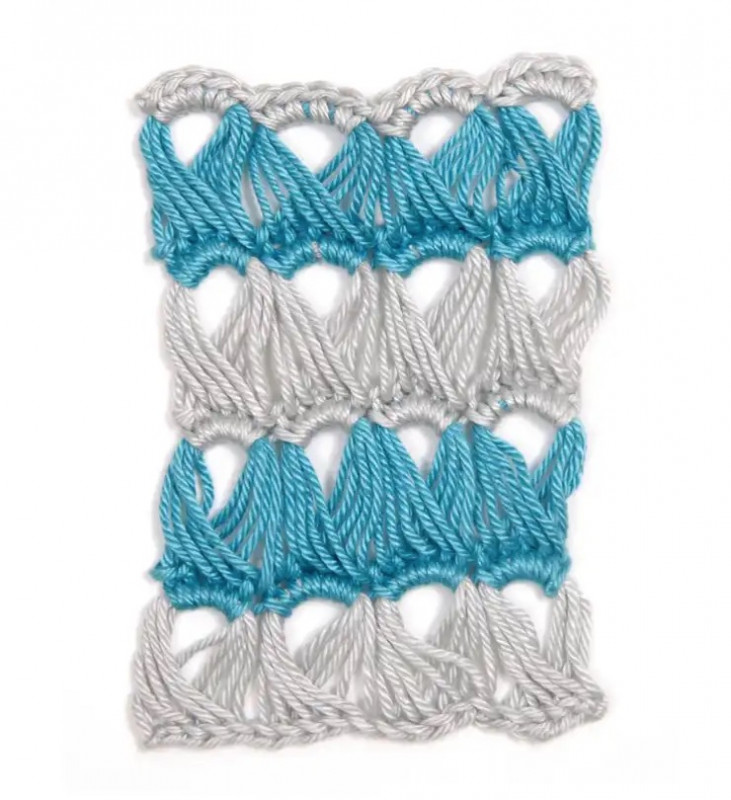
There’s plenty of scope for creativity with broomstick crochet! You could try using different sizes of broomstick on the broomstick row – on this swatch, we alternated using a 15mm and 20mm broomstick.
Happy crocheting!
That is very lovely and gorgeous
Thanks! Have a great day! 🌷
Hey there, I am reading this Broomstick Lace pattern and this is so different from how my grandmother taught me. But I am going to try it after you inform me on what yhr means. I am sorry if i sound foolish, but I have never seen this term before. Please advise me. Thank you, Sylvia Earle