Mosaic Crochet Stitch Tutorial

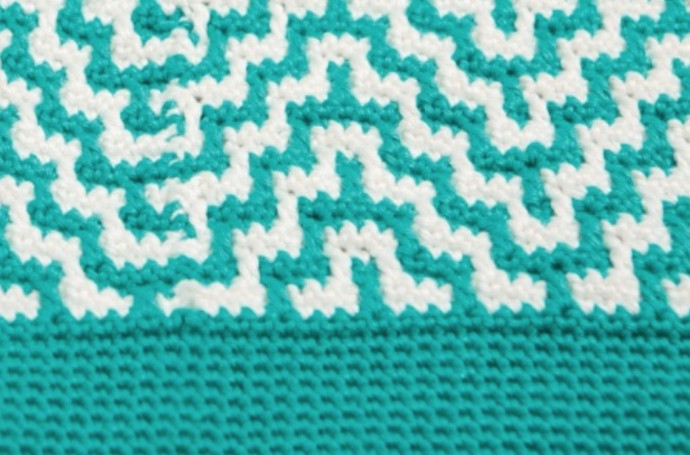
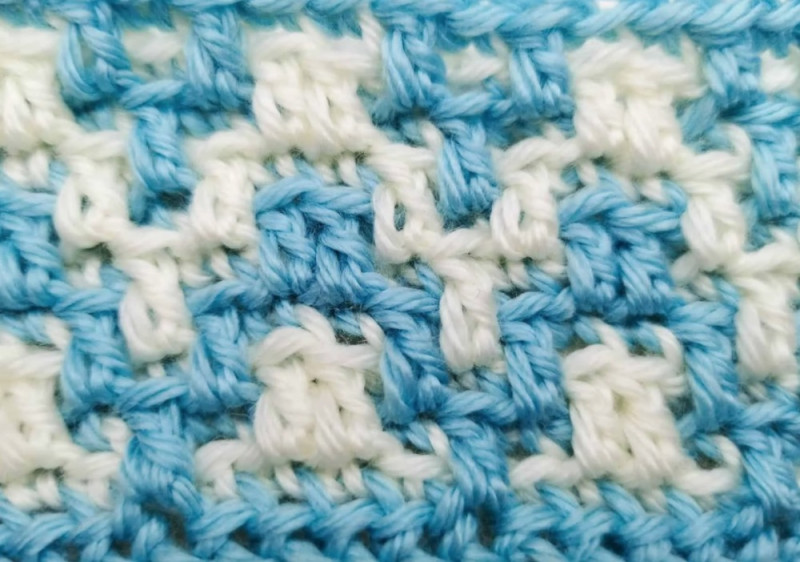
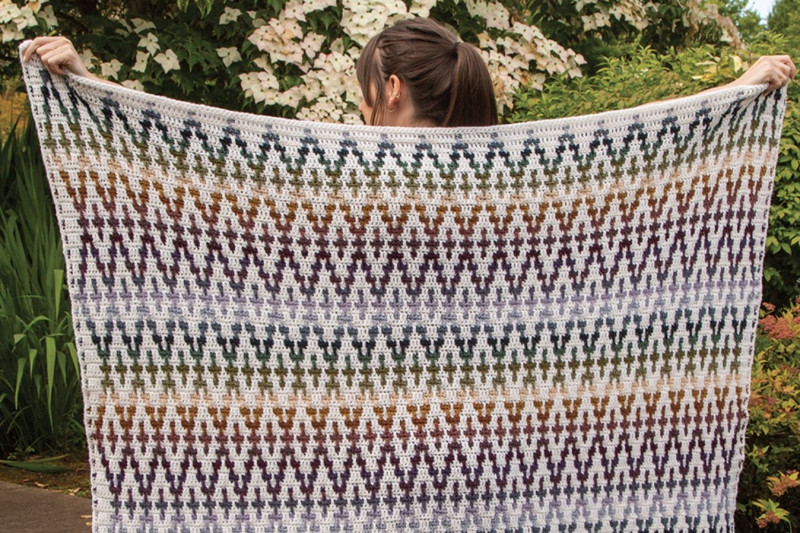
The mosaic crochet stitch tutorial features a beautiful mosaic stitch pattern. It creates a lovely zig zagging v-shaped crochet pattern.
What’s great about mosaic crochet is that you use only one color per row, meaning it’s easier to follow.
Mosaic crochet is such a beautiful crochet technique, but it’s also one that not that many have tried. My guess it’s because it looks far more complex than it actually is. By following the steps
in this free crochet tutorial I will share an easy tutorial and 5 simple rules of mosaic crochet with you & I promise you I’ll break it down to easy “rules” or techniques.
5 simple rules of Mosaic crochet
1. Only use 1 color per row/round
Even though mosaic crochet can look really complex, the good news is that you will actually use only 1 color per row/round.
2. Alternate color A and color B every other row/round
The second of the simple rules of mosaic crochet is using the two colors on every other row or round. This means you will never use the same color two rows/rounds after each other.
3. Always work on the right side
No matter if you are working in rows or rounds, you will always have the right side of the work facing you. Here’s how it applies to rows vs rounds:
Working in rows:
When working mosaic crochet in rows, you will always cut the yarn at the end of the row. This is because you will always work from right to left, with the right side of the work facing you.
This leaves a good amount of yarn tails.
For this I recommend always working over your yarn tails at the beginning of the row/round or leave them to create fringe later.
4. All single crochet stitches are worked in the back loop
The back loop single crochet stitches are worked at all times unless otherwise specified.
On the next row, these can be covered by the other color to create the patterning.
5. All double crochet stitches are worked in the front loop 2 rows/rounds below
The double crochet stitches are often called Long Double Crochet because they are worked into the front loop 2 rows/rounds below.
Instructions
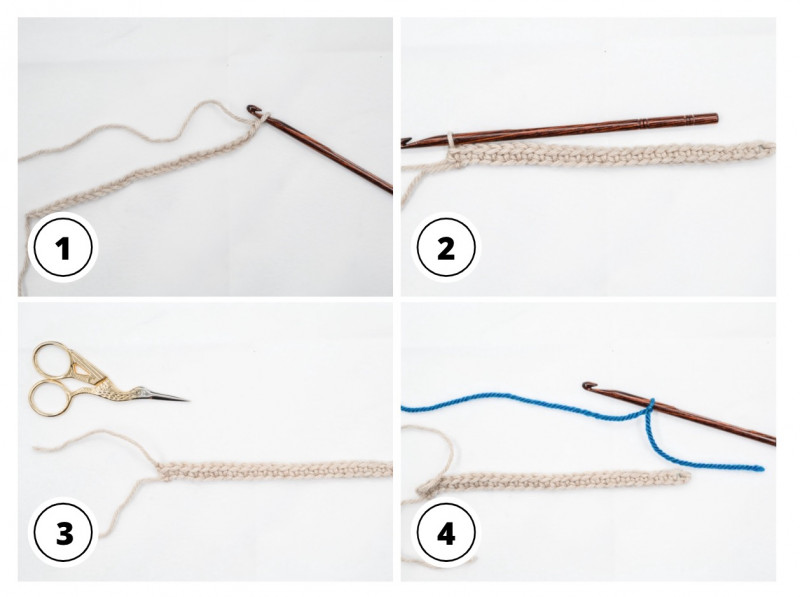
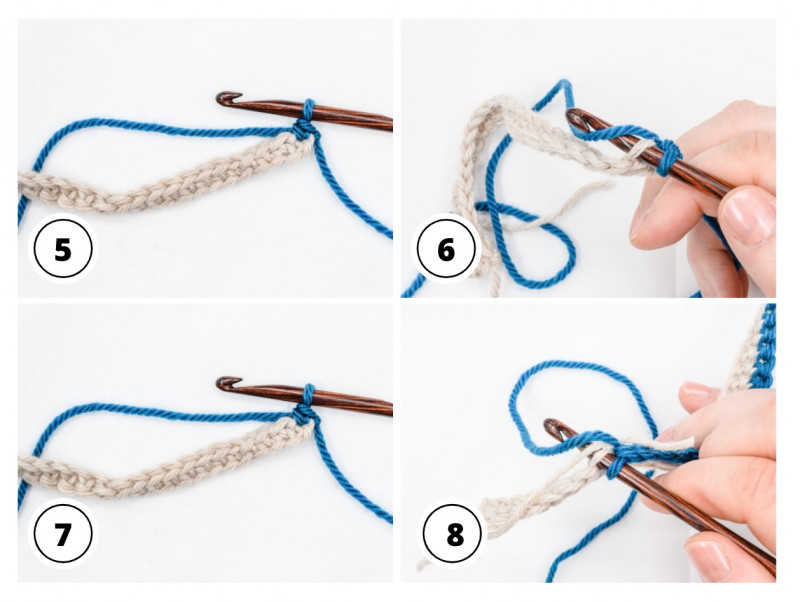
With CA ch a multiple of 5 + 3 stitches.
Row 1 with CA: Sc 1 in 3rd ch from hook, sc 1 in each ch across, cut yarn.
Row 2 with CB: Attach yarn on RS with sc in 1st st, BLsc 1 in each st until you have 1 st left, sc 1 in last st, fasten off & cut yarn.
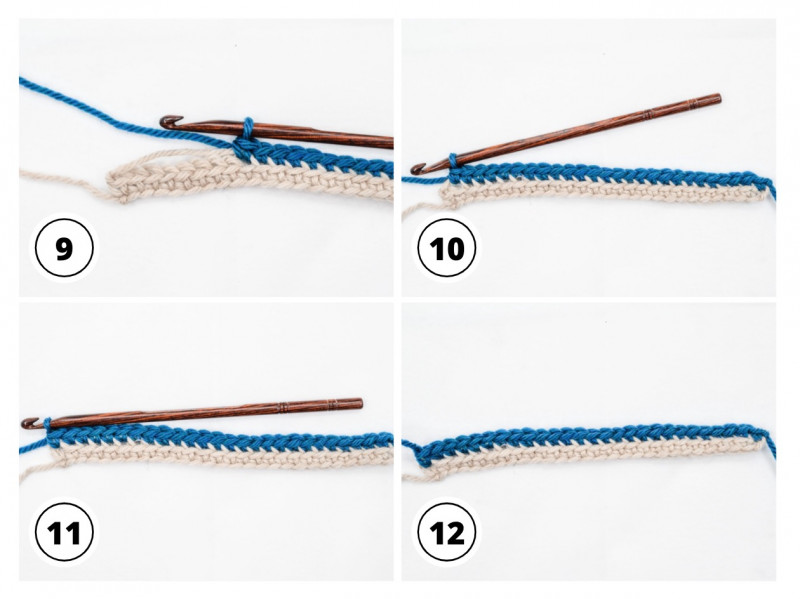
Row 3 with CA: Attach yarn on RS with sc in 1st st, *BLsc 1 in the next 2 st, Ldc in FL of st 2 rows below, BLsc 1 in the next 2 st*, repeat from *to* until you have 1 st left, sc 1 in last st, fasten off & cut yarn.
Row 4 with CB: Attach yarn on RS with sc in 1st st, *Ldc 1 in FL of st 2 rows below, BLsc 1 in the next 3 st, Ldc 1 in FL of st 2 rows below* , repeat from *to* until you have 1 st left, sc in last st, fasten of & cut yarn.
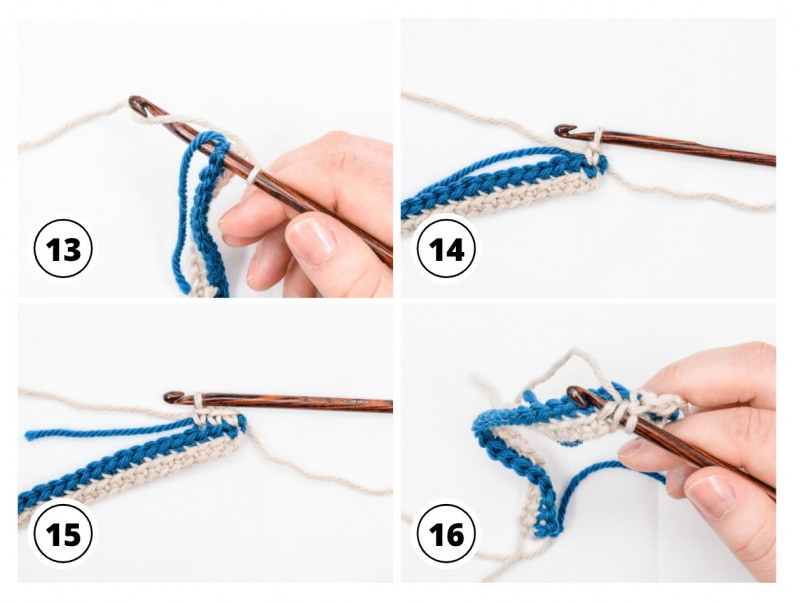
Row 5 with CA: Attach yarn on RS with sc in 1st st, *BLsc 1 in next st, Ldc in FL of st 2 rows below, BLsc 1 in next st, Ldc in FL of st 2 rows below, BLsc 1 in next st*, repeat from *to* until you have 1 st left, sc in last st, fasten of & cut yarn.
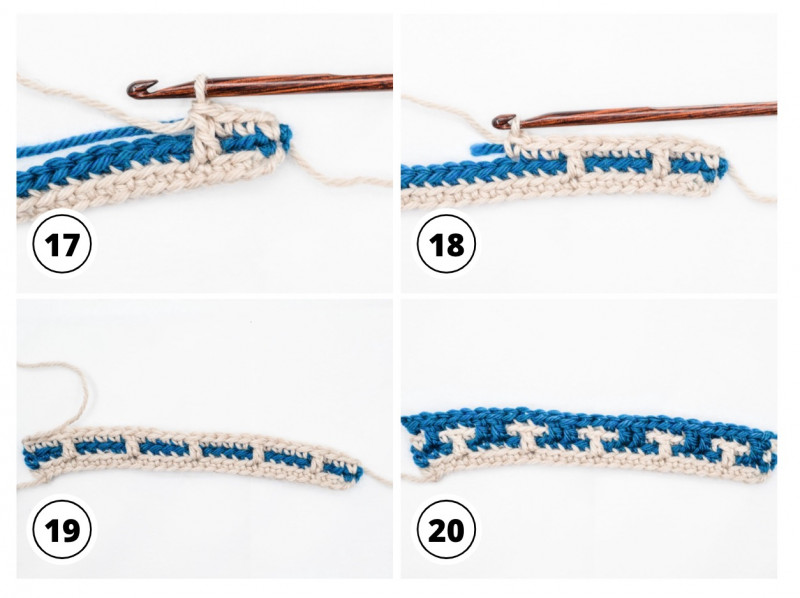
Row 6 with CB: Repeat row 3.
Row 7 with CA: Repeat row 4.
Row 8 with CB: Repeat row 5.
Repeat row 3-8 until you reach desired length.
Hope you enjoyed this free crochet tutorial teaching you the basics of mosaic crochet!