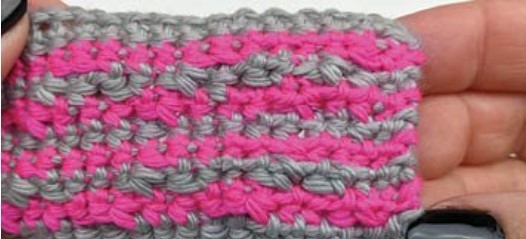
Overlay Mosaic Crochet Photo Tutorial

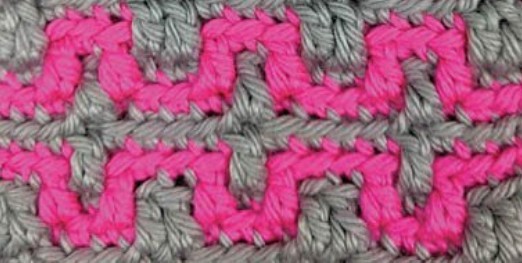
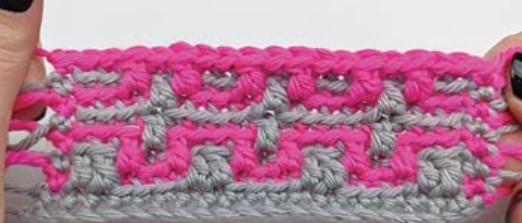
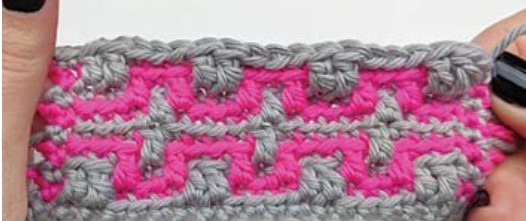
Mosaic crochet is a fun and easy way to create beautifully intricate patterns, all using single crochet and double crochet stitches, without having to change colors in the middle of a row. This tutorial will guide you through the basics of the overlay method, and get you on your way to following patterns and charts.
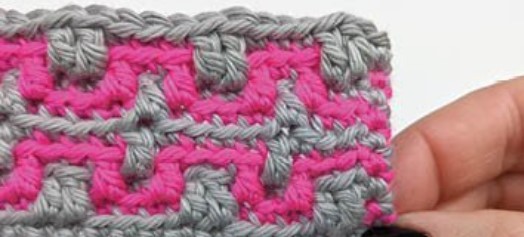
In overlay mosaic crochet, the design is worked from the front side only, from right to left (or left to right for left-handed crocheters). Each row alternates between two contrasting colors, either A or B.
The mosaic pattern is created by working all single crochet (SC) stitches into the top-back loops of the same row, and dropping down all double crochet (DC) stitches into the front loops of the row below of the same color. This is where the term “overlay” comes from. The DC stitches cover up the SC stitches from the previous row, allowing you to overlay different colors and create very complex-looking patterns.
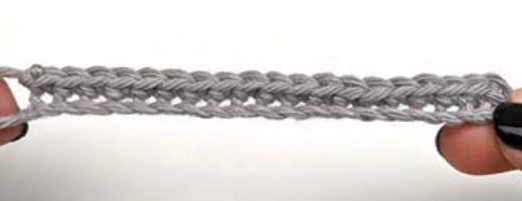
In most mosaic crochet patterns, the mosaic design does not start until Row 3. You will need to start with 2 SC rows, 1 row in Color A, and 1 row in Color B, both worked into the top-back loops only. This will give you a foundation to start working your mosaic stitches.
Refer to your specific pattern chart to find the appropriate number of chains to start with.
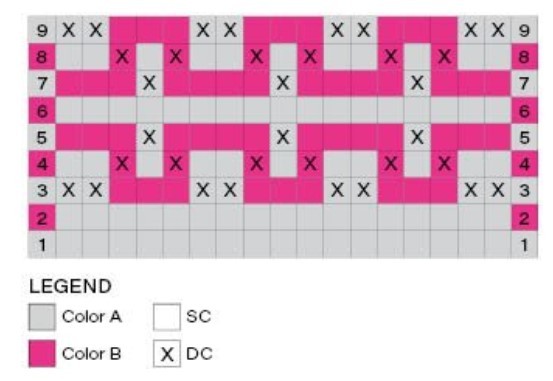
Here are the main points to consider when working an overlay color chart:
- The numbered columns on the right and left sides of the chart are color-coded with the color you will be using for the entire row, either A or B. The example chart starts with color A for Row 1 (gray), and color B (pink) for Row 2.
- The colors of the boxes in the center of the chart show you where the DCs drop down from the row above. This only serves as a reference and will shows what a finished row looks like after you’ve added the next row in the chart.
- Only read the symbols on the chart (Xs in this pattern), and don’t switch colors in the middle.
TIME TO PRACTICE
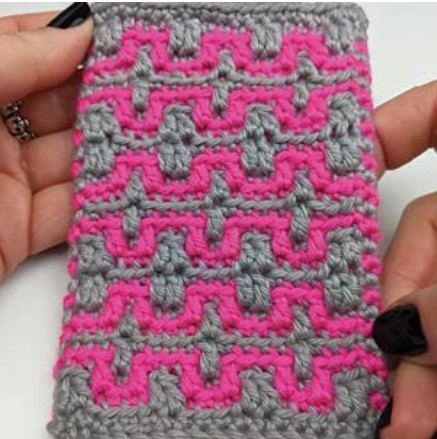
Use the small chart below to help you learn mosaic crochet. In the next section, we’ll break down how to read this chart stitch by stitch and row by row.
This chart shows 17 stitches across. You will also need to add two more for your border stitches. Start your foundation chain with 19 chains (17 + 2).
Since each row starts with a new color, you will be adding border sts at the beg and end of each row (except Row 1).
The border sts also help to keep your edges straight, and gives you a clear point along the edge to add a wide finishing border, fringe, or for attaching to another panel.
An easy way to secure your next color to the row is to flip the tail into the first lp before starting your border st. This locks your tail-end in without having to use any knots.
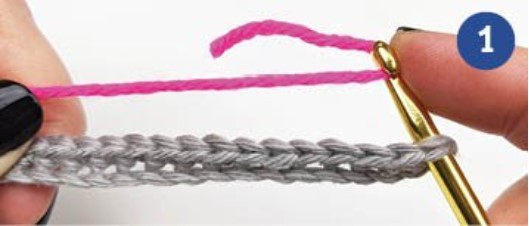
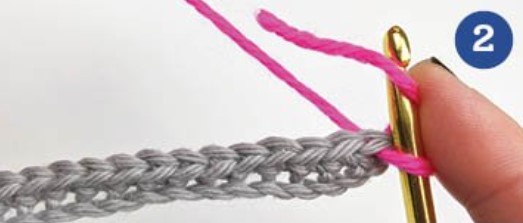
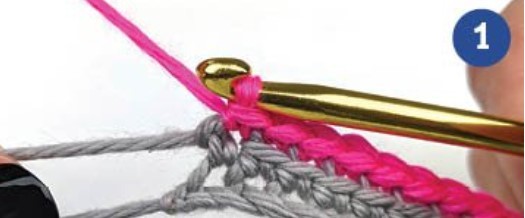
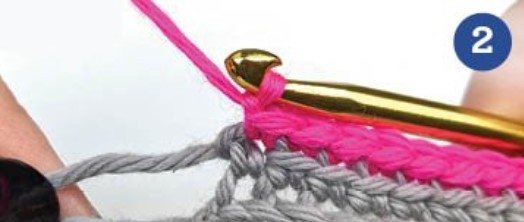
BEGINNER BORDER STITCH (BBst)
1. Insert your hook into both lps of the first st, and hook your yarn. Pull the yarn through to make a lp on your hook.
2. Hook the tail from the back and pull all the way through the lp. Do not tighten!
3. Insert your hook back into the lp, and begin your first border st.
4. Ch 1, SC back into the same st.
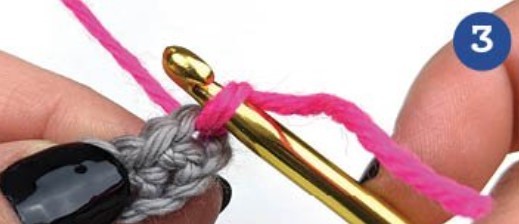
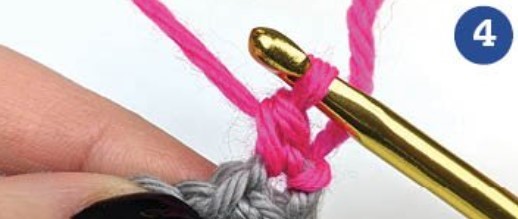
ENDING BORDER STITCH (EBst)
1. SC into both lps, tighten.
2. Ch 1 and tighten again. Cut your yarn, leaving about a 2-3" tail, and pull the yarn through.
PATTERN
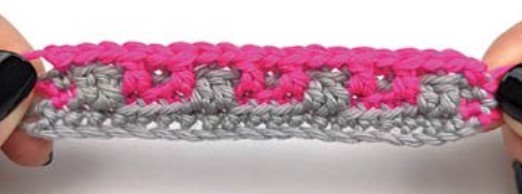
Row 1
Because the numbered boxes of this row are Color A, work all of the sts in Color A.
Ch 1, SC into the 2nd ch from the hook. SC Blp for all rem sts. 19 SC. At the end of the row, tighten last SC. Ch 1, and tighten again. Cut yarn leaving about a 2-3” tail, pull the yarn through.
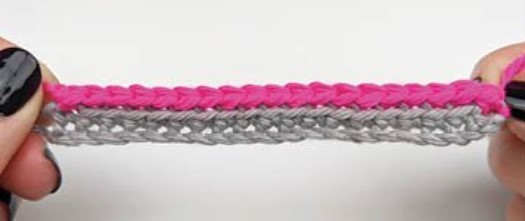
Row 2
Because the numbered boxes of this row are Color B, work all of the sts in Color B.
BBst in first st. SC Blp for 17 sts. EBst in last st
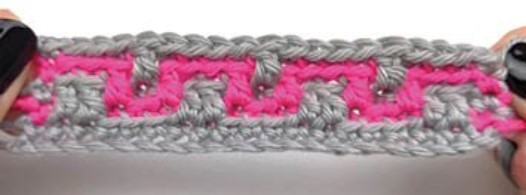
Row 3
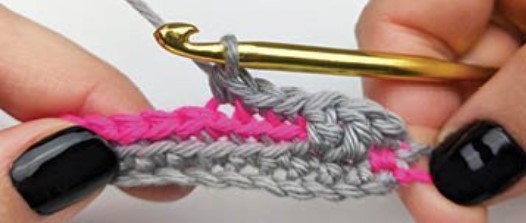
Because the numbered boxes of this row are Color A, work all of the sts in Color A.
BBst. * 2 DC Flp in the gray row below, 3 SC Blp.
Rep from *, ending on a 2 DC Flp. EBst in last st.
Row 4
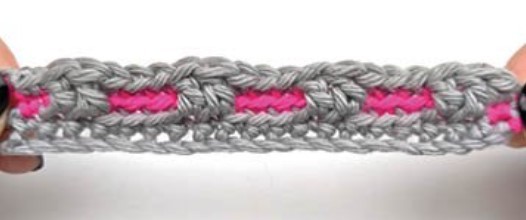
Because the numbered boxes of this row are Color B, work all of the sts in Color B.
BBst. * 2 SC Blp, DC Flp in the pink row below, SC Blp, DC Flp in the pink row below. Rep from *, ending on a 2 SC Blp. EBst in last st.
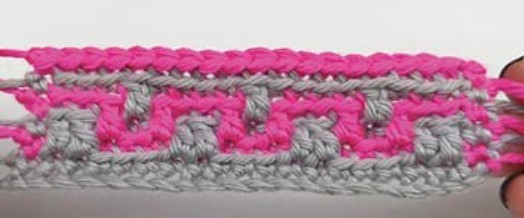
Row 5
Because the numbered boxes of this row are Color A, work all of the sts in Color A.
BBst. * 2 SC Blp, DC Flp in the pink row below, SC Blp, DC Flp in the pink row below. Rep from *, ending on a 2 SC Blp. EBst in last st.
Row 6
Because the numbered boxes of this row are Color B, work all of the sts in Color B.
BBst in first st. SC Blp for 17 sts. EBst in last st.
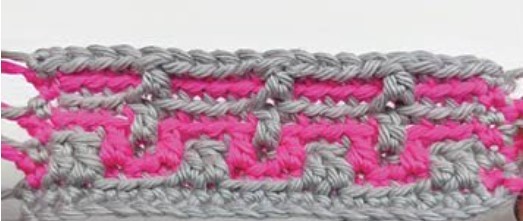
Row 7
Because the numbered boxes of this row are Color A, work all of the sts in Color A.
Rep Row 5.
Row 8
Because the numbered boxes of this row are Color B, work all of the sts in Color B.
Rep Row 4.
Row 9
Because the numbered boxes of this row are Color A, work all of the sts in Color A.
Rep Row 3.
You can finish your sample with Row 9 or make it taller by rep Row 2-9.
FINISHING THE EDGES
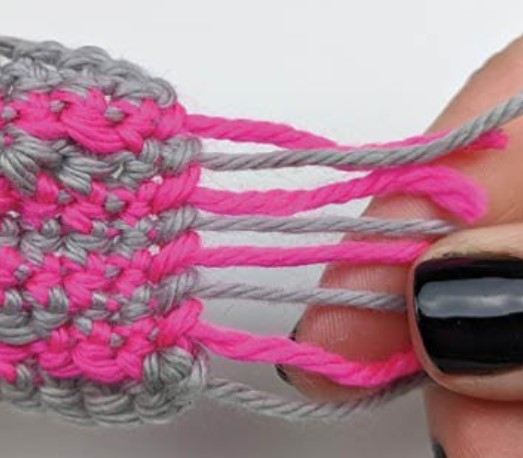
The nature of overlay mosaic crochet means you will have tail-ends on the sides. There are many different ways for handling these. You can hide them, wrap them along the edge, add fringe to camouflage them, or weave them into the back. Read on to learn an easy way to weave them into the back, which is best for when you want a clean edge.
When working with very short tails, it’s best to weave your needle into the back FIRST, then insert the tail into the eye of the needle.
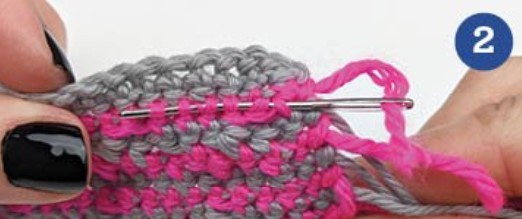
1. Sk over the border st and weave your needle into several sts of the same color on the back, making sure not to stick into any sts that show on the front.
2. Insert the tail into the eye of the needle and pull through the sts. Tip: weave in all of the tails first, then trim all the excess. This way you’re not switching back and forth between scissors and the needle.