Crochet Basics: Alpine Stitch

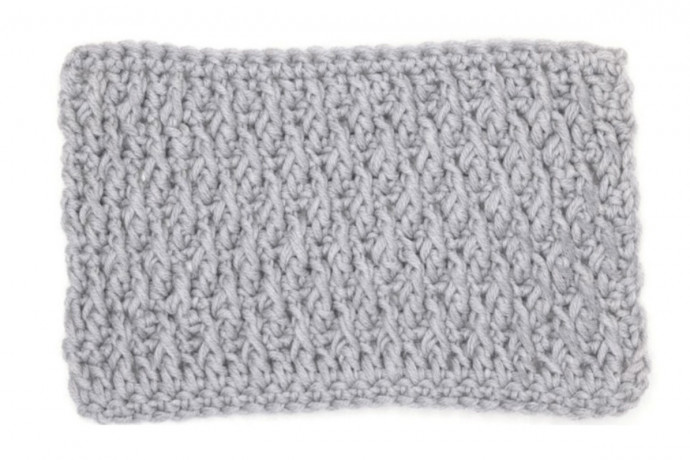
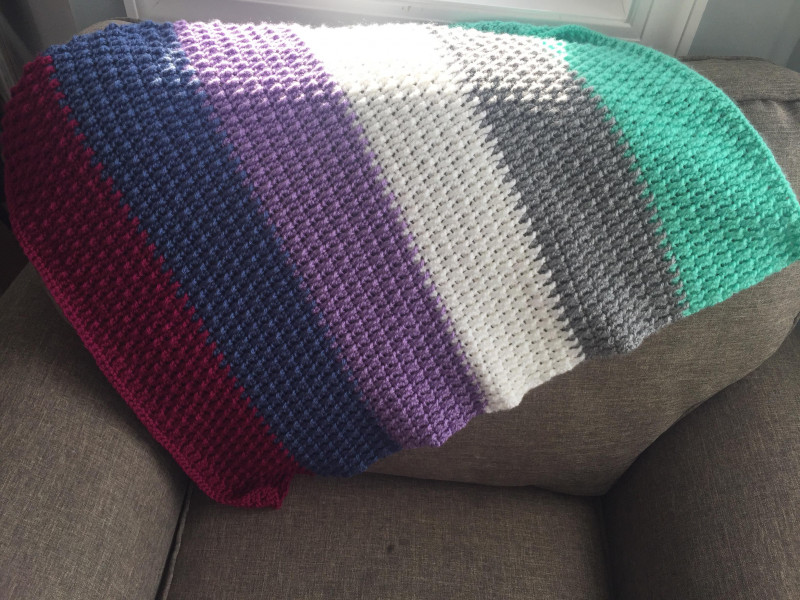
Add a new crochet stitch to your crochet repertoire with the beautiful Alpine stitch. It's easy to learn, but creates a unique texture you'd never guess was so easy to work. If you are proficient in single and double crochet, you can perform this stitch. The Alpine stitch is great for blankets, accessories, shawls, scarves and cowls and garments. It would also be a great texture for a pillow.
The secret to making the twisted tips of the Alpine stitch is the front stitches. These are just like regular crochet stitches, but they go around the previous stitches instead of through the tops of the stitches. Even if you've never done this type of stitch before, this tutorial will teach you how.
You can use any size yarn with an appropriate hook size for this. Be sure to make a sample to see how the yarn twists and shows the pattern.
There are several ways to work this stitch pattern, and I've highlighted the one I prefer.
It can be worked with any number of stitches, but I've written the instructions with odd numbers. I prefer this approach as it gives a sense of balance!
The stitch is worked with a 4-row repeat pattern, alternating rows of double crochet and solid stitches with rows of single crochet. This is a relatively easy stitch pattern that is suitable for an adventurous beginner. So, here we go!
Stitches & Abbreviations
ch = chain
cont = continued
dc = double crochet
fptr = front post treble
sc = single crochet
st = stitch
RS = right side
WS = wrong side
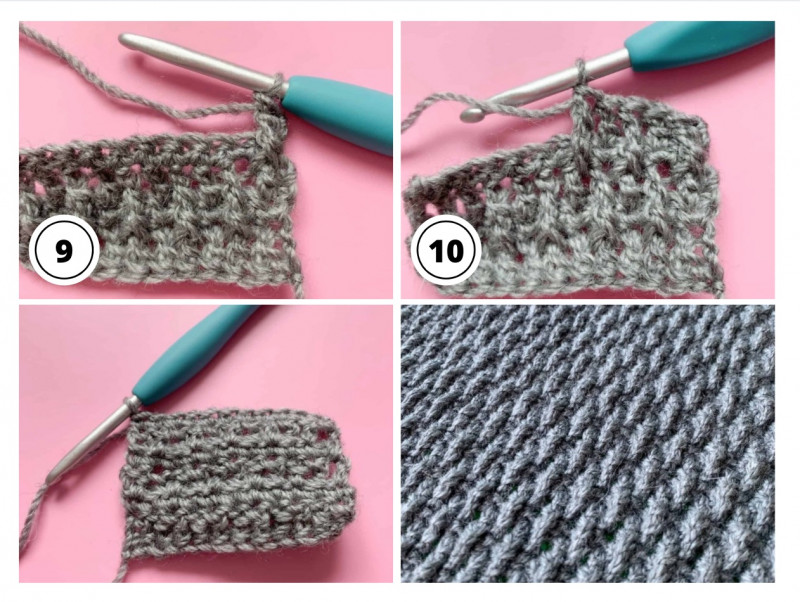
Instructions
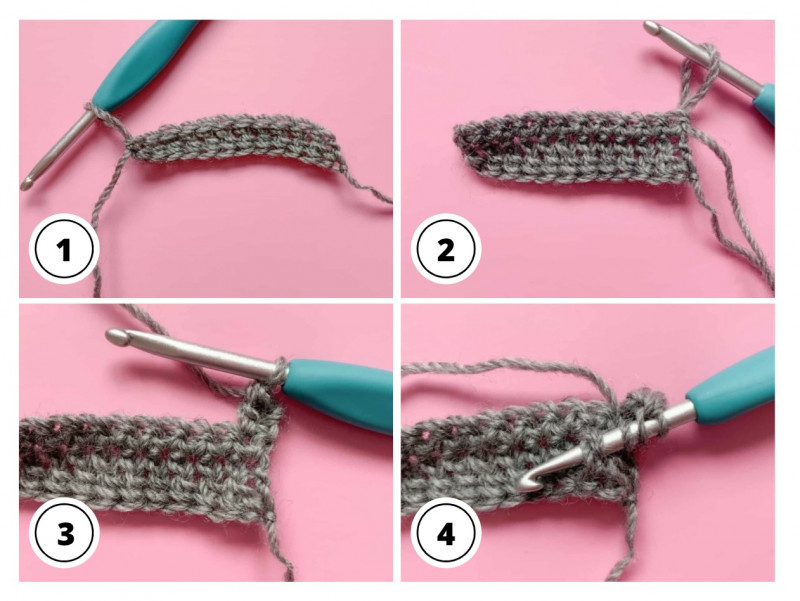
Chain an odd number of sts to start.
Row 1 (RS): Work a double crochet into the 3rd ch from hook and each stitch to end, turn – I have used 11 sts here – turn
Row 2 (WS): Ch1 (does not count as st), 1sc in in each st to end, turn
Row 3: Ch2 (does not count as st), 1dc In first st, *1fptr in corresponding dc 2 rows below, 1dc in next st; rep from * to end, turn. Row 3 is essentially just alternating dc and fptr all the way across which is the basis of the pattern.
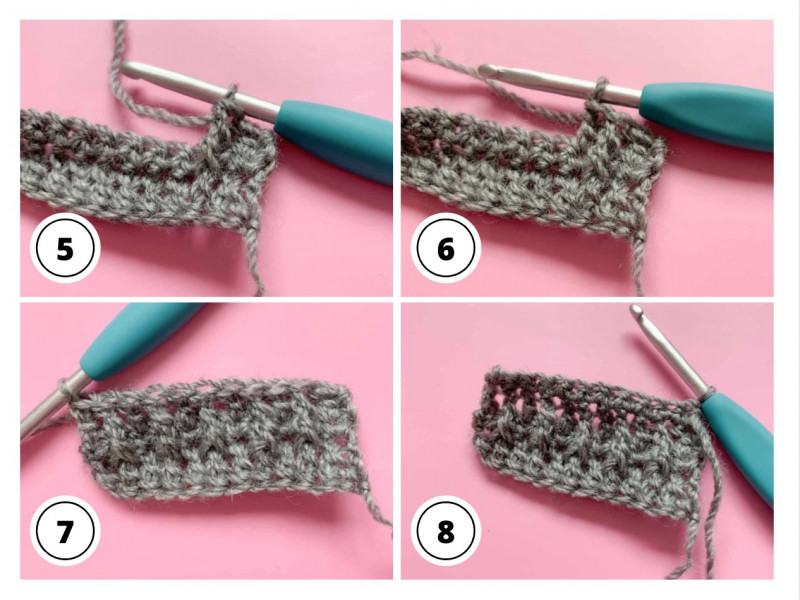
Row 4: Repeat Row 2
Row 5: Ch2, 1fptr in first dc 2 rows below, *1dc in next st, 1fptr in correstponding dc 2 rows below; rep from * to end, turn. In Row 5 you will also alternate between dc and fptr (just like Row 3) but this row will start the row with a fptr worked into the dc 2 rows below.
Row 6: Ch1, 1sc in each st to end, turn (As Row 2)
For the pattern: Repeat rows 3 – 6 and finish up on a row 2 repeat.
Tips for working Alpine Stitch
1. Fptr (front post treble) will always be worked into the dc 2 rows below and dc will always be worked into the sc from the previous row.
2. Make sure you do not work into the sc above the post stitch you just worked around (there is more info on this in the video)
3. If you are finding gaps at the end of the row where you work an fptr as the last stitch of the row, try replacing it with a front post double crochet (fpdc) instead!
4. When working this stitch, you are likely to see a little curl in the corners but this flattens out as you work and can be irradiated with a bit of blocking if required!
Happy crocheting!