Crochet Basics: Mosaic Crochet

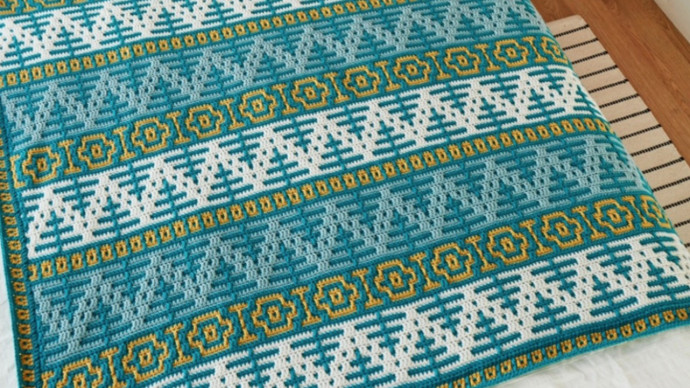
The mosaic crochet stitch tutorial features a beautiful mosaic crochet technique. It creates a lovely zig zagging v-shaped crochet pattern. Mosaic crochet, despite how complex it looks, only requires a few stitches, two contrasting yarn colors, and some care when it comes to counting. For the majority of Mosaic crochet designs you will probably be using just 2 colors, so to avoid the tedium of weaving in hundreds of loose ends you will probably want to carry the unused color up the side of your work. Although it can be used in a variety of garments, its usage in home decor is especially common. What’s great about mosaic crochet is that you use only one color per row, meaning it’s easier to follow. Learn how to make this wonderful crochet technique.
Abbreviations:
BLsc = back loop single crochet
ch = chain (s) (tutorial)
FL = front loop
Ldc = long double crochet
RS = right side
sc = single crochet (tutorial)
st = stitch (es)
To crochet this pattern you will use the mosaic crochet technique, following these 4 simple rules:
- You will use color A and B every other row.
- All single crochet stitches are worked in the back loop.
- All double crochet stitches (long double crochet/ Ldc) are worked 2 rounds below in the front loop & this front loop are always the same color as the one you’re working with.
- You will always work on the right side. That means you’ll cut yarn at the end of each row and reattach at the beginning of the row. I recommend working over yarn tails both at the beginning and end or the row.
Instructions
This pattern is a multiple of 5 stitches. Add 2 for beginning and end of row.
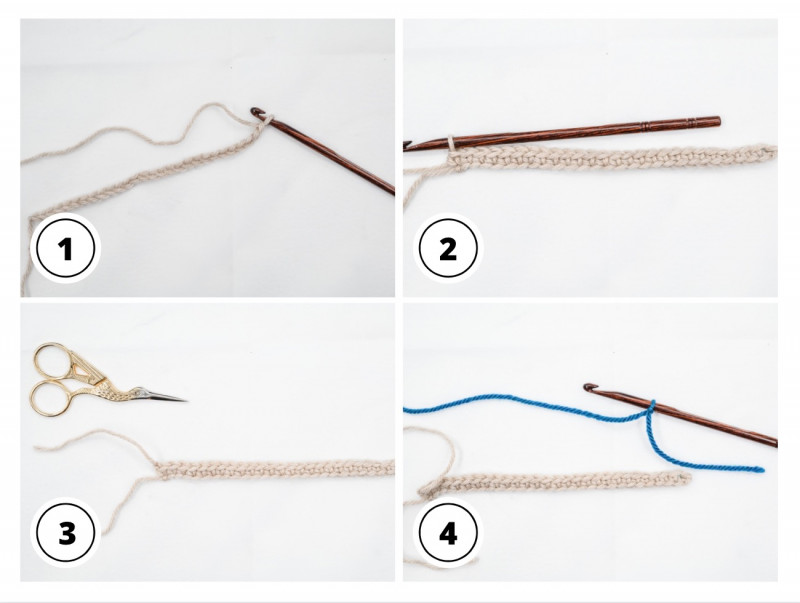
Step 1. With CA ch a multiple of 5 + 3 stitches.
Step 2. Row 1: Sc 1 in 3rd ch from hook, sc 1 in each ch across.
Step 3. Cut yarn and fasten off, because you are going to work all rows on the right side of the work.
Step 4. Row 2: Grab color B and make a slip knot.
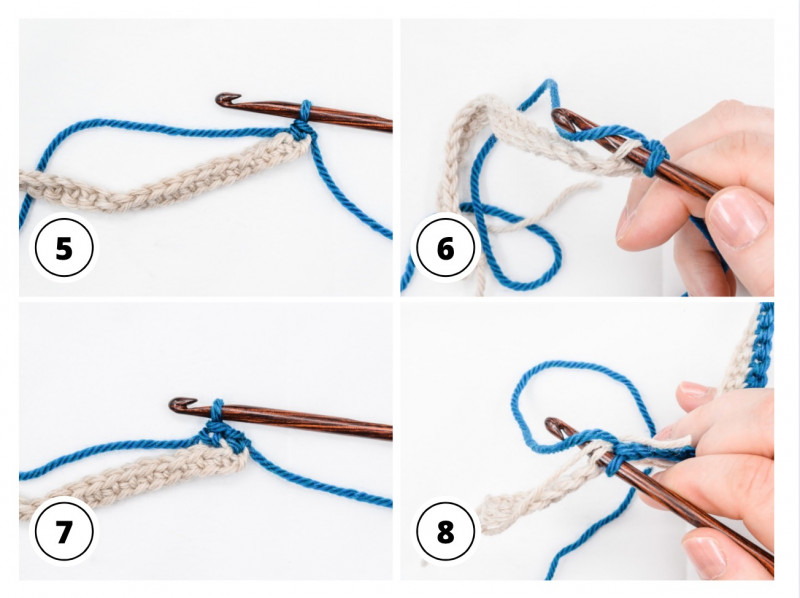
Step 5. Row 2 cont.: Always work single crochet in first stitch, through the whole stitch.
Step 6. Row 2 cont.: Work following single crochet stitches in the back loop.
Step 7. Row 2 cont.: First back loop single crochet finished. Continue to crochet back loop single crochet across, until you have 1 stitch left.
Step 8. Row 2 cont.: When you reach the last few stitches of the row, start working over the yarn tail with CA, from the end of row one.
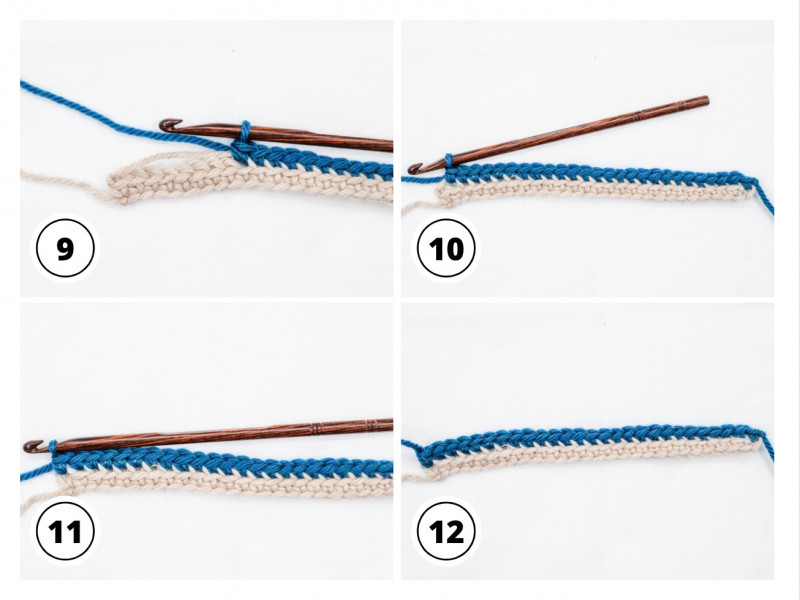
Step 9. Row 2 cont.: You can see how the yarn tail is fastened by working over it.
Step 10. Row 2 cont.: When you have 1 stitch left, work a regular single crochet into the last stitch.
Step 11. Row 2 cont.: Sc in the last stitch finished.
Step 12. Cut yarn and fasten off, 2 rows finished.
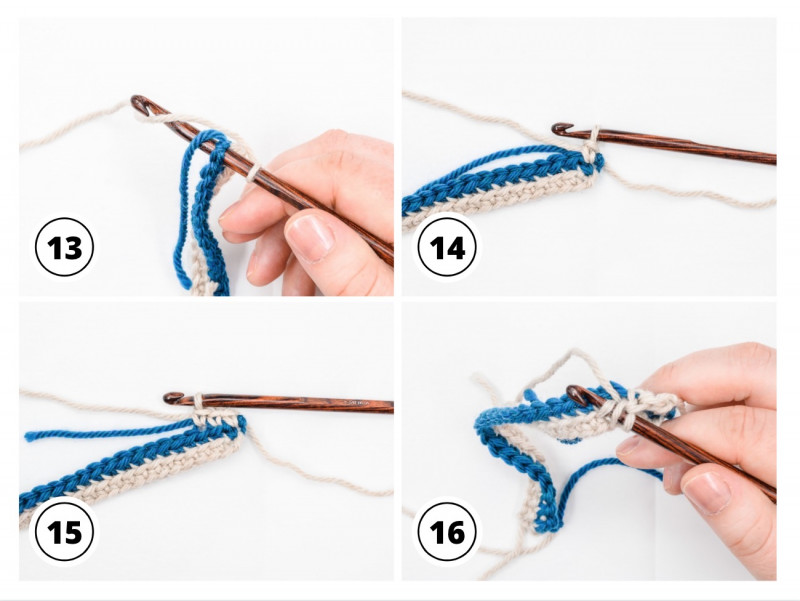
Step 13. Row 3: Single crochet in first stitch with color A. Notice that you should crochet over color B.
Step 14. Row 3 cont.: First single crochet finished. Notice how color B is placed, ready to be worked over.
Step 15. Row 3 cont.: Single crochet in back loop of the next 2 stitches.
Step 16. Row 3 cont.: Double crochet in the front loop of stitch 2 rows below. Ready to draw up a loop from the front loop showed on photo.
Step 17. Row 3. cont: Double crochet in front loop of stitch 2 rows below finished. (Ldc worked).
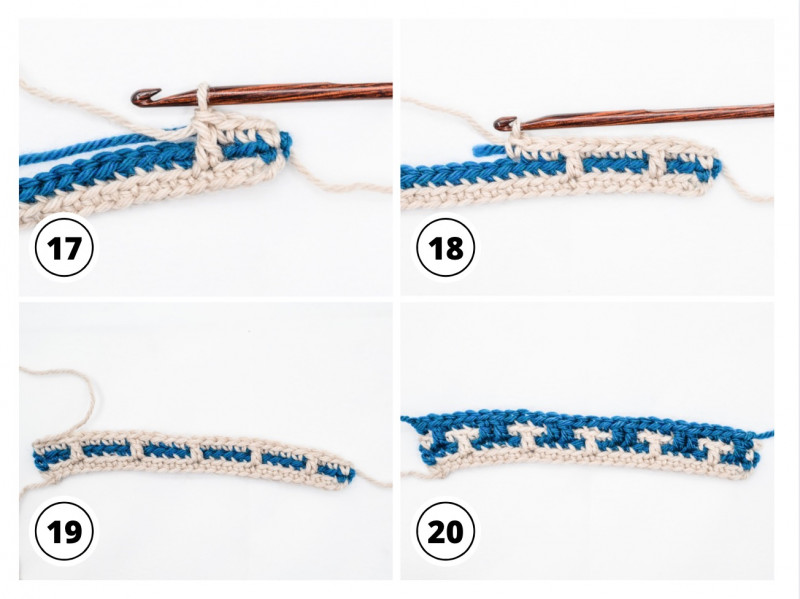
Step 18. Row 3 cont.: Work this repeat across row 3 until you have 1 stitch left: BLsc in next 2 st, Ldc 1, BLsc in next 2 st.
Step 19. Row 3 cont.: Row 3 finished. Yarn cut & fastened off.
Step 20. Row 4: This is how row 4 looks finished. Steps: Attach yarn on RS with sc in 1st st, *Ldc 1 in FL of st 2 rows below, BLsc 1 in the next 3 st, Ldc 1 in FL of st 2 rows below*, repeat from *to* until you have 1 st left, sc in last st, fasten of & cut yarn.
Step 21. Row 5: This is how it looks finished. Steps: Attach yarn on RS with sc in 1st st, *BLsc 1 in next st, Ldc in FL of st 2 rows below, BLsc 1 in next st, Ldc in FL of st 2 rows below, BLsc 1 in next st*, repeat from *to* until you have 1 st left, sc in last st, fasten of & cut yarn.
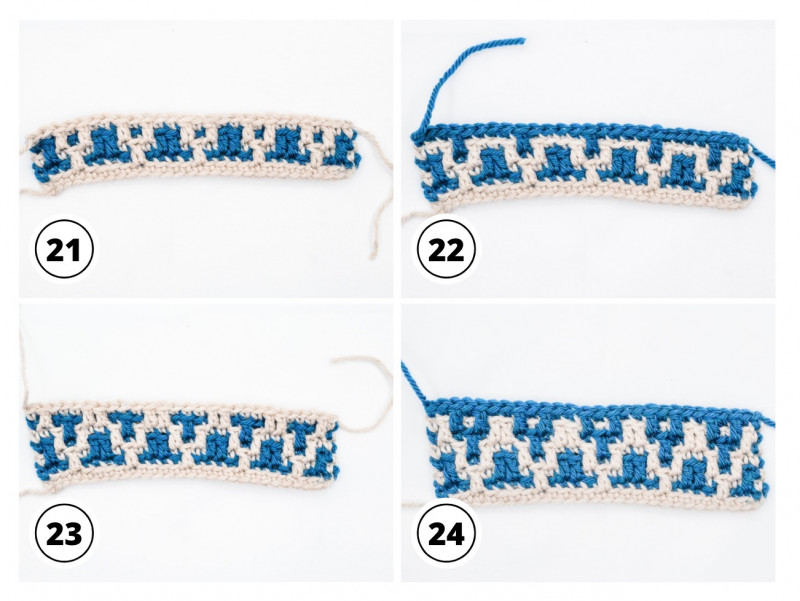
Step 22. Row 6: Repeat row 3.
Step 23. Row 7: Repeat row 4.
Step 24. Row 8: Repeat row 5.
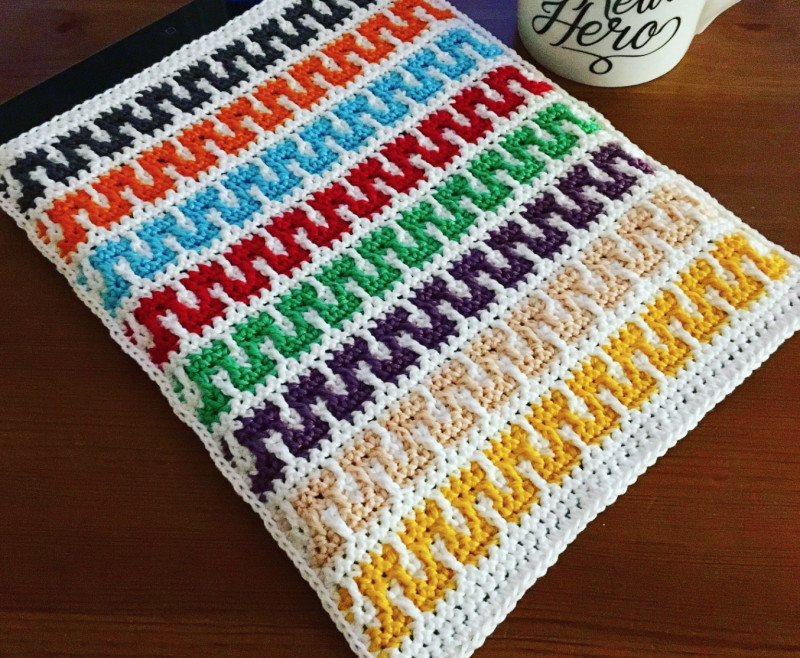
Have fun creating your own mosaic crochet patterns.
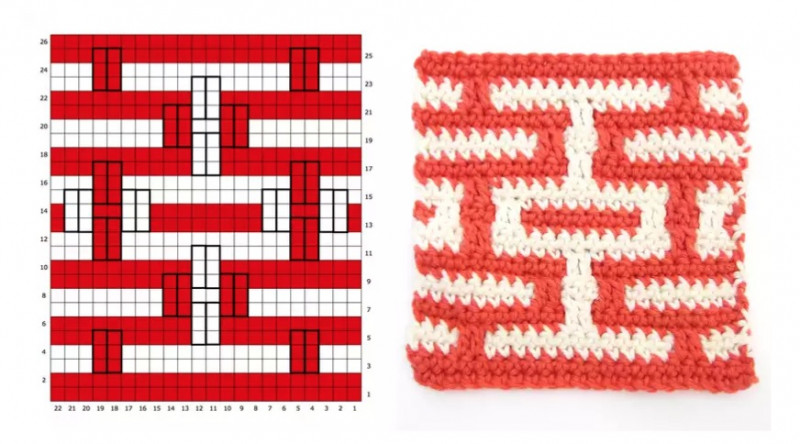
Follow these guidelines and suggestions for making your own chart, then set your imagination free!
- You can make charts with squared paper and a pencil, or with an app where you can color in the squares.
- Start by making a chart with simple two-row stripes, then plan your vertical links.
- Start and finish with two plain rows of dc.
- To anchor the stitches of a row, the first and last dc must be worked in the main color: Yarn A for Yarn A rows, Yarn B for Yarn B rows. If necessary, add these sts to each end of the row.
- On a Yarn A row, you can’t place Yarn B squares over Yarn A squares, and vice versa on Yarn B rows.
- For a more pleasing look, it’s best to make the vertical links at least two sts wide.
I hope this article has encouraged you to give mosaic crochet a try.
Thank you I have to look at this later today I have to go do something else right now
Absolutely, I am going to try this, you provided a very good tutorial, thank you!
Awesome! Thank you so much! 😊
Absolutely beautiful pattern! I'm going to try to build up enough confidence to make this. Thank you so much for sharing!
Thank you so much!🥰
what kind of yarn and weight do you use for this
Any kind of yarn will work 💛