Knitting Basics: Seed Stitch + Avoiding Mistakes

Knitting is an art form, a passion, a therapy, whatever you want to call it, to me it is the most fun you can have with yarn. So, let’s continue to create yarn magic, one stitch at a time! Today’s stitch is the Seed Stitch! Seed Stitch is made up of single knits and purls that alternate both horizontally and vertically. This stitch is an excellent choice of stitching for any item when you'll see both sides of the finished product, such as a scarf, because it looks the same on both sides. What is a bump on one side is a valley on the other, and vice versa. The stitch also lays flat, so it's ideal for the borders of sweaters or cuffs. However, some knitters find switching between knitting and purling for every stitch a little tedious.
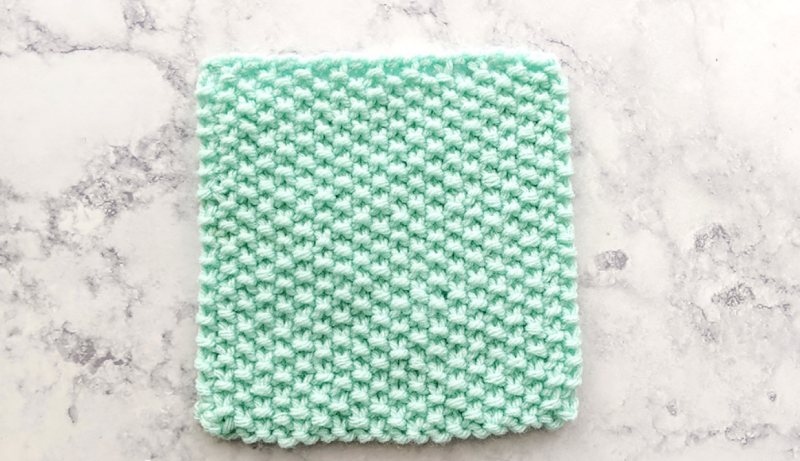
When you're doing the seed stitch, just remember that the knits and purls never stack on each other. The little purl bumps that this technique creates look like seeds, which is the effect that gives this stitch its name.
Instructions
Cast on any number for the Seed Stitch technique and it will work out. Below lists Seed Stitch swatch instructions for both even and odd numbered cast ons.
For an even number cast on:
Example – Cast on 20
Row 1: *knit 1, purl 1; repeat from * to end
Row 2: Repeat Row 1 until desired length.
For an odd number cast on:
Example – Cast on 19
Row 1: knit 1, *purl 1, knit 1; repeat from * to end
Row 2: purl 1, *knit 1, purl 1; repeat from * to end
Repeat Rows 1 & 2 until desired length.
Bind off in seed stitch by alternating knits and purls.
Now let’s talk about situations that are supposed to be simple but often cause beginner knitters a lot of frustration. Some of these situations happen at first attempts to knit seed stitch – one of the most basic knitting stitch patterns that is used and loved by many knitters.
All issues with seed stitch can be easily avoided, but beginner knitters are often too embarrassed to ask for help. So if you are a beginner knitter, or if you know someone who’s learning to knit, I hope you’ll find the tips outlined in this tutorial helpful.
1. Accidental yarn overs
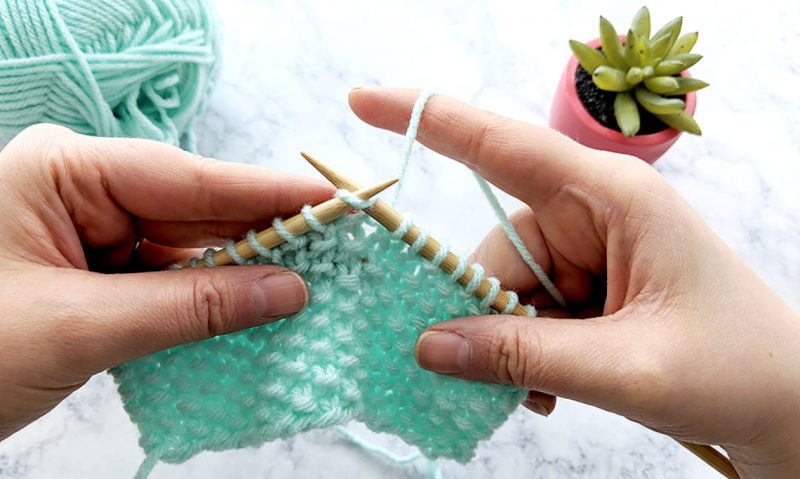
This issue happens when a knitter first attempts to work on a pattern that has knit and purl stitches in the same row, like seed stitch or ribbing. The reason for the accidental yarn overs is working each stitch with the yarn at the back of the work. When a knitter is comfortable working in garter stitch (knitting every stitch in every row), it becomes a habit to keep the yarn at the back of the work. To avoid any problems with stitch patterns like seed stitch, remember to bring the yarn to the front of the work before purling a stitch. Then bring the yarn to the back of the work before knitting the next stitch.
2. Seed stitch looks like ribbing
This issue occurs because the only difference between seed stitch and “knit 1, purl 1” ribbing is that in ribbing knits and purls are stacked on top of each other forming neat columns of stitches (“ribs”). In seed stitch, knits and purls are scattered. If you don’t follow the second rule of seed stitch – “knit the purls and purl the knits” – you’ll get ribbing. A quick fix will be to work seed stitch on an odd number of stitches and remember to start each row with a knit stitch. Unfortunately, the quick fix won’t be helpful if the pattern tells us to work only a certain number of stitches in seed stitch, for example, when making a border.
3. Seed stitch is tough on hands
This issue is common to more experienced knitters. When we work on a big project made mostly in seed stitch, we may feel that our hands get tired faster. The reason for that is the fact that we have to move the yarn to the front or to the back of the work after every stitch. Over time, this little action puts a strain on the wrists and arms, especially when we use English knitting style. A quick fix to this issue is to take breaks after every 20-30 minutes of knitting. For a long-term solution, it helps to use continental knitting style.
The fabric formed by the seed stitch is dense, stretchy, and reversible showing visible bumps on both the front and back of the work. The little bumps in the fabric resemble seeds, thus the name – seed stitch! The seed stitch is so versatile that it can be used in nearly any project. This includes baby hats, washcloths: A simple project like a washcloth allows you to practice the stitch while making a useful item, baby booties, hand warmers, jackets, and neck warmers.
I love this stitch and am currently working on a scarf. I think the instructions on the top for even and odd stitches are reversed. For odd I start every row with knit and for even I start row one with knit and row two with purl. Please confirm. Thank you, M.
Pinned for later reference❤️