Fix Knitting Mistakes by Ripping Out

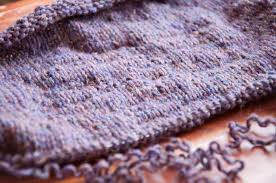
So you’ve been knitting for a while and managed to get a good-sized chunk of that section done but when you look down and inspect your work you realize that you’ve made a mistake! This is the “deer in the headlights” moment. And it’s not the mistake that is so scary; it’s the “What do I do now?!” feeling that paralyzes us. Fear not! Learning to fix mistakes will empower you to move forward with confidence, because strength comes from the tools and knowledge of how to correct things, not from the impossible wish that nothing will ever go wrong.
If you are like me, and you do not live in the “every-stitch-must-be-perfectly-perfect” camp, you know that some errors need to be fixed, or they will haunt you forever and ruin the piece you are working so hard to create. That’s why ripping out is a necessary technique to learn.
Ripping Out a Short Distance
You just noticed a mistake back near the beginning of the row; now what? Well, you unknit back to that point.
Instructions
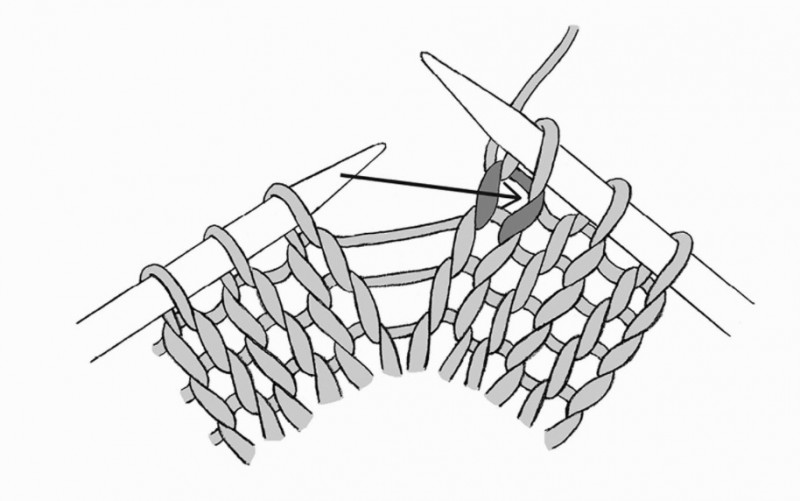
1. Hold your needles as usual and poke the left tip into the stitch under the one on the tip of the right needle from front to back, and slide it over to the left needle.
2. Tug the end of the yarn, so it pulls out of the back of that stitch.
3. Keep doing this until you get to where you want to be. Then fix the glitch, and move forward again.
Ripping Out Several Rows
Ripping back multiple rows is exponentially more scary than ripping out a short distance, but it does have the benefit of reinforcing everything you (should) know about how the stitches (should) sit on the needles. You could unknit one stitch at a time, but you’ll probably want to poke your eyes out before you’re done (three hours later); so take a deep breath and stay calm.
Instructions
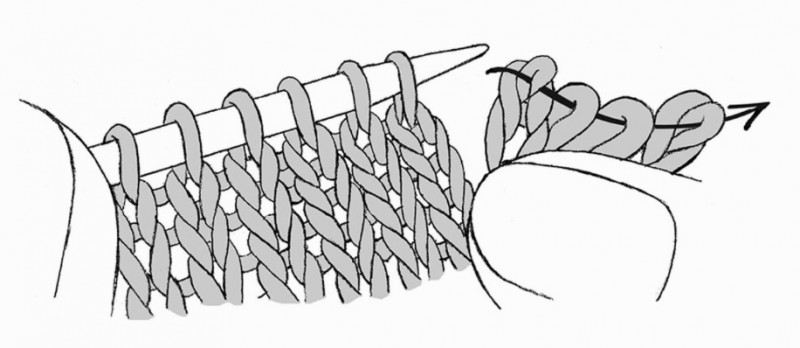
1. Find where the mistake is and mark that spot with a locking stitch marker or a bit of yarn.
2. Pull the needle out of the stitches (gasp!). Hold the piece in one hand and gently pull the yarn to unravel the stitches back to the row above the one you are aiming for.
3. Decide which hand is more comfortable holding the needle, and work from that side to the other. For instance, hold the empty knitting needle in your right hand and the knitted work in your left hand, and unravel one stitch at a time, working from the right edge to the left. Pick up each unknit stitch on the needle from back to front so that you are placing the stitch on the needle in the correct position. Work across the row until all stitches are back on the needle.
To work from the left side, hold the needle in your left hand and the work in your right hand. Working from the left, you will be picking up the stitches from the front side.
Dealing with Kinky Yarn
Sometimes the raveled yarn is kinky and curly because it locked itself into the form of the stitches. This is especially the case if the piece sat for a while before you got up the nerve to deal with it. Cut the yarn, leaving a tail to weave in, and start with new yarn.
As for what you cut off, it’s easy to refresh the kinked stuff. Wrap it around your hand and elbow to make a loop, and use some scraps of yarn to tie several places around the loop to keep all the strands under control. Soak your skein in cool water, squeeze out the water, and roll it in a towel. Then just hang it over a towel rack and let it dry. Roll it back into a ball, and it’s ready to be knit.
Let me know which method(s) you prefer to use, or perhaps you have a different one altogether and would like to share.
I've found that to prevent dropping stitches when ripping out several rows, it works best for me to keep an extra line of plastic fishing line threaded through the stitches for an emergency fall back to row of work. I do this about every two or three rows… depending on how difficult the knitting pattern is for me. Then when I must re-knit from the row where the stitch or stitches were lost, it amounts to an easier task. All I need do is insert a needle through the stitches from either direction and the project is ready for the reknit.