Crochet Basics: Picot Stitch Tutorial

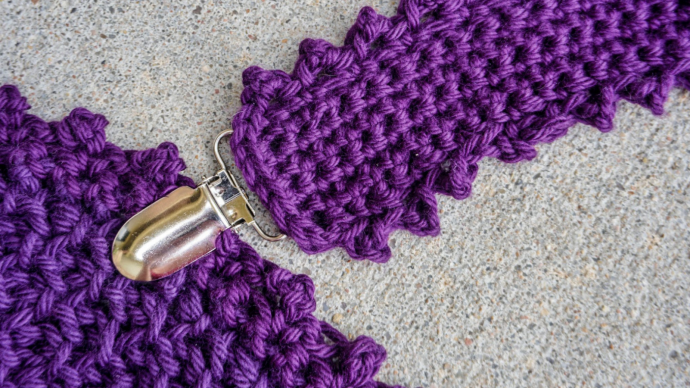
Picot crochet is a fun technique using chain stitches to create loops, small curves, ball-like shapes, and decorative patterns. This edging stitch pattern combines single crochet, double crochet, and other basic stitches to create designs. You’ve probably noticed, that the picot stitch appears on the edges of countless crochet projects. And while it’s a popular edging for doilies, blankets and garments, this stitch is much more versatile than simple borders. In fact, there are several ways to customize the stitch and make it match any pattern. Plus, the picot can also be called to the middle of patterns, often to fill spaces with interesting texture. Today I invite you to learn the step-by-step for crocheting the picot stitch, as well as some examples for modifications on the simple stitch.
How to crochet the picot stitch
Here are the steps to crochet the basic picot stitch.
Step 1:
Chain three.
Step 2:
Insert hook into first chain.
Step 3:
Yarn over.
Step 4:
Pull yarn through.
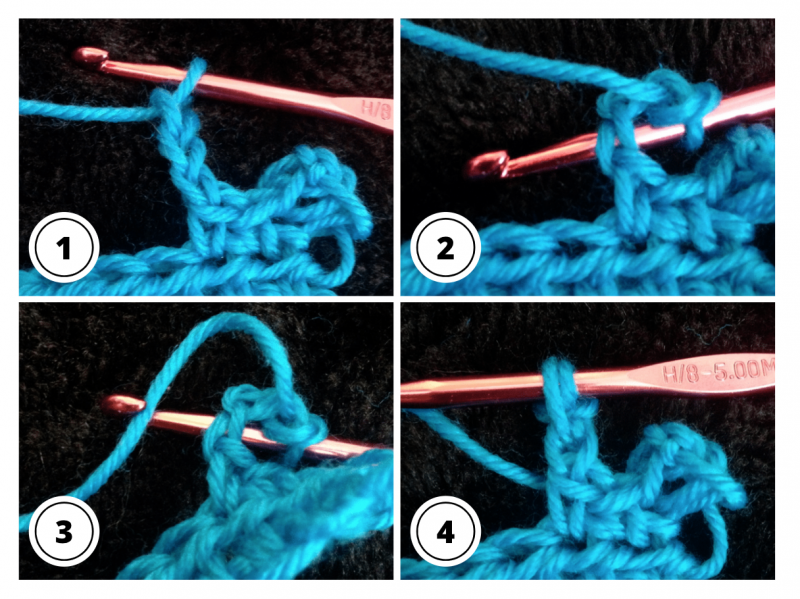
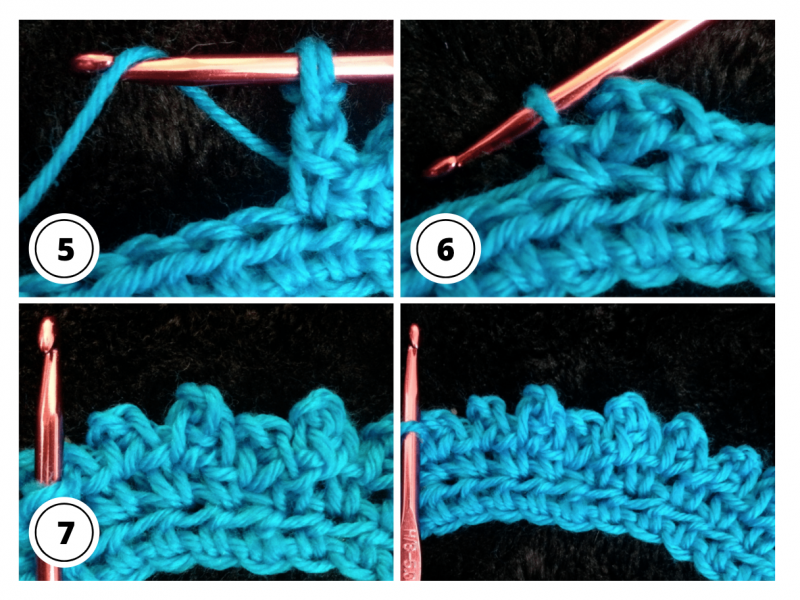
Step 5:
Yarn over.
Step 6:
Pull yarn through both loops on hook.
Step 7:
Single crochet in next stitch.
In other words, what you’re doing here is creating a chain three and then making a sc stitch into the first chain of that chain three and following that with a sc in the next stitch of the row.
How to crochet a row of picot stitch
If you want to create a whole row of picot crochet stitches for an edging, you’ll repeat steps 1-7 across the row.
Variations on picot crochet stitch
The instructions above are for the basic crochet picot stitch. However, there are several variations on this popular design. Here are the most common variations:
Increase the number of chains
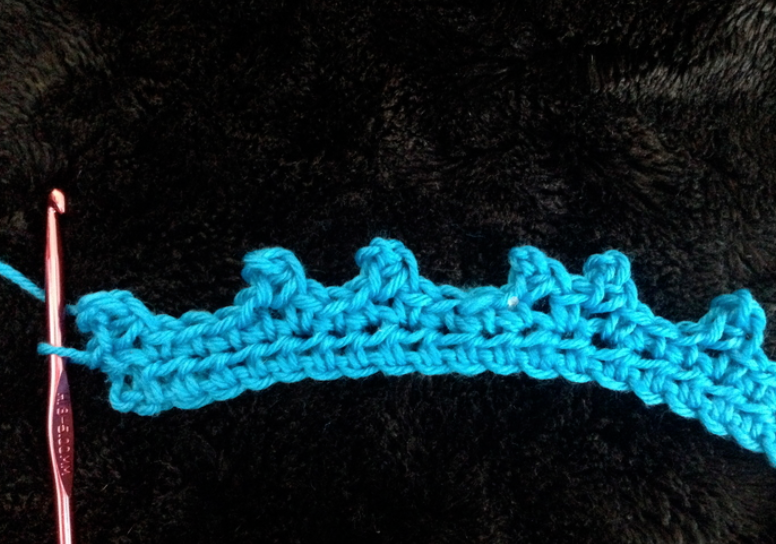
Instead of beginning the picot with a ch 3, you can begin it with a ch 4, ch 5 or even more chains. This just creates a taller and more open picot stitch. The photo below shows a picot stitch made with a ch 5.
Begin with a single crochet
You can sc, then chain three on top of it (like in step 1) and continue the rest of the steps from there. This gives your picot stitches a little flatter and wider. Work into black loops only
Insert hook into back loop only of the chain three stitch, and work BLO in step 2.
Add sc stitches between picots
In the description above for working rows of crochet picot stitch, you would chain three directly on top of the sc in step seven. If you want to make a more defined, openwork version of the picot stitch, add one or two more sc stitches after step seven before you begin your next picot.
If you’d like to practice the Picot Stitch, I’ve prepared a short downloadable tutorial in the end of the page. This simple crochet snowflake pattern truly showcases the beauty in the variations of the picot crochet stitch. Make it as designed for the winter holidays, or create your own versions for garlands to be used for upcoming Christmas.
Wow!!! I have never seen so many variations of crochet stitches. This is very enlightening. Thank you so much.