Learn to Crochet Round Potholder: Step-by-Step Guide

Hello, my dears! We all know that practice makes perfect, and today I’m sharing with you a lovely project to help you master your crocheting in the round technique.
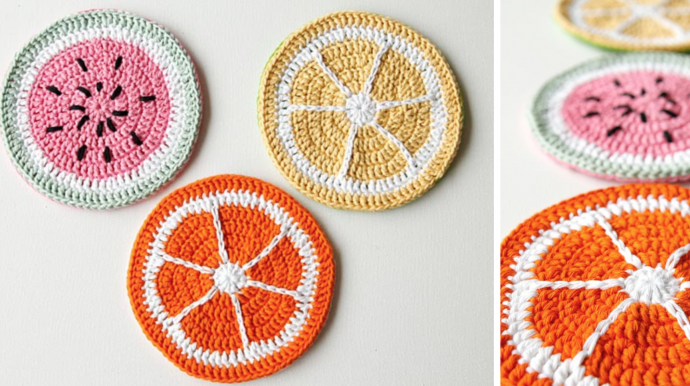
I used regular cotton and a 4mm hook. Be sure to crochet this potholder tight, than it will function better. Choose your colors carefully. Put them together and make a sketch if you can. You don't want to be halfway discovering you don't like the look of it. The stitches used in this pattern include double crochet (dc), slip stitch (sl st), and chain (ch).
Well, there we go. I’ll show you the orange potholder as an example.
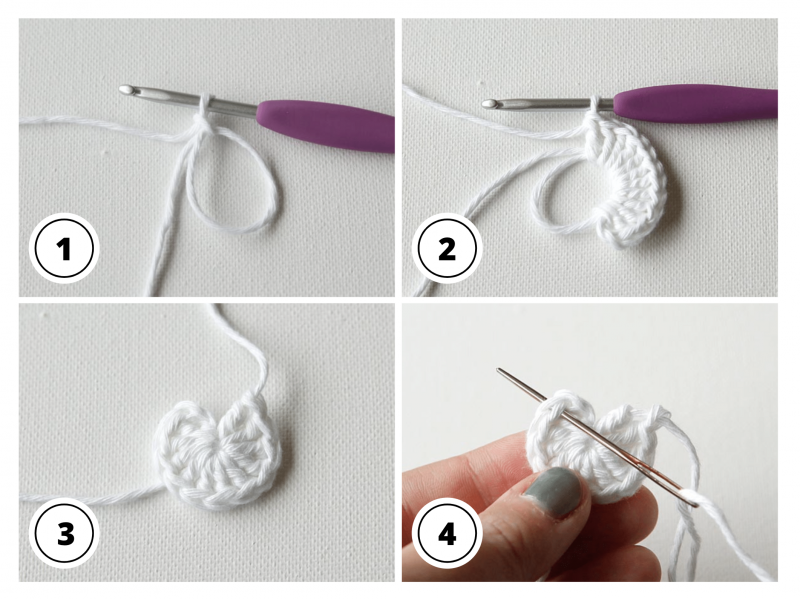
Step 1
Start with your white yarn. Begin by making a magic circle, and secure with a stitch.
Step 2
Chain 2, then work 11dc into the ring, for a total of 12 stitches.
Step 3
Cut the yarn, pull through the loop on your hook, and close the magic circle by pulling on the bottom yarn tail.
Step 4
Close the circle by threading your yarn tail, and inserting the needle from front to back through the first dc you made, skipping the chain 2.
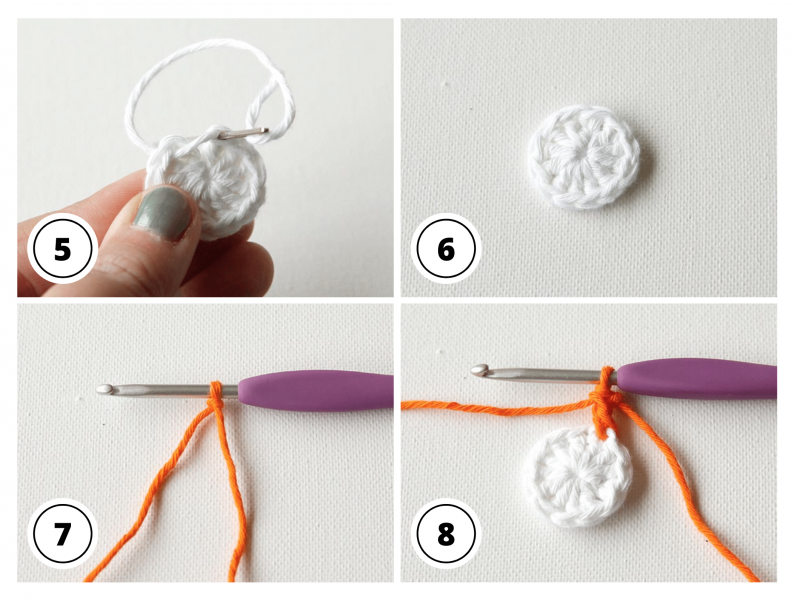
Step 5
Insert your needle through the back loop of the last dc you made.
Step 6
Sew in both ends.
Step 7
Grab your orange yarn, and start with a slip knot on your hook.
Step 8
Start by making a dc into your white circle. This way of starting a round is called a standing stitch. We're going to start all of our new colors like this from now on.
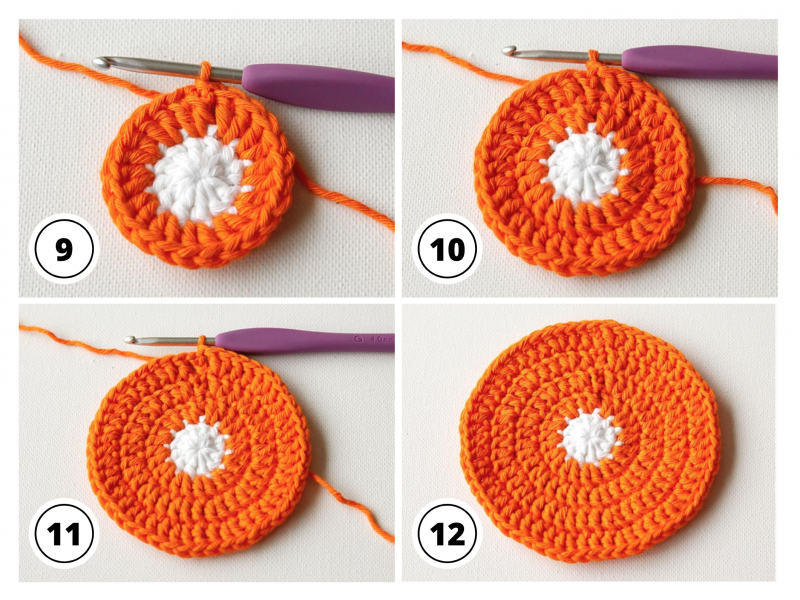
Step 9
Work 2dc into every stitch around. Your stitch total is now 24. Join with a slip stitch in the first dc.
Step 10
Chain 3, then work 2dc into the next stitch. Work *1dc, inc* around (inc means increase; work 2 stitches into one stitch). Join with a slip stitch to the top chain of your beginning chain 3. Your stitch total is now 36.
Step 11
Chain 3, then work 1dc into the next stitch, and 2dc into the stitch after that. Work *2dc, inc* around. Join with a slip stitch. Your stitch total is now 48.
Step 12
Chain 3, then work 2dc into the next two stitches, and 2dc into the stitch after that. Work *3dc, inc* around. Your stitch total is now 60. Cut the yarn, and join the round like you did with the white circle. Sew in the ends.
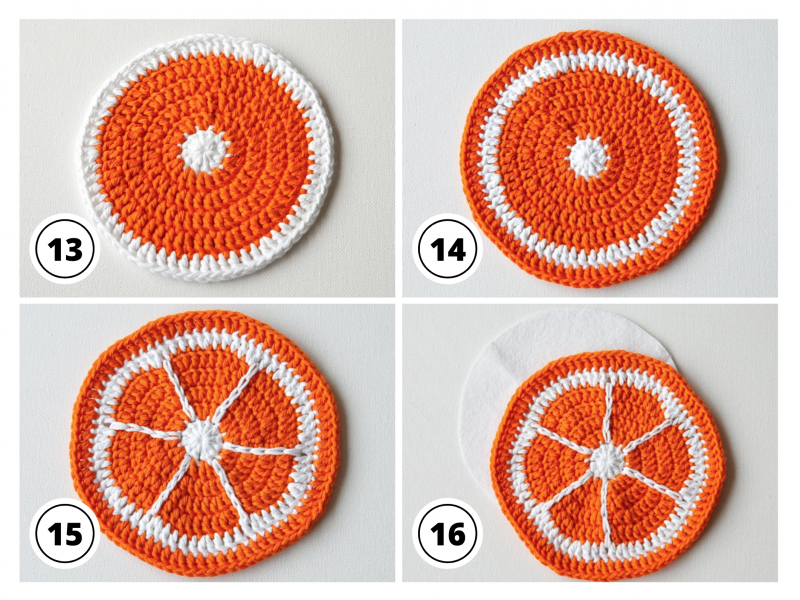
Step 13
Join your white yarn like you did with the orange yarn. Work *4dc, inc* around. Join with a slip stitch. Your stitch total is now 72. Cut the yarn, and join the round like you did with the white circle. Sew in the ends.
Step 14
Join your orange yarn like you did before. Work *5dc, inc* around. Join with a slip stitch. Your stitch total is now 84. Cut the yarn, and join the round like you did with the white circle. Sew in the ends.
Step 15
We're now going to crochet the wedges by using surface slip stitches. Grab your white yarn, and pull it to the front from the center of your piece. Slip stitch your way up to the second white round. Cut the yarn and sew in the ends. Repeat this 5 more times.
Step 16
Sew on the Back. Cut out a piece of felt that is the same size as your crochet piece. Put your crochet piece on top of your felt. Grab some sewing thread and your sewing needle, and attach the felt to the crochet piece using a blanket stitch. Sew in the ends.
That’s it! Easy, right?
Change the colors and use some black accent yarn to create the look of seeds for a watermelon potholder, or make another one in yellow, for a lemon potholder! Enjoy Your Potholders!
Do you like this project? Are you going to make these potholders, perhaps in some other color combinations? Let me know if you have any questions or other comments below.
Thanks for the patterns, and yes I’m going to make these.
Thanks again,
Mary
Thank you very much, Mary! Glad you're going to try this pattern!
I would like to copy this pattern but it would require about 8 pages because of the way you set it up. This is a waste of paper and very annoying. I can't sit in front on my computer and crochet. Please find a way of making this more accessible for all of us. I'm sure i am not the only one who finds this format annoying.
Thank you for considering this change. It will make a lot of people happy. I've seen many good patterns on your website and have to bypass them for the reason stated above.
Sincerely, Alice McDonald
Hello, Alice! Thank you very much for your comment, I appreciate that! Of course, I took it into consideration, and now you may find the 1-page printables for the tutorials in the end of each post. I hope you enjoy these little lessons, and I will be happy if my readers will enjoy the learning process.
Thank you!
Anna @blossom lady