How to crochet in the round – Step-by-Step Guide

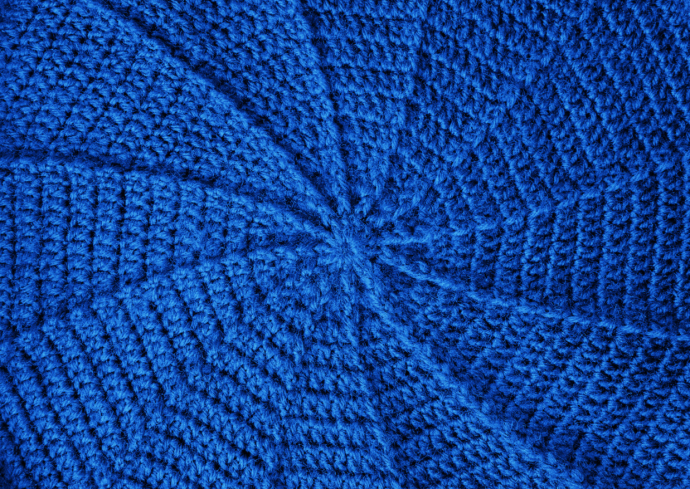
Today I invite you to learn one of the basic crochet techniques you need to learn as a beginner – crocheting in the round. You will use this technique for lots of project. Amigurumi and hats are the most common, but you can also crochet a rug or blanket this way as well. Here I will show you how to crochet in the round with a simple step-by-step guide with pictures. I promise it’ll be really easy!
Crocheting in the round can be difficult when you’re first starting out. The first thing you need to know is that there are two ways to crochet in the round. One way is to close the round with a slip stitch and the second is to work continuously in the round. Today we’ll focus on the first method – slip stitching, I find it easier to begin with.
A few things you should know first
The stitch you choose will determine how many stitches you will begin with.
Single Crochet – begin with 6 stitches
Half Double Crochet – begin with 8 stitches
Double Crochet – begin with 10 stitches
If you start with 6 stitches, your total stitch count will increase by 6 after each round. If you start with 8 stitches, your total stitch count will increase by 8 after each round. And so on.
Abbreviations used:
Sl St – Slip Stitch
Hdc – Half Double Crochet
Ch – Chain
Yo – Yarn over
Rep – Repeat
If you have any questions at all, please don’t hesitate to ask! Leave a comment below and I will be happy to help you along the way!
Rounds 1-2
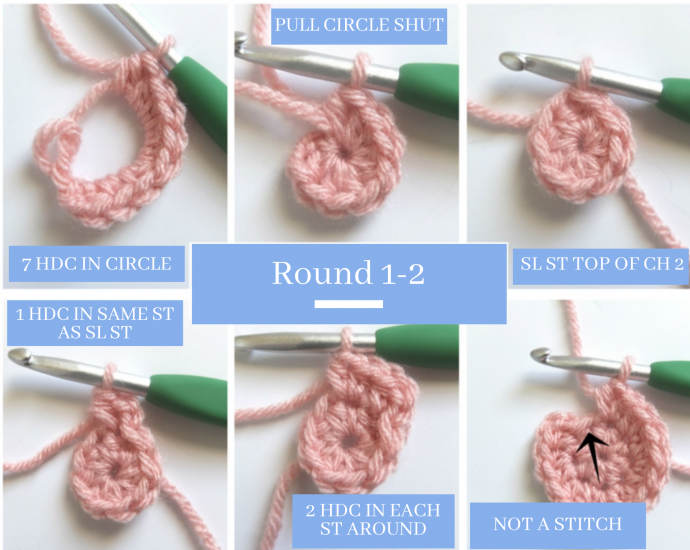
Create your magic circle, ch 2 (the ch 2 counts as a hdc).
Round 1: 7 hdc into your circle. (You will have 8 hdc total including the ch 2)
Pull the tail to close the circle. Sl st to the top of the ch 2. (Insert your hook into the top of ch 2, yo pull loop through st AND through the loop on your hook.)
Round 2: Ch 2, 1 hdc into the same st as your sl st. [1 hdc into the very next st. Then repeat another hdc into the SAME st. (You will have 2 hdc in the same st – in some patterns, the designer will label this as an increase). Continue with 2 hdc into the next st and in each st around. Sl st to the top of ch 2. (16 st)
If you take a look at the picture, you will see that the last “stitch” in the round looks like a stitch, but it really isn’t. It is the sl st you created in the previous round. Do not hdc into this st.
Round 3
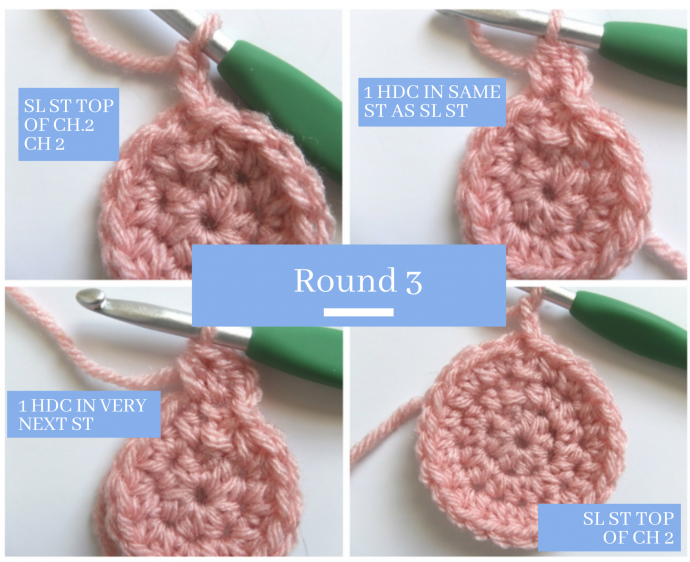
Round 3: Ch 2, 1 hdc into the same st as sl st. 1 hdc into the next st. [2 hdc into the next st. 1 hdc into the next]. Rep [ ] around. Sl st to top of ch 2. (24 st)
Rounds 4-7
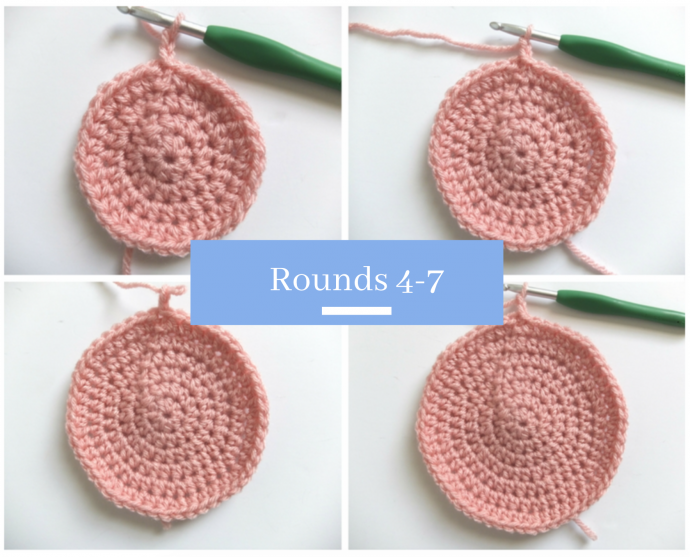
Round 4: Ch 2, 1 hdc into the same st as sl st. 1 hdc into each of the next two st. [2 hdc into the next st. 1 hdc into each of the next two st]. Rep [ ] around. Sl st to top of ch 2. (32 st)
Round 5: Ch 2, 1 hdc into the same st as sl st. 1 hdc into each of the next three st. [2 hdc into the next st. 1 hdc into each of the next three st]. Rep [ ] around. Sl st to top of ch 2. (40 st)
Round 6: Ch 2, 1 hdc into the same st as sl st. 1 hdc into each of the next four st. [2 hdc into the next st. 1 hdc into each of the next four st]. Rep [ ] around. Sl st to top of ch 2. (48 st)
Round 7: Ch 2, 1 hdc into the same st as sl st. 1 hdc into each of the next five st. [2 hdc into the next st. 1 hdc into each of the next five st]. Rep [ ] around. Sl st to top of ch 2. (56 st).
Are you starting to see the pattern? Continue increasing each round in this fashion until you feel comfortable crocheting in the round!
Fantastic tips!!! Really appreciate them 🤩🤩🤩
Thank you, dear Jen! Glad you liked them!!! 🌹
thank you. the illustrations are easy to understand.