The Crochet Nesting V-Stitch: A Complete Tutorial

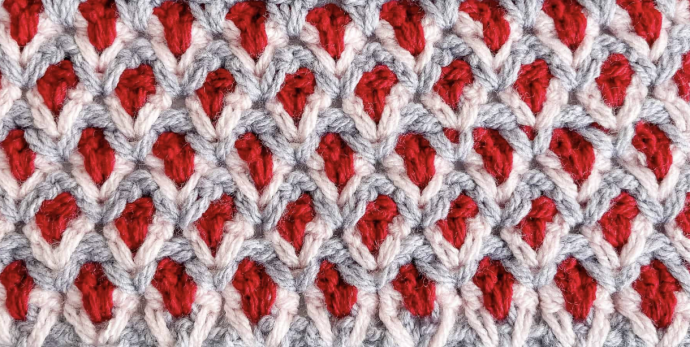
The crochet nesting V-stitch is a captivating and visually appealing stitch pattern that offers a unique texture and stunning colorwork possibilities. Despite its intricate appearance, this stitch is created using a simple V-stitch (dc, ch 1, dc). What makes it distinctive is the way you change the placement of these V-stitches, stacking them two rows below the current row.
This tutorial will guide you through creating this remarkable stitch, and there's even a handy cheat sheet to help you keep track of the V-stitch placement by row. This stitch is ideal for various projects like blankets, scarves, and more. Let's get started!
Special Stitch:
- V-st (V-stitch): (1 dc, ch 1, 1 dc) worked in the same stitch or space.
Pattern Notes:
- To resize, chain multiples of 3 + 1 for the foundation chain.
V-Stitch Placement Cheat Sheet by Row:
- Row 1: Standard V-stitch
- Row 2: V-stitch in the same location as the V-stitch from Row 1
- Rows 3-8: V-stitch placement two rows below the current row
Instructions:
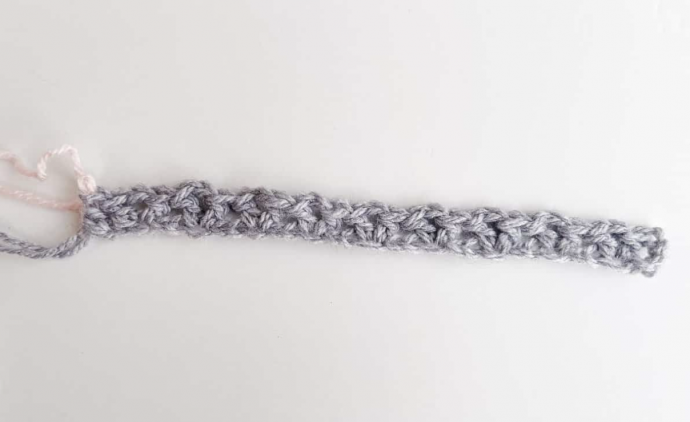
Row 1:
- With Color A, chain the desired number of chains. The sample is worked with 31 chains.
- (RS) (Dc, ch 1, dc) in the fifth chain from the hook (the skipped chains count as the first stitch).
- Skip 2 chains, V-stitch in the next chain, repeat from * to * until the last 2 chains.
- Skip the next chain, and make 1 dc in the last chain.
- Drop Color A, and join Color B. Turn. (9 V-stitches + 2 stitches)
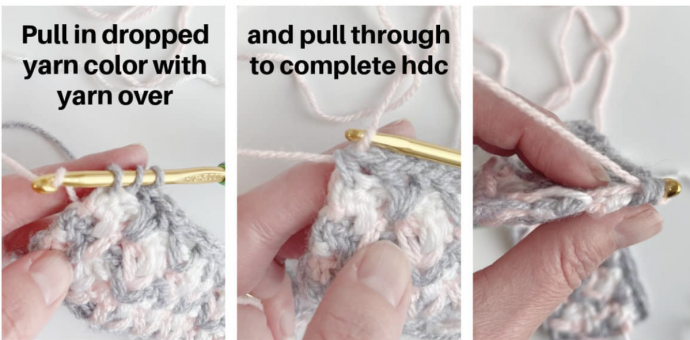
Row 2:
- Chain 1 and make 1 half-double crochet (hdc) in the same stitch.
- While working over the ch-1 space, make a V-stitch in the same chain as the next V-stitch from the previous row.
- Repeat from * to * until the last stitch, and make 1 hdc in the last stitch.
- Drop Color B and join Color C. Turn. (9 V-stitches + 2 stitches)
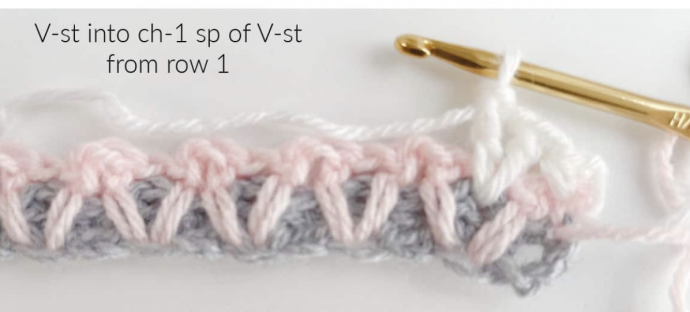
Row 3:
- Chain 1 and make 1 hdc in the same stitch.
- Working in the ch-1 space of the V-stitch from two rows below, make a V-stitch in the next ch-1 space.
- Repeat from * to * until the last stitch, and make 1 hdc in the last stitch.
- Drop Color C, pull in the dropped Color A, and turn. (9 V-stitches + 2 stitches)
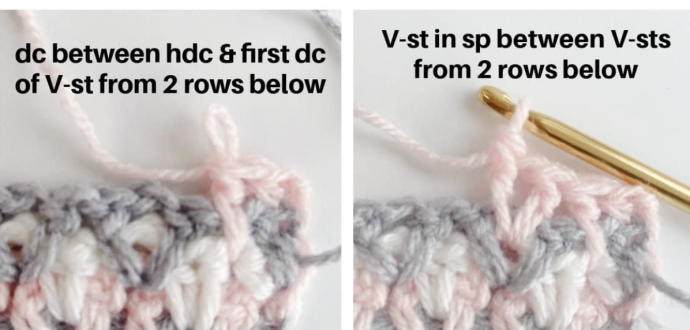
Row 4:
- Chain 1 and make 1 hdc in the same stitch.
- Make 1 dc in between the first hdc stitch and the next dc two rows below.
- Working in between the next two V-stitches from two rows below, make a V-stitch in the next space.
- Repeat from * to * until the last V-stitch, skip over the last V-stitch, and make 1 dc in between the last V-stitch and the hdc from two rows below.
- Make 1 hdc in the last stitch.
- Drop Color A and pull in the dropped Color B. Turn. (8 V-stitches + 4 stitches)
Row 5:
- Chain 1 and make 1 hdc in the same stitch.
- Make 1 dc in between the hdc and the next dc two rows below.
- Working over the ch-1 space of the V-stitch from the row below, make a V-stitch in the space between the next two V-stitches from two rows below.
- Repeat from * to * until the last 2 stitches, make 1 dc in between the last dc and the hdc from two rows below, and make 1 hdc in the last stitch.
- Drop Color B and pull in the dropped Color C. Turn. (8 V-stitches + 4 stitches)
Row 6:
- Chain 1 and make 1 hdc in the same stitch.
- Make 1 dc in between the hdc and the next dc two rows below.
- Working in the ch-1 space of the V-stitch from two rows below, make a V-stitch in the next ch-1 space.
- Repeat from * to * until the last 2 stitches, make 1 dc in between the last dc and the hdc from two rows below, and make 1 hdc in the last stitch.
- Drop Color C and pull in the dropped Color A. Turn. (8 V-stitches + 4 stitches)
Row 7:
- Chain 1 and make 1 hdc in the same stitch.
- Make a V-stitch in the space between the next dc and the V-stitch two rows below.
- Working in between the next two V-stitches from two rows below, make a V-stitch in the next space.
- Repeat from * to * until the last stitch, and make 1 hdc in the last stitch.
- Drop Color A and pull in Color B. Turn. (9 V-stitches + 2 stitches)
Row 8:
- Chain 1 and make 1 hdc in the same stitch.
- Make a V-stitch in the space between the next dc and the next V-stitch from two rows below.
- Working over the ch-1 space of the V-stitch below and in the space between the next two V-stitches, make a V-stitch in the space between the V-stitches two rows below.
- Repeat from * to * until the last stitch, make 1 hdc in the last stitch.
- Fasten off Color B, pull in the dropped Color C, and turn. (9 V-stitches + 2 stitches)
Continuing:
- Continue repeating rows 3 to 8 until you achieve the desired size.
- Fasten off, weave in the ends, and admire your stunning work!
The crochet nesting V-stitch is a beautiful and versatile stitch that you can use to create a wide range of colorful and textured crochet projects. Enjoy experimenting with various color combinations to make your creations truly unique. Happy crocheting!