The Crochet Arcade Stitch Tutorial

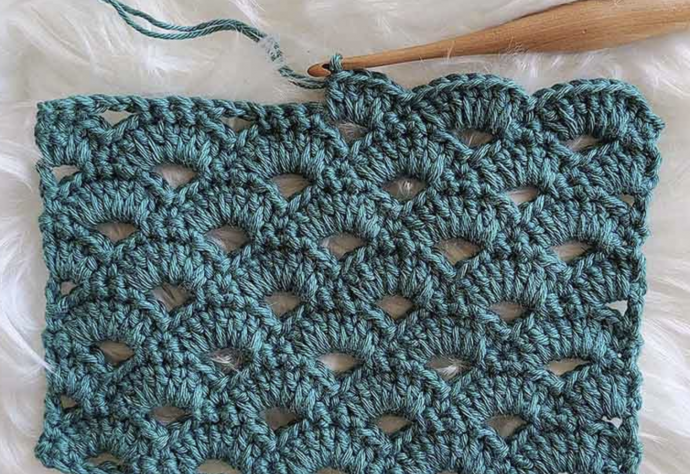
The Crochet Arcade Stitch is a versatile pattern primarily composed of double crochets, resulting in a fabric that's not only beautiful but also breathable.
Featuring an offset design with a straightforward repeating pattern, it quickly becomes a project you can crochet without the need for constant stitch counting. You can comfortably enjoy your favorite movie while working on this captivating crochet blanket.
This stitch offers flexibility in terms of color choices. Opt for a single color to achieve a chic, sophisticated design, or unleash your creativity by using a vibrant rainbow of yarns. Mixing and matching colors can transform it into a lively and joyful project. Below, you'll find some swatches showcasing both approaches.
The Crochet Arcade Stitch is beginner-friendly, making it ideal for projects requiring a reversible and sturdy pattern. It's perfect for crafting garments, accessories, table runners, decorative throws, and much more. Whether you're a novice or an experienced crocheter, this stitch opens up a world of creative possibilities.
Instructions
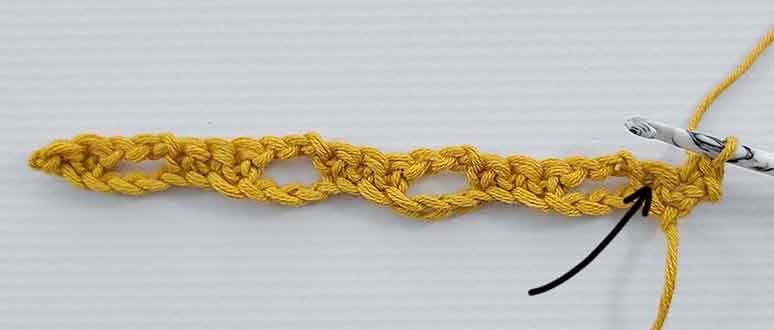
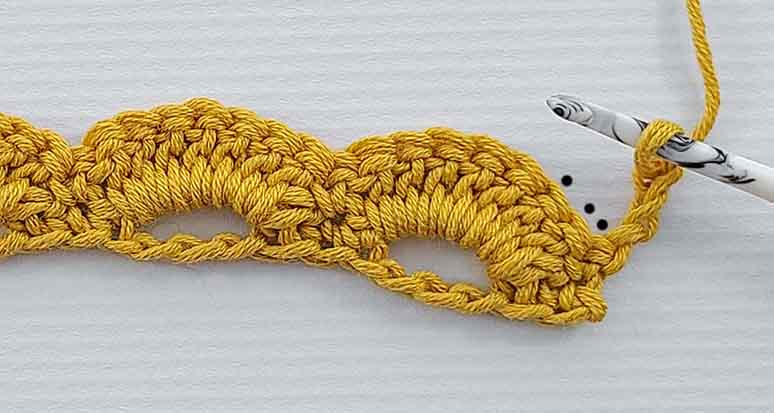
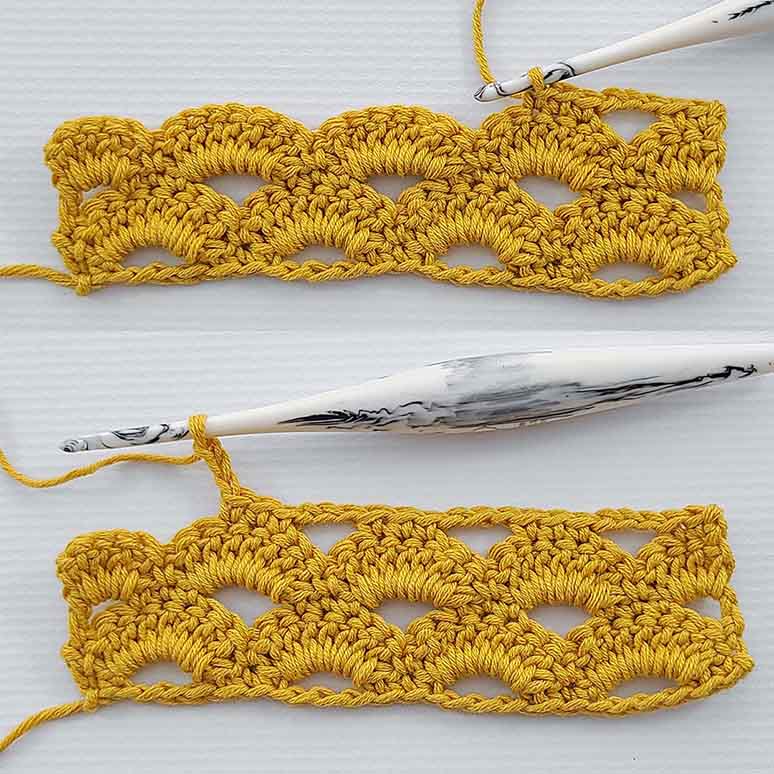
For this practice swatch, chain 26. This is a multiple of 6 + 1 stitch + 1 turning chain.
ROW 1 – The Foundation Row
To begin the crochet Arcade stitch, we first have to create the foundation row. This foundation row does not count as a part of the row repeats and will only be worked this once.
Written in one of my patterns, this row will look like this:
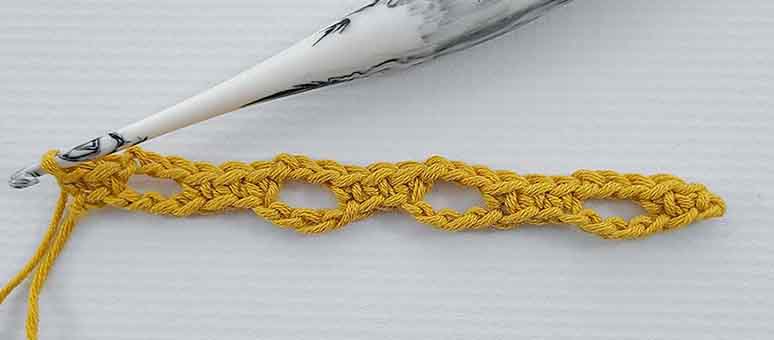
Row 1 – Place 1 sc in 2nd ch from hook and 1 sc in next ch, [ch 3, sk 3 ch, 1 sc next 3 chs]. Repeat across the row until 5 chs remain. Ch 3, sk 3, 1 sc in next 2 chs. (4 ch 3 spcs, 13 sc)
Here’s how to follow this row step by step:
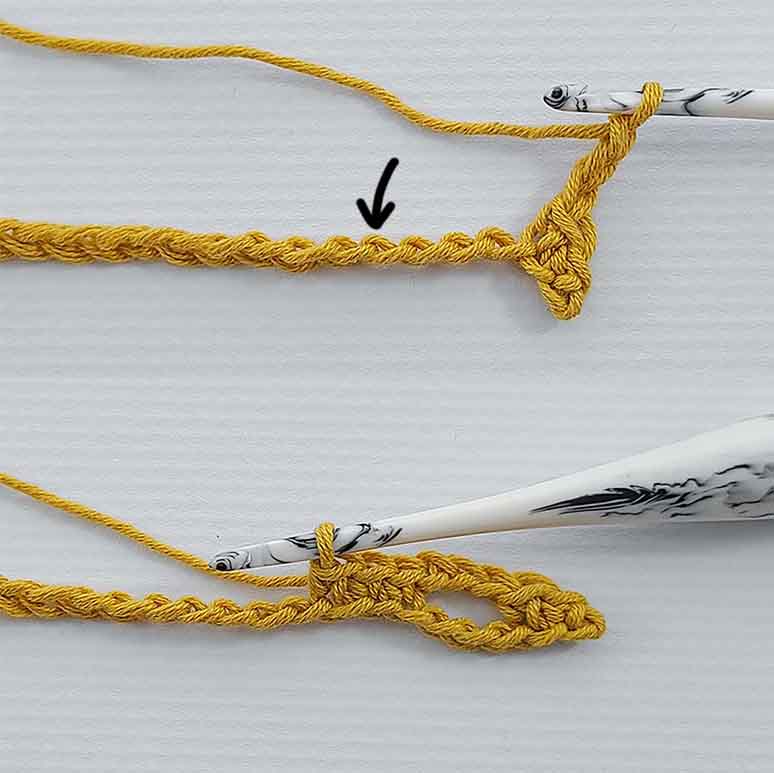
To start the foundation row after creating our starting chains, we will place 1 single crochet in the second chain from the hook and 1 single crochet in the next chain.
Then, the stitch repeat for the row begins, which you can see in brackets in the pattern above.
We will chain 3, skip 3 chains, and place 1 single crochet in each of the next 3 stitches.
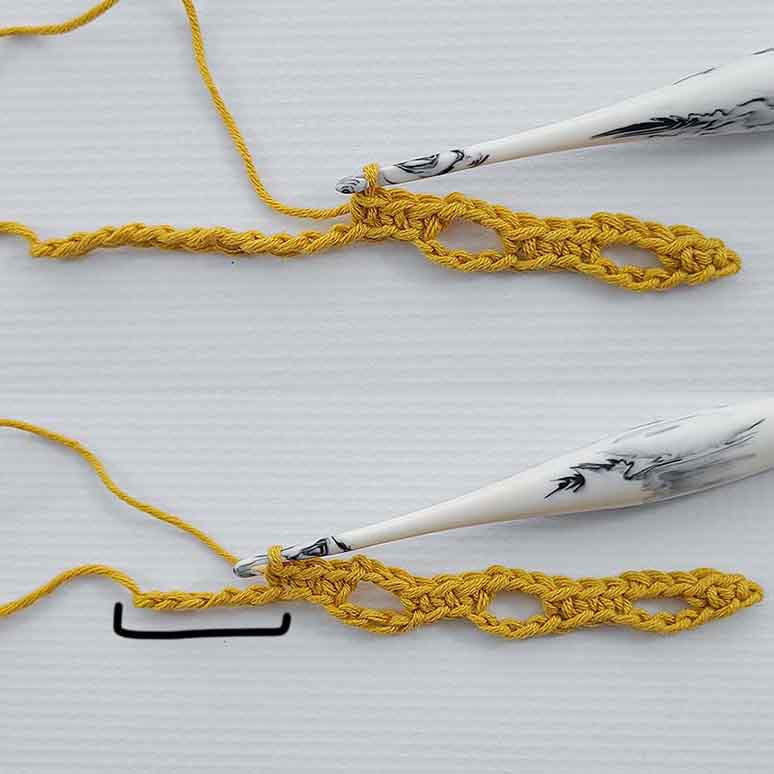
We will repeat [chain 3, skip 3 chains and place 1 single crochet in each of the next 3 stitches] across the row until only 5 chains remain.
By doing this, we are creating chain 3 spaces that will be worked into on the next row to create the arches.
When we have 5 chains remaining, we will chain 3, skip 3 chains and place 1 single crochet in each of the last 2 chains.
Our row now starts and begins the same way.
We have a total of 13 single crochets and 4 chain spaces.
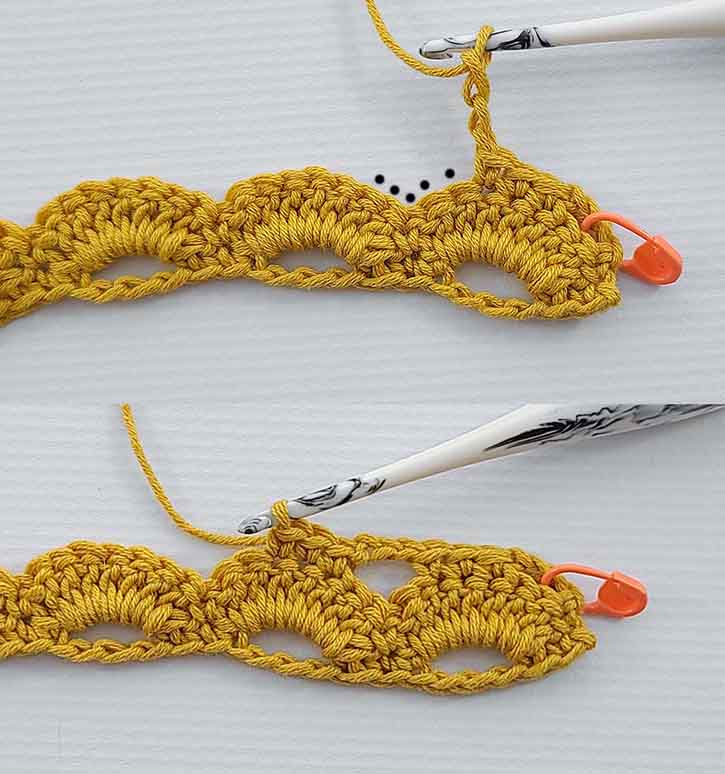
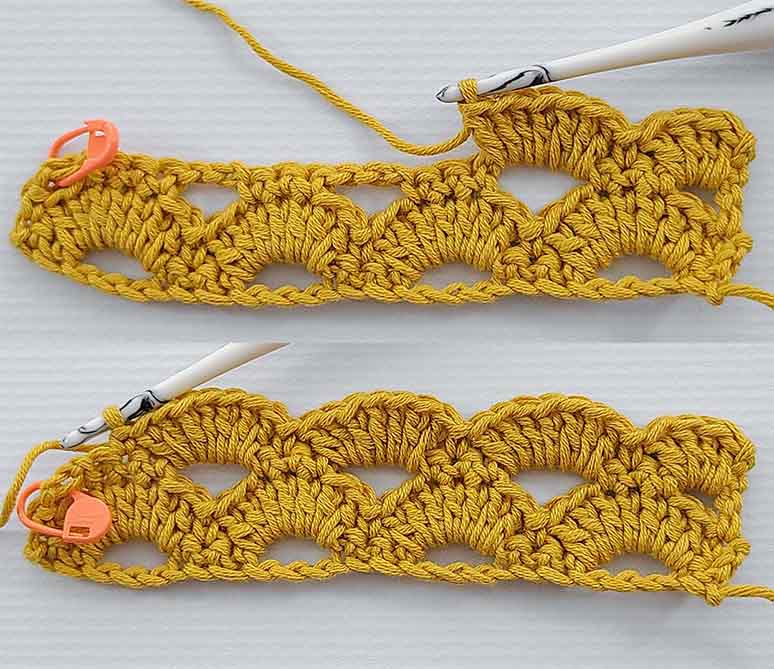
ROW 2 – Repeat Row 1
We can now begin our second row of the project. This row is considered the first repeat row.
Written in one of my patterns, this row will look like this:
Row 2 – Ch 1, turn. 1 sc first st, [sk 1 sc, 7 dc in ch 3 spc, sk 1 sc, sc next]. Repeat across the row to the end. Your last sc should be in the last st of the row. (4 Dc Fans, 5 sc)
Here’s how to follow this row step by step:
To begin this row, we will chain 1 and turn. Then, we will place 1 single crochet in the first stitch.
Our repeat begins immediately after this first stitch.
To begin the stitch repeat, we will skip 1 stitch (a black arrow points to the stitch).
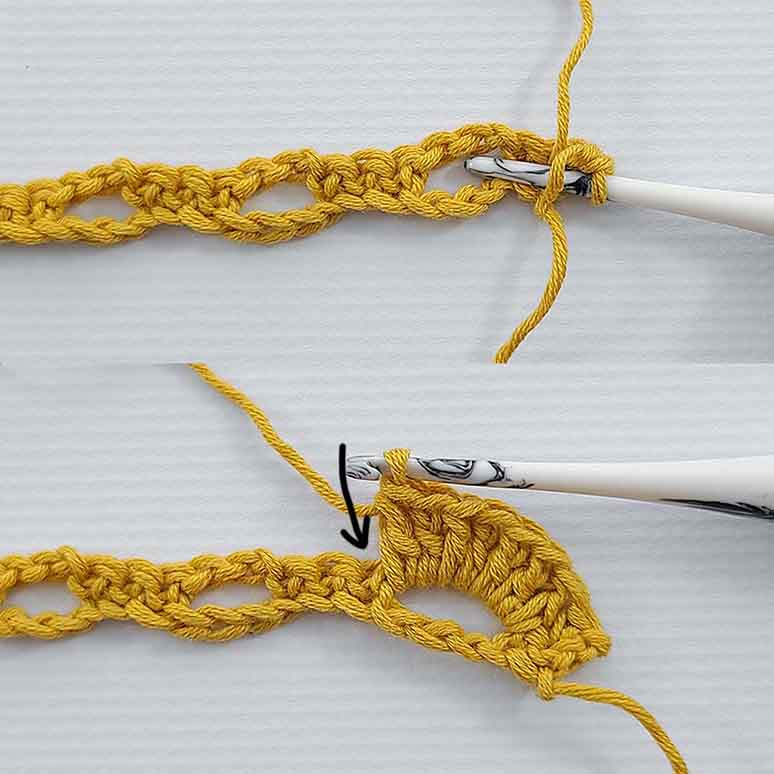
Then, place 7 double crochet into the chain 3 space.
You don’t have to find any specific stitch to work into or anything special. Just insert your hook directly into the chain 3 space and work double crochets as you normally would until you have 7.
When your 7 double crochets are completed, you will skip 1 stitch and place 1 single crochet in the next.
Sometimes the next stitch that we need to skip can sort of be hidden in the 7 double crochets of the Arcade stitch. Make sure to push the 7 double crochets out of the way so you know you’re working into the right stitch.
TIP: You can always assume the correct stitch to place 1 single crochet in is the middle single crochet of the 3.
With the single crochet placed, we have finished the first stitch repeat of this row.
We will continue to repeat [skip 1 stitch, place 7 double crochet in the chain 3 space, skip 1 stitch, place 1 single crochet in the next stitch] all the way across the row.
Your last single crochet of this row should be in the very last stitch of the row.
With this row complete, we now have 4 “dc fans”. These dc fans are the 7 double crochets in the chain 3 space.
We also have 5 single crochet.
We have a total of 33 stitches.
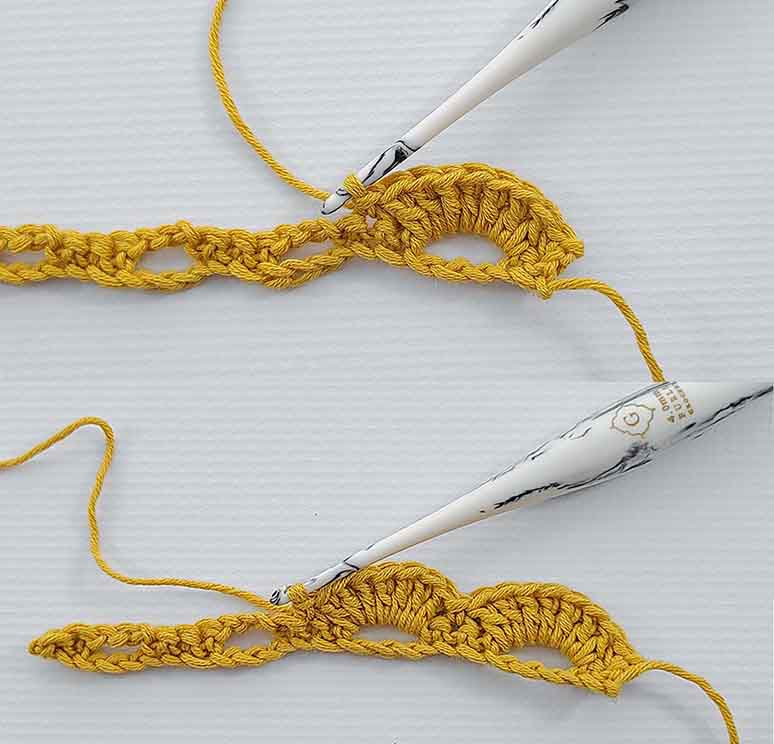
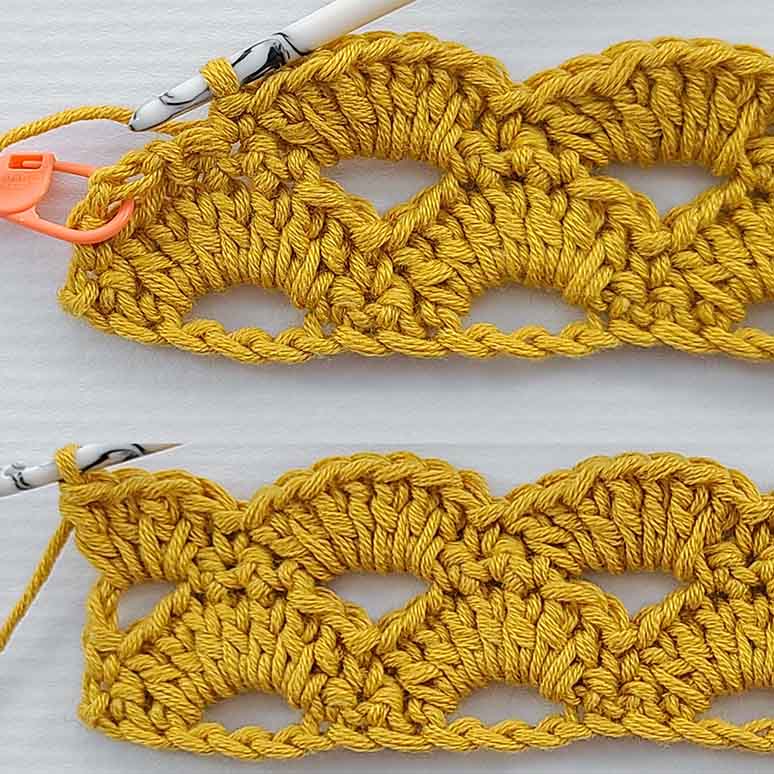
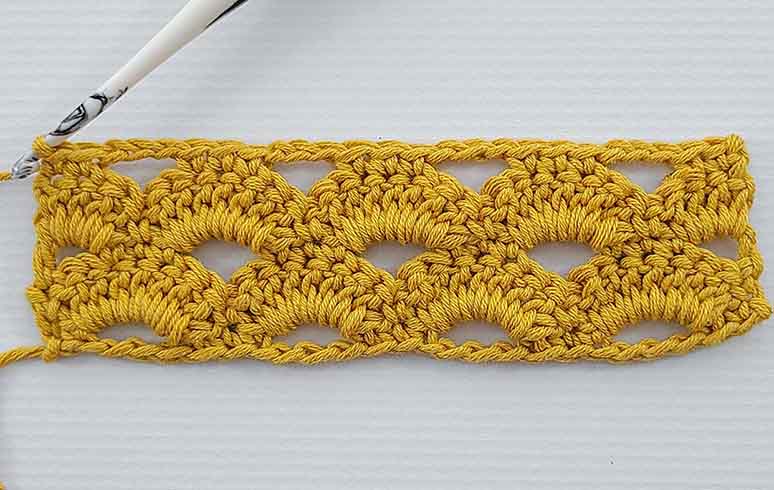
ROW 3 – Repeat Row 2
This row is considered the second repeat row of the Crochet Arcade Stitch.
Written in one of my patterns, this row will look like this:
Row 3 – Ch 3 (counts as a double crochet and a chain 1 here and throughout), turn. Sk first st and next 2 sts, 1 sc 3 sts [ch 3, sk 5 sts, 1 sc next 3 sts]. Repeat until 3 sts remain. Ch 1, sk 2, dc last. (3 ch 3 spcs, 12 sc, 2 dc, 2 ch 1 spcs)
Here’s how to follow this row step by step:
To begin this row, we will chain 3 and turn. This chain 3 counts as a double crochet and a chain 1 space.
If you prefer to chain 4 to count as a double crochet and a chain 1 space instead, that’s totally fine!
Once we have chained 3 and turned, we will then skip the stitch we chained out of (because these chains count as a stitch) and the next 2 stitches.
These stitches are marked with black dots in the picture.

We will then place 1 single crochet in each of the next 3 stitches.
If you aren’t familiar with using chains that count as a stitch and a space, you may want to place a stitch marker around the chains.
These chains have a tendency to lay against the fan of the row below and can easily be missed if you aren’t familiar with them.
Now we will begin our stitch repeat for this row.
We will chain 3, skip 5 stitches and place 1 single crochet in each of the next 3 stitches.
You want to make sure you’re skipping all 5 of the stitches. If you don’t, your stitch pattern will become wonky.
We will repeat [chain 3, skip 5 stitches, place 1 single crochet in each of the next 3 stitches] until 3 stitches remain.
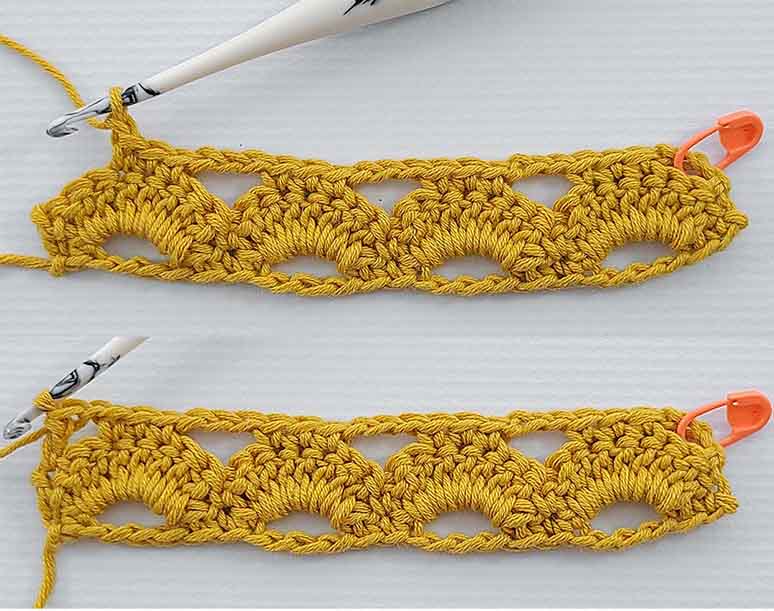
When only 3 stitches remain, we will chain 1, skip 2 stitches and place 1 double crochet in the last stitch.
This row is now complete and we will have 2 double crochet, 2 chain 1 spaces, 3 chain 3 spaces and 12 single crochet.
In this row, we have created new chain spaces for the fans of the crochet Arcade stitch to be placed into.
Because of the chain 1 spaces at the beginning and end of the row, the fans on the next row will now be offset from the previous fans.
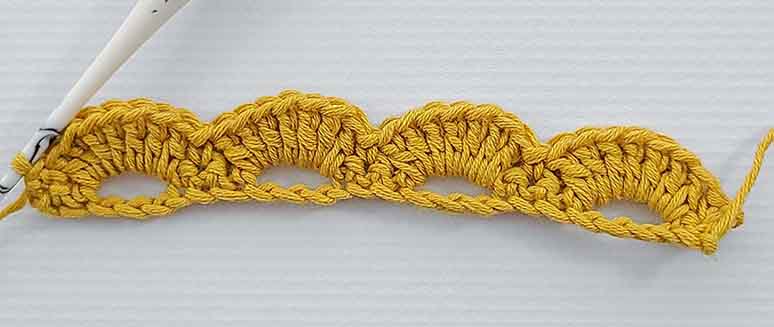
ROW 4 – Repeat Row 3
This row is considered the third repeat row of the Crochet Arcade Stitch.
Written in one of my patterns, this row will look like this:
Row 4 – Ch 2 (doesn’t count as a stitch here or throughout), turn. 4 dc in first ch 1 spc. Sk 1 sc, sc next [sk 1 sc, 7 dc in ch 3 spc, sk 1 sc, sc next] Repeat across until ch 1 spc remains. Place 4 dc in ch 1 spc. (3 Dc Fans, 2 Dc Half Fans, 4 sc)
Here’s how to follow this row step by step:
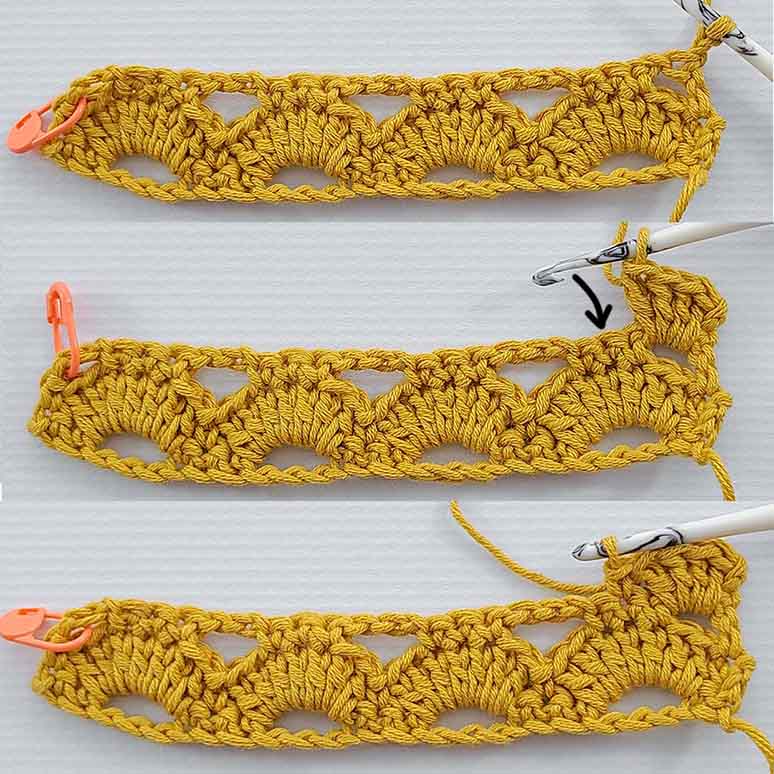
To begin this row, we will chain 2 and turn.
Ignoring the double crochet below, we will work 4 double crochet into the chain 1 space. This will be considered a “dc half fan” as it appears as half of a full fan.
We will then skip 1 stitch and place 1 single crochet in the next. A black arrow points to the stitch that we place this single crochet into.
Now we will begin our stitch repeat for the row.
We will [skip 1 stitch, place 7 double crochet in the chain 3 space, skip 1 stitch and place 1 single crochet in the next].
This repeat is worked the same as it was in Row 2, it is just offset a little bit.
We will repeat this until only the chain 1 space remains.
In the chain 1 space, we will place 4 double crochet.
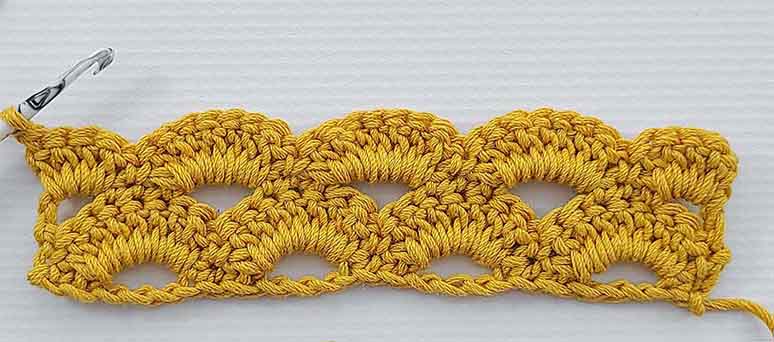
This row is now complete and we will have 2 dc half fans, 3 dc fans and 4 single crochet.
ROW 5 – Repeat Row 4
This row is considered the fourth repeat row of the Crochet Arcade Stitch.
Written in one of my patterns, this row will look like this:
Row 5 – Ch 1, turn. Place 1 sc 2 sts. [Ch 3, sk 5 sts, 1 sc 3 sts]. Repeat across the row until 7 sts remain. Ch 3, sk 5, 1 sc last 2 sts. (4 ch 3 spcs, 13 sc)
Here’s how to follow this row step by step:
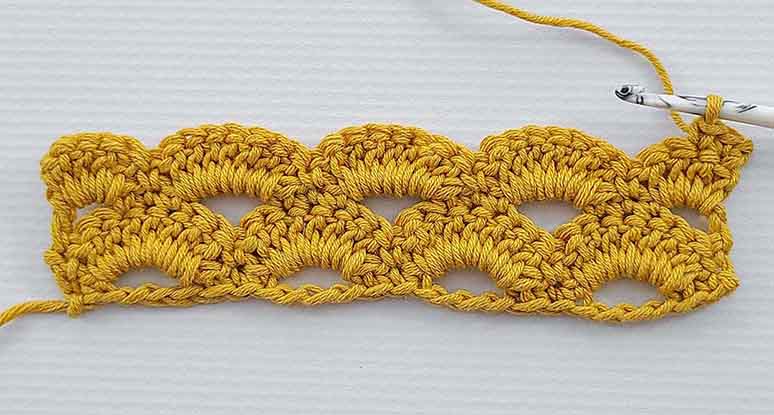
To begin this row, we will chain 1 and turn.
We will then place 1 single crochet in the first stitch and 1 single crochet in the next stitch.
Now we will begin our stitch repeat for the row.
We will [chain 3, skip 5 stitches and place 1 single crochet in each of the next 3 stitches].
We will repeat this until
We will repeat this until we have 7 stitches remaining.
We will skip 5 stitches and place 1 single crochet in each of the last 2 stitches.
We now have 13 single crochet and 4 chain 3 spaces.
This completes both the foundation row and the four row repeat of the crochet Arcade Stitch!