Working Magic (Circles)


Like anything, magic circles have a loyal fan club and a group who feel somewhat less love for them. To put it lightly. If you’ve never tried one, they are definitely worth giving a couple goes before writing them off entirely. If you have yet to master them, I’ve got some tips for you.
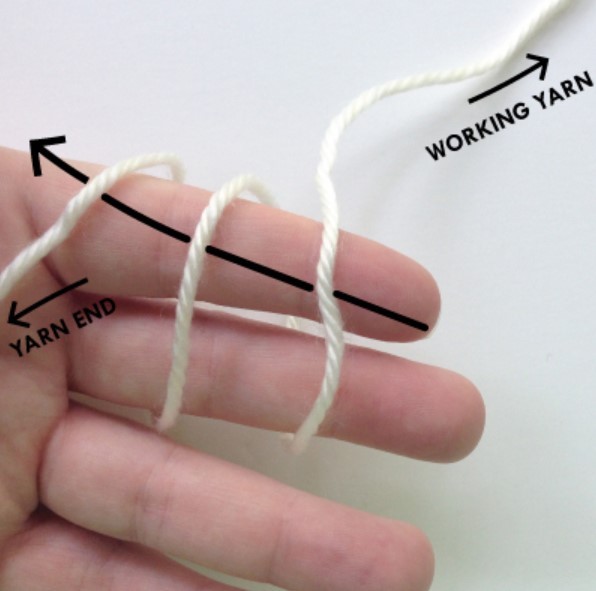
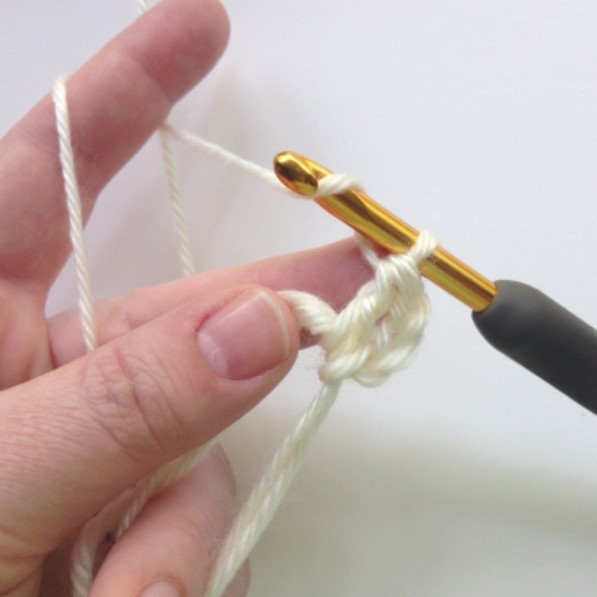
First off, wrap that yarn around your fingers, not once, but twice. Like showin photo.
Stick your hook through the loops in the direction of the arrow (above).
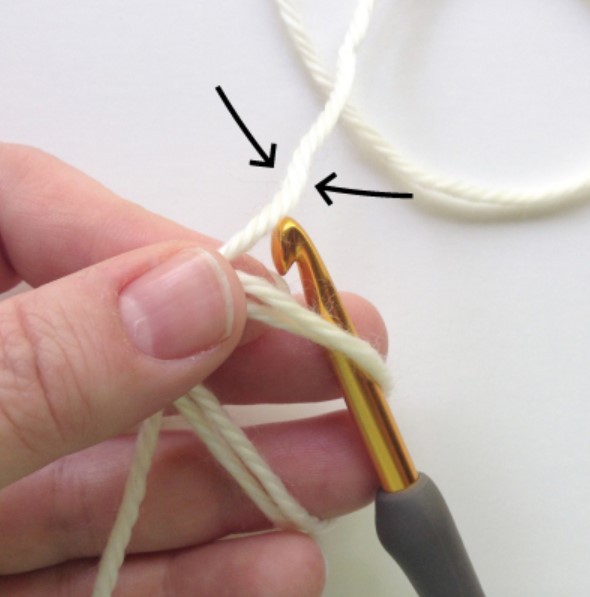
Bring the loops of yarn together and pinch them like in photo.
Now, see the yarn the arrows are pointing to? Yes, your working yarn. Grab that with your hook and pull it through the double circle. Notice that my ring finger is in the loop stretching out the bottom of it? Fancy finger work! It helps me steady the loop.
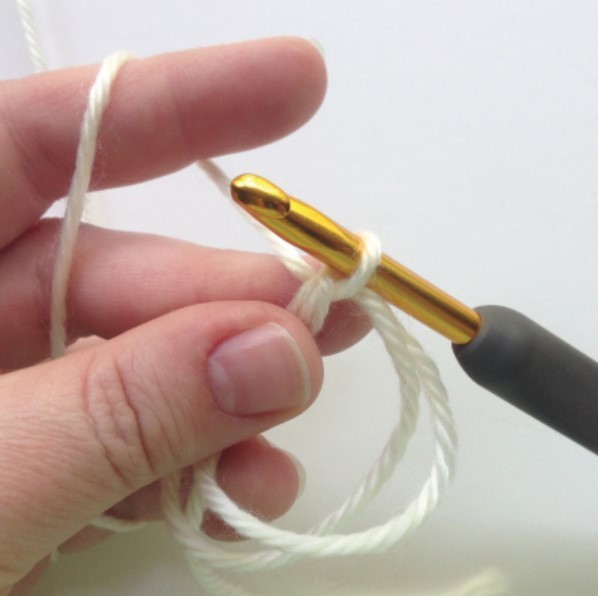
You’ve just made a magic circle! But the trickiest part is coming – working into the circle. I’ll be honest, they are flimsy and floppy. There is no body to them so they are hard to work into. I’ll show you what I do to keep them steady so that I can make nice even stitches.
Look at how my thumb and finger are pinching the double circle. That’s how I keep the circle sturdy while work into it. I’m also keeping the working yarn taut with my index finger just like I would if I were making normal stitches. But it becomes increasingly important right now as the working yarn is very slack against the loops of the magic circle.
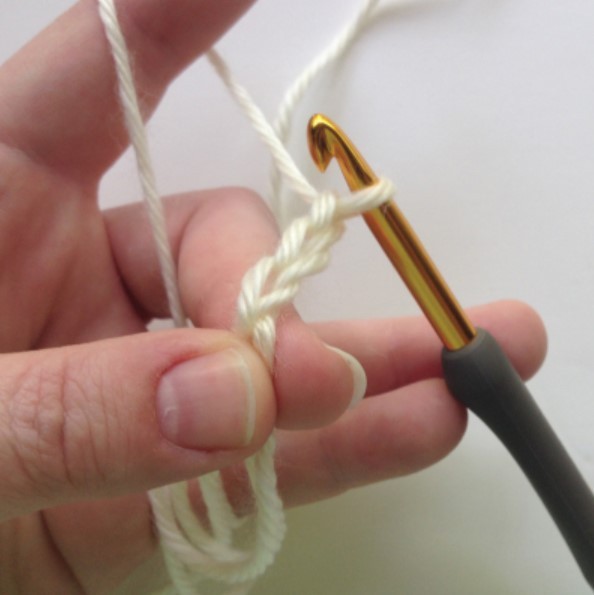
Okay, time for some more fancy finger work. Move your thumb and finger so that they pinch the magic circle on both sides of the loop you just pulled up. Now you can make your starting chains. As many as your pattern calls for. Mine called for 3.
You can let go of the right side of the circle now and work your stitches, but keep the left side pinched as you work. Like shown the photo.
Look at my ring finger. It’s also helping steady the circle by keeping it taut. I didn’t even realize I did that until today!
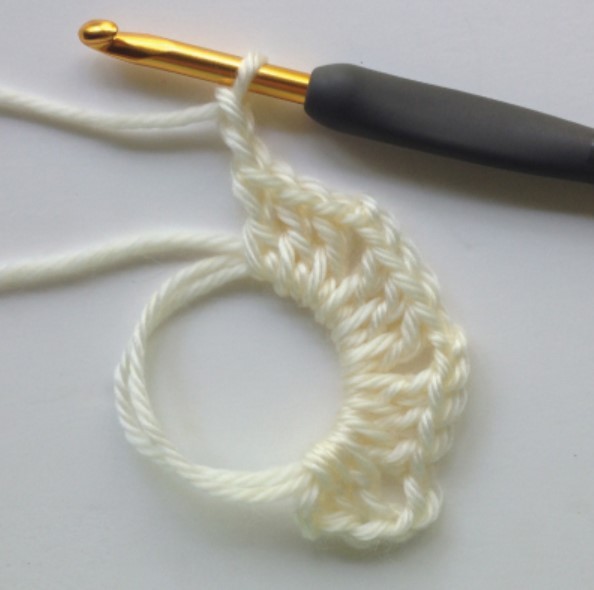
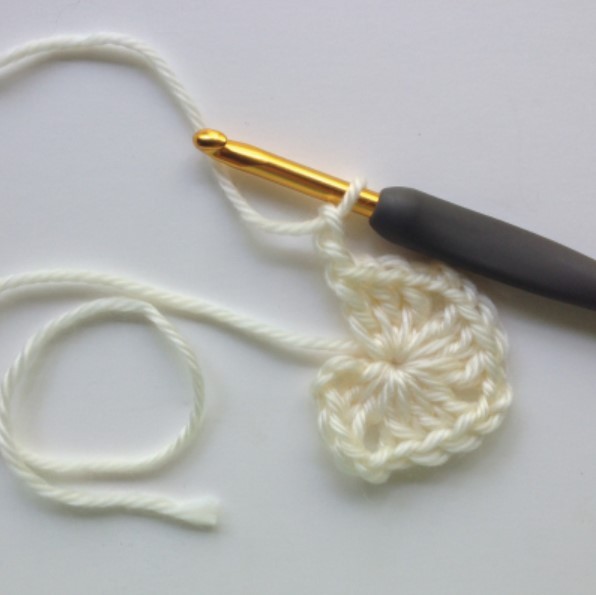
Once you’ve got all your stitches worked into the circle it might look a little something like shown in the photo.
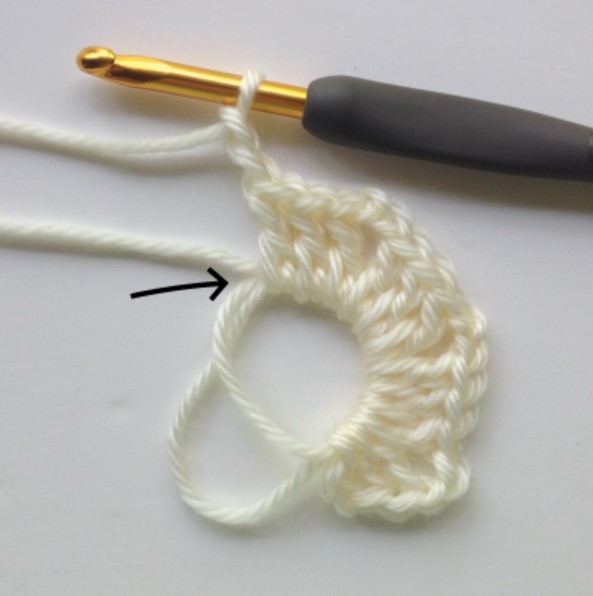
Closing this circle takes a couple little steps more than a normal magic circle because it’s doubled. You can’t just pull on the tail and close it. That extra loop will get caught and stick out. So here is how you close it. First, pull on the tail just a little bit so that the first loop starts to close.
See how one loop got smaller? That is the outer loop. Grab that loop and pull on it from the top where the arrow is (above). You’ll know you’ve got it right because the other loop will tighten. If it doesn’t and the tail starts to shorten, you’re pulling the wrong side. When you know you’re pulling at the right spot, go ahead and tighten it.
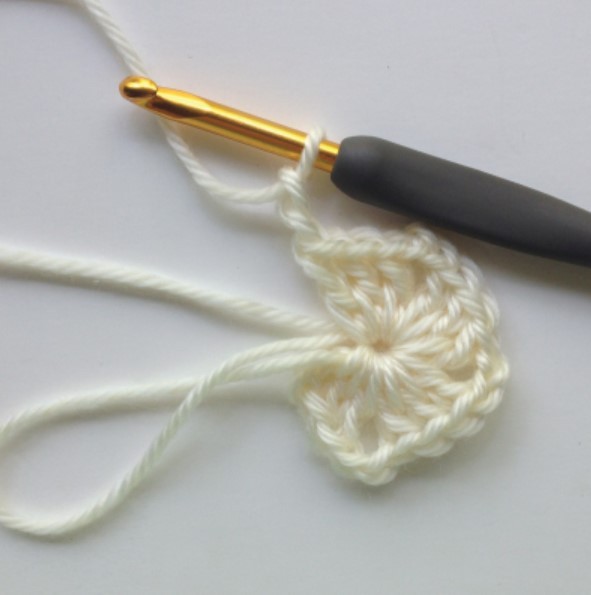
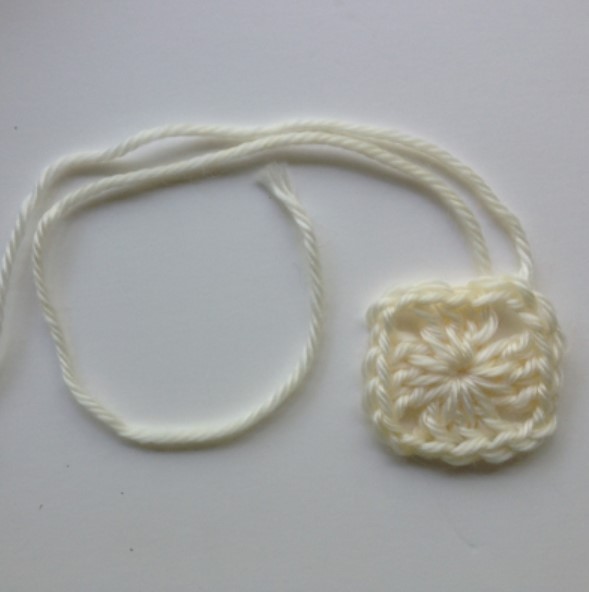
Now you can pull on the tail and close that loop. Join to your starting chain and you’re off!
How about pictures of the magic circle for left-handed people,
I just realized this came through pretty small. If you want a full-size image, just message me, or you can do the same procedure I did (grab pictures and flip them).
What a great idea! I just copied the images and flipped them. Hope this works for you! Dawn app.gemoo.com/share/image-annotation/601590071500943360?codeId=vJ4KdLj4z4rEw&origin=imageurlgenerator&card=601590070636916736