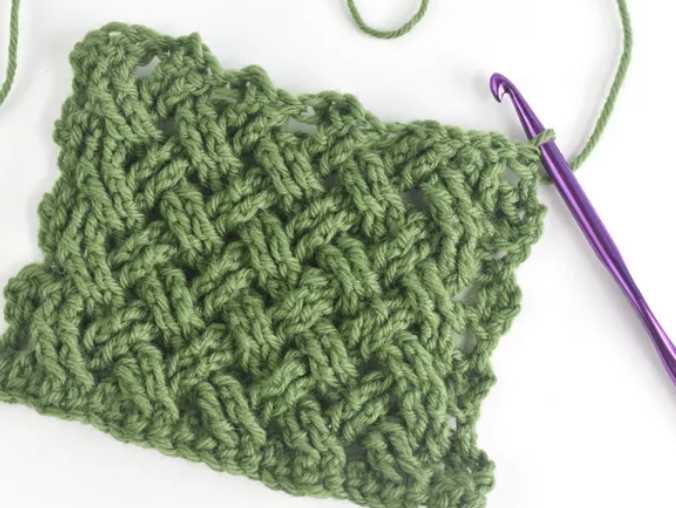
How to Crochet Celtic Weave Stitch

Create a distinctive woven texture with the Celtic Weave Stitch, a crochet pattern that mimics the appearance of yarn basket weaving. While it falls under the category of advanced crochet stitches, it becomes easier to grasp once you're familiar with it.
Prior knowledge of front and back post crochet stitches can be advantageous when tackling this pattern, but you can also pick up these techniques as you progress through the steps. The essence of this stitch lies in creating a crocheted cable, essentially rearranging stitches to make them cross each other. The Celtic weave stitch is a versatile choice for various projects, including blankets, scarves, hats, and more.
This tutorial will guide you through the process of working this stitch flat, but with slight adjustments, you can apply it in the round as well. With a little practice, you'll master the art of crocheting this intricate and eye-catching Celtic Weave Stitch.
Instructions
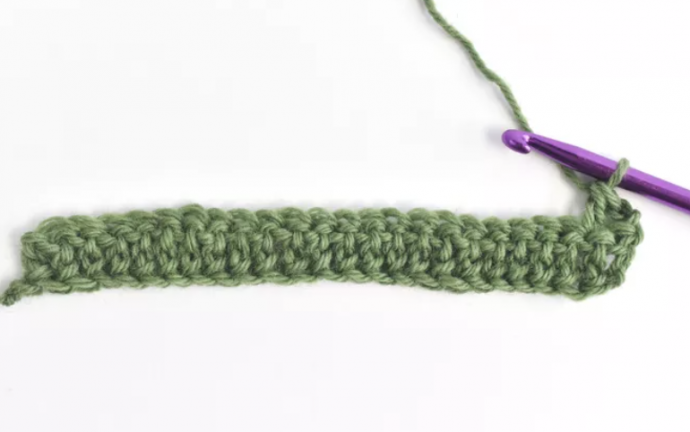
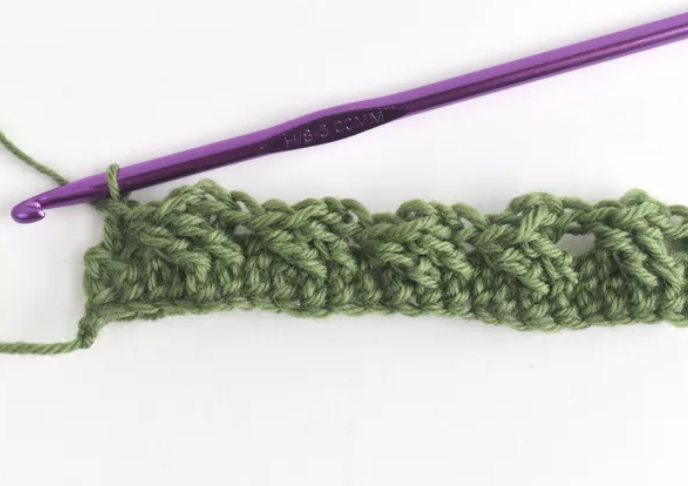
1. Begin your Celtic weave crochet with a multiple of 4 + 2 stitches. Start either with a chain and then work double crochet stitches or form the foundation row with foundation double crochet stitches. Whichever method you choose, check that you have the correct multiple of double crochets.
At the beginning of the first row of Celtic weave, chain 2, and double crochet in the first stitch.
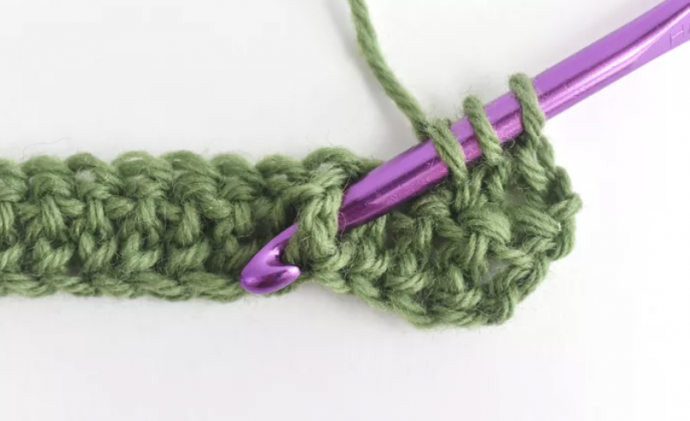
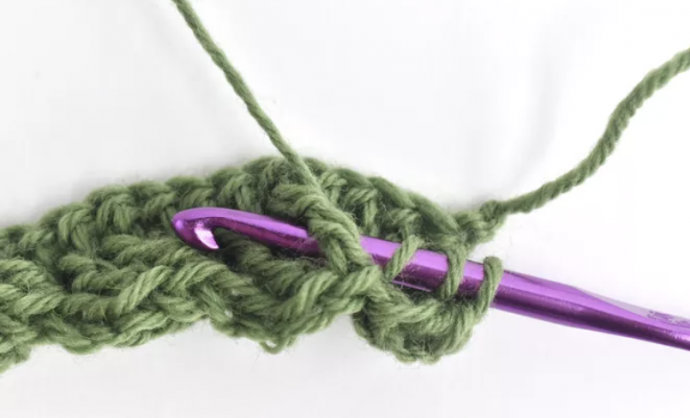
2. Skip two stitches and work a front post treble crochet in each of the next two stitches. To make a front post treble crochet, yarn over two times, just as you would for a standard treble crochet. Instead of inserting the hook at the top of the stitch, go between the double crochet "posts" from the front of your work. Finish the treble crochet as usual.
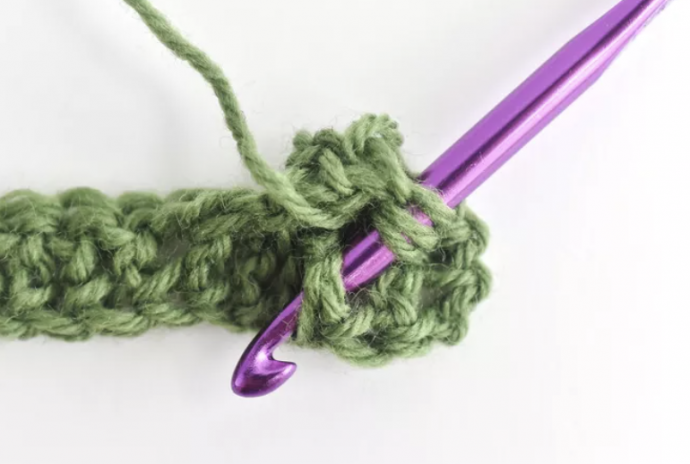
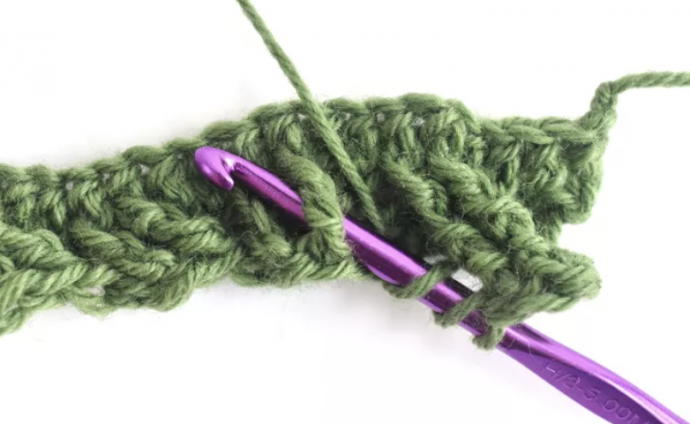
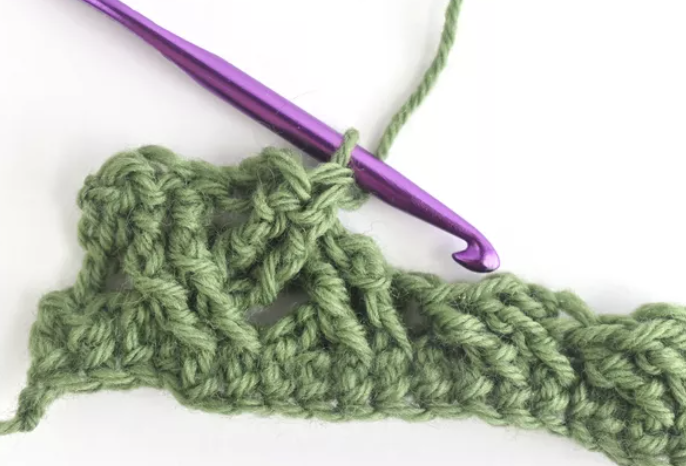
3. Go back to the first skipped stitch and work a front post treble crochet, then work another in the next stitch. Working these stitches is trickier than the first two stitches because the first stitches tend to hide the stitches from the previous row. Use your fingers to feel and identify where those stitches are and where to insert your hook.
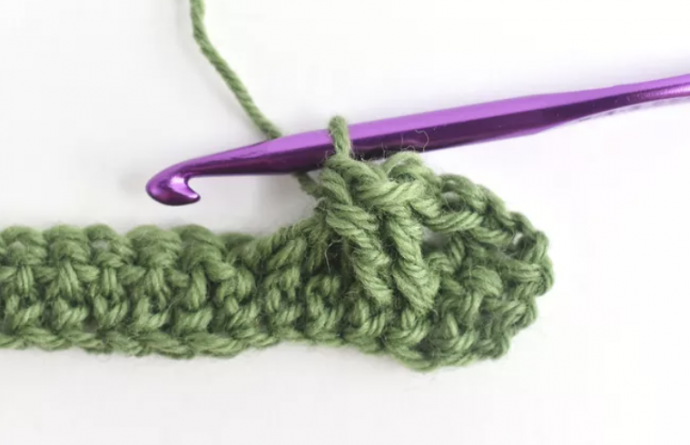
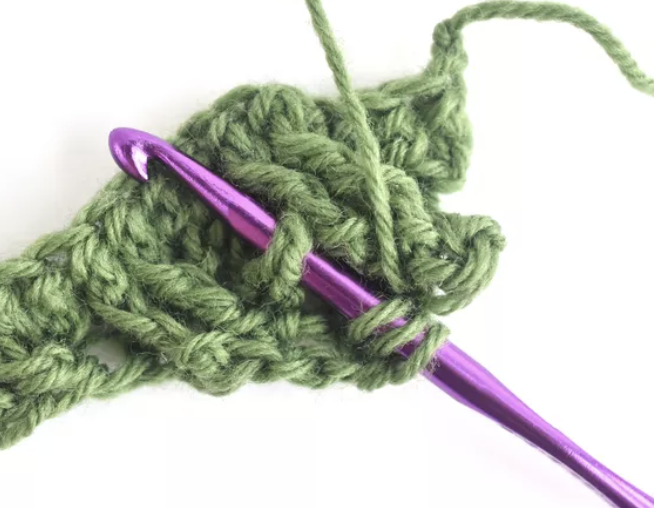
4. Those first four front post treble crochets form the first set of Celtic weave stitches. You should see a set of two stitches crossing from the lower right toward the upper left. Repeat the previous two steps to continue the pattern along the row: Skip two stitches, front post treble crochet 2, and front post treble crochet 2 in the skipped stitches.
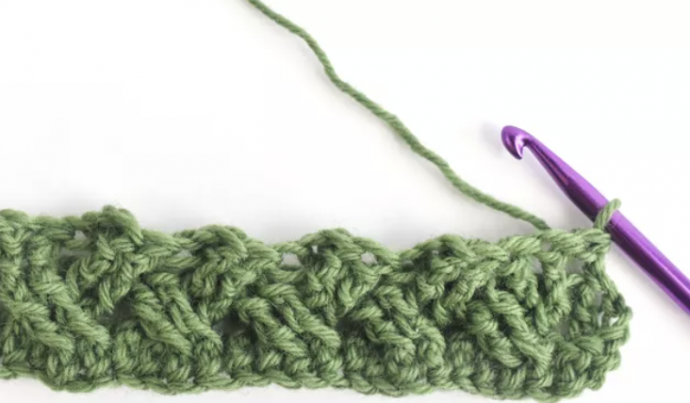
5. At the end of the row, work a double crochet in the last stitch. With row 1 finished, you should see the groups of stitches leaning toward the left, with groups of stitches going behind them. It's also normal to see small gaps between the groupings.
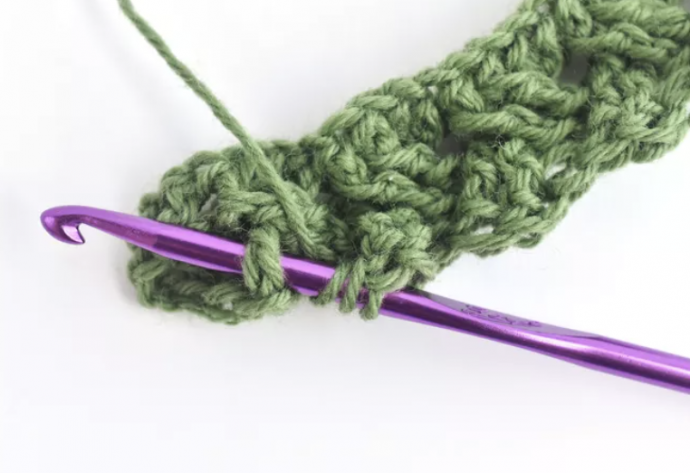
6. At the beginning of row 2, chain 2 and work a double crochet in the first stitch. Work a back post treble crochet in each of the next two stitches. These will be the two easy-to-spot stitches, not those hidden behind.
To make a back post treble crochet, yarn over two times, then insert the hook so it goes under the post on the back of your work. Finish the treble crochet as usual.
Tip
Because you need to work through the back of the post (which is the right side of the crochet), it's easier to hold your crochet so your work looks upside down.
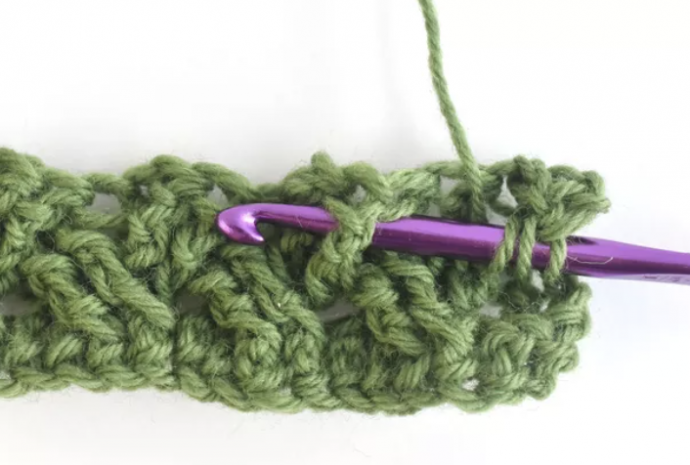
7. Skip two stitches and work a back post treble crochet in each of the next two stitches. These will be the two easy-to-spot stitches, not those hidden behind.
8. Go back to the first skipped stitch and work a back post treble crochet, then work another in the next stitch. These stitches are tucked away under the first set of back post treble crochets. Feel where they are first to make it easier to work the new stitches.
9. As you work row two, it's actually the back of your work. To see how your first set of Celtic weave stitches, flip your crochet over and you can see the woven pattern starting to show up.
Flip your work back so you can continue across the row. Repeat the previous two stitches across the row: Skip two stitches, back post treble crochet 2, then back post treble crochet 2 in the skipped stitches. Stop when three stitches remain.
10. Work a back post treble crochet in each of the next two stitches. End with a double crochet.
11. At the end of row two, when you look at the right side of the work, you should see the stitches looking like they are continuous, working over and under the groups of stitches.
12. Row three follows the same pattern as row one, but instead of working into the foundation row, the stitches go through the back post treble crochets from the previous row.
Therefore, for this row chain 2, double crochet, *skip two stitches, front post treble crochet 2, front post treble crochet 2 in the skipped stitches, repeat from * to the last stitch, double crochet.
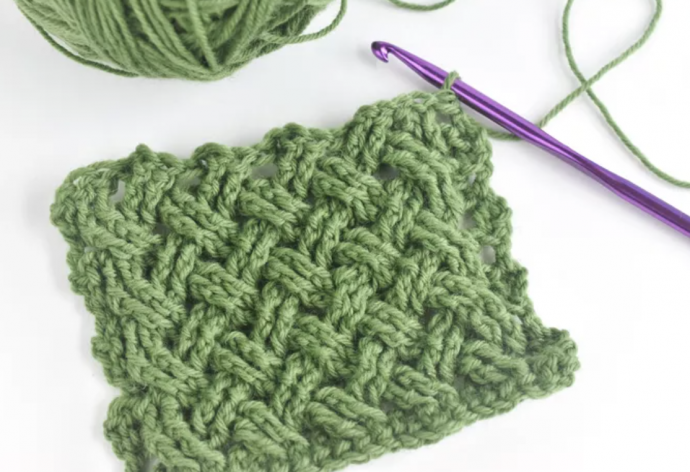
13. Repeat rows two and three to continue building the Celtic weave stitch pattern. It's amazing to watch the design appear because it looks like it's actually woven!