How to Crochet The Mini Bean Stitch

Step into the world of crochet and discover the delightful Mini Bean Stitch. This tutorial unravels the secrets of this stitch, also known as the Elizabeth Stitch, offering you a step-by-step guide to mastering its intricacies.
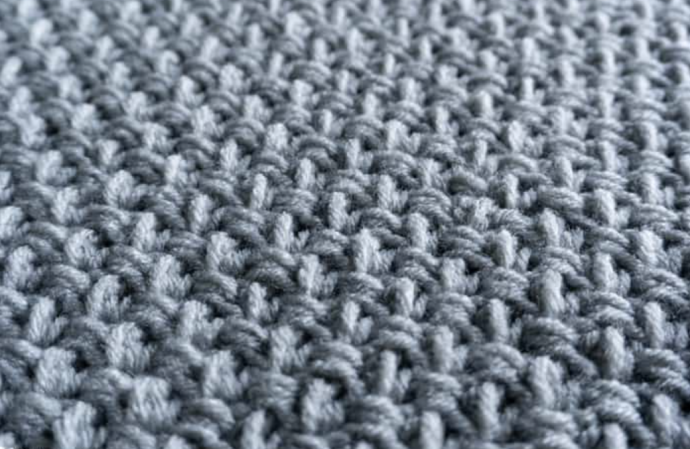
The Mini Bean Stitch Tutorial, featured in the article linked above, equips you with the knowledge and skills to create this charming stitch pattern. With its compact texture and subtle raised bumps, the Mini Bean Stitch adds a touch of elegance to any crochet project.
By following the detailed instructions and accompanying visuals, you'll learn how to create the foundation row and execute each stitch with precision. This versatile stitch can be used to create a variety of crochet items, from cozy blankets and scarves to stylish accessories and home decor.
With its simplicity and versatility, the Mini Bean Stitch allows you to explore your creativity and experiment with different color combinations and yarn choices. Its unique texture adds depth and visual interest to your crochet creations, making them stand out with their own distinct charm.
So grab your crochet hook and yarn, and embark on a journey of creativity with the Mini Bean Stitch. The tutorial provided in the article will be your trusty guide, helping you master this stitch and incorporate it into your future projects. Whether you're a beginner or an experienced crocheter, this stitch is sure to captivate you and inspire you to explore new possibilities in your crochet endeavors.
Instructions
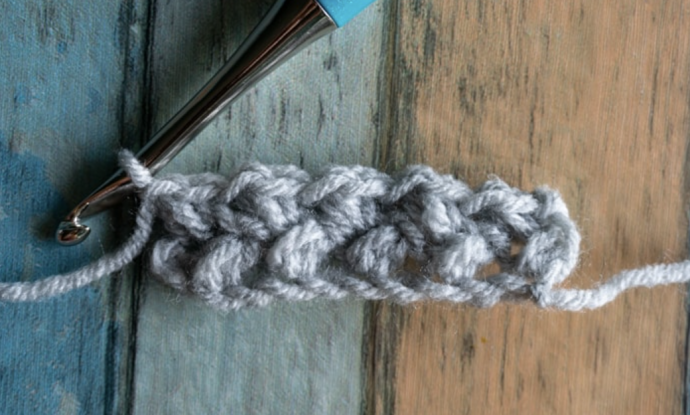
To start a new project with the Mini Bean stitch, you’ll want to make a chain using a multiple of TWO plus one. So start with an odd number of chains. Each two chains will make up one Mini Bean.
For example, if you chain 20+1, you’ll end up with 10 Mini Bean stitches and if you chain 60+1 you’ll end up with 30. The “plus one” accounts for the side of the first stitch of the first row.
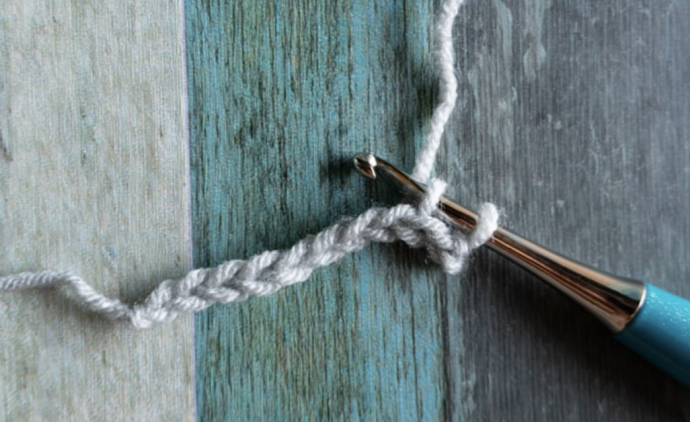
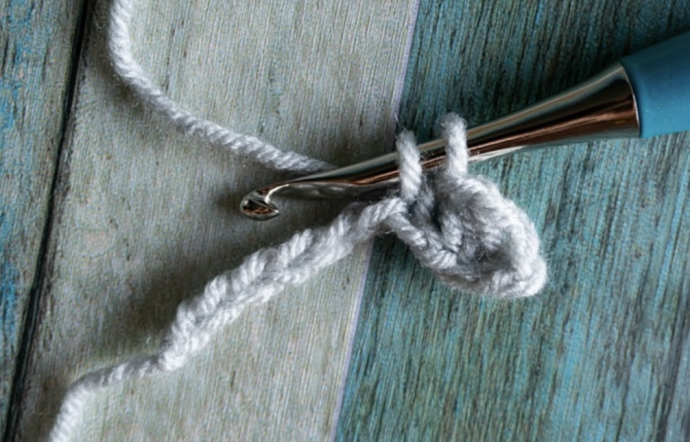
Insert your hook into the third chain from the hook. Pull up a loop. Yarn over, insert hook into same chain and pull up a loop.
You should now have four loops on your hook. Yarn over, pull through all four loops, then chain one to close the stitch.
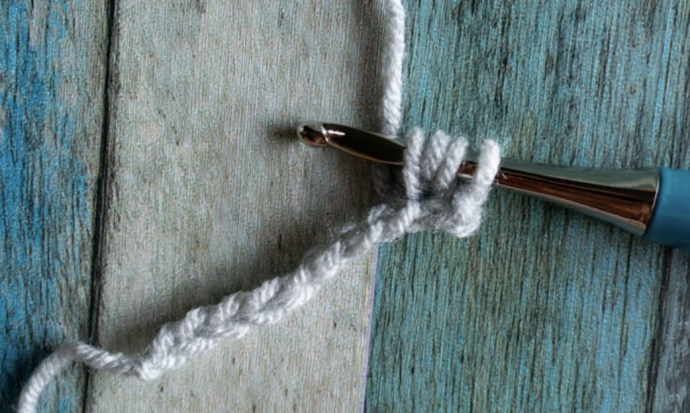
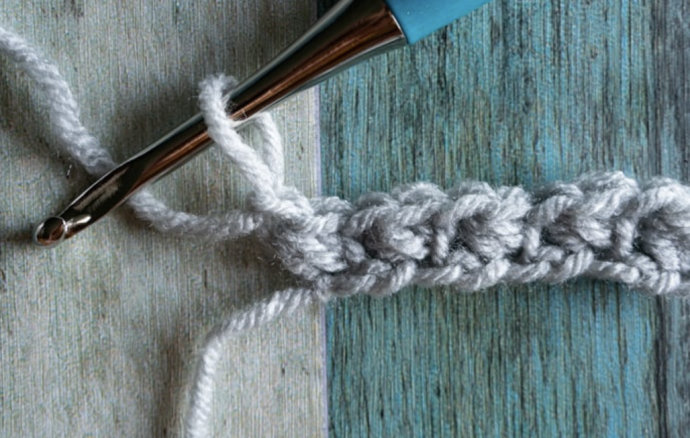
Skip the next chain, insert hook into the next chain, pull up a loop. Yarn over, insert hook into same chain and pull up a loop.
With four loops on your hook, yarn over and pull through all four loops and chain one to close the stitch. Repeat this process until you reach the last chain.
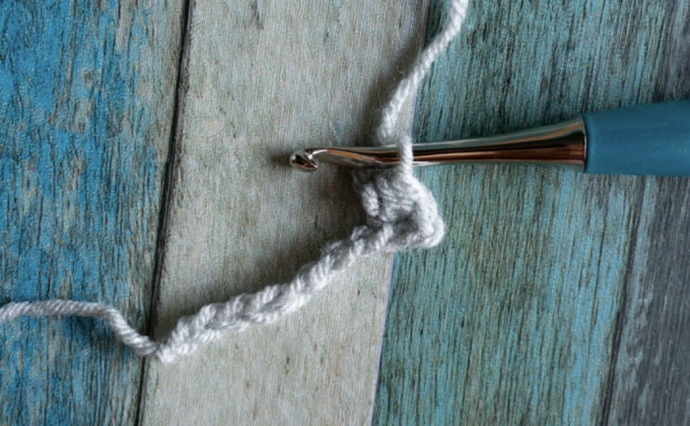
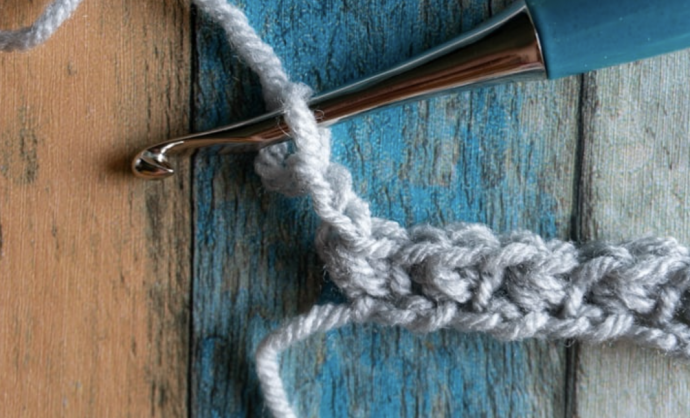
To start a new row, chain one and turn. (It will look like you have two chains: one to close the last stitch and one to start the new row.) This is better explained in the video below.
To make all subsequent rows of the Mini Bean stitch:
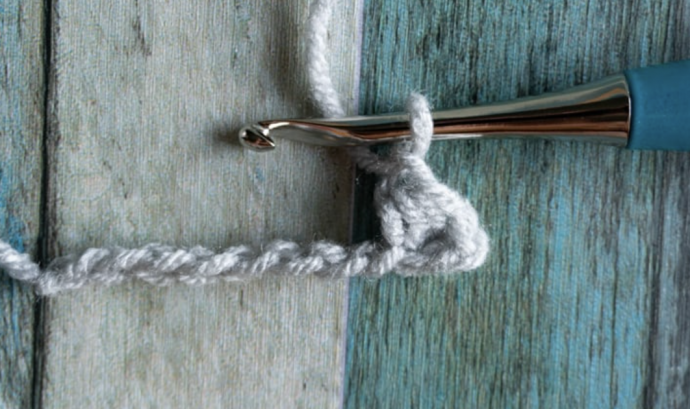
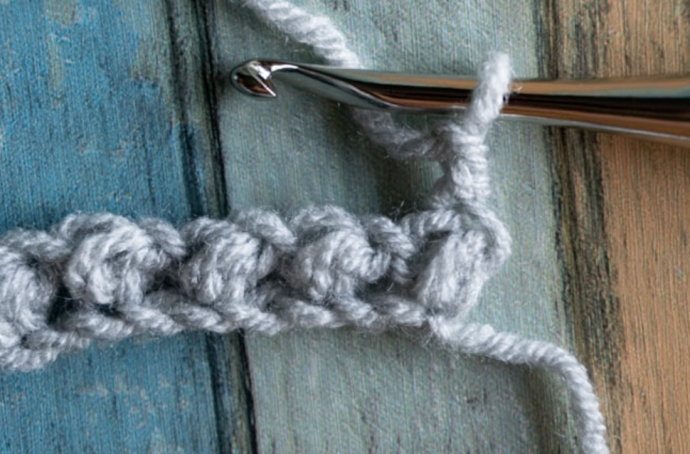
Insert hook into the side of the next stitch.
Pull up a loop so that you have two loops on your hook. Yarn over, insert hook into the same stitch, pull up a loop so that you have four loops on your hook. Yarn over and pull through all four loops. Chain one to close the stitch. Stitch made!
Continue to the end of the row, always going into the side of the Mini Bean from the previous row (as pictured above and explained in the video below). Don’t forget to chain another to start the new row (so that it looks like you have two chains).