Mastering Knitting Basics: Cast on. Part 2

Blossom Lady
Aug 03, 2020 03:14 AM
Don’t worry if your cast-on row looks uneven when you first try it. Practice makes perfect, so pull all the yarn off the needle and have another go. Once you know how to cast on knitting, you can get going with any project you like.
Today let’s focus on the knit-on and two-color cast on methods.
Knit-on
The knitted on cast-on is a very strong and reasonably stretchy cast on to start your knitting project with. It’s the cast on I use most often because it is just so easy to do. Personally, I wouldn’t use it for a knitting project that would be blocked heavily. For all other applications, though, it makes a very nice edge. Think for example of edges of garments, non-lace blankets etc. This particular method is also great for the beginner knitter because it is basically the knit stitch that is used to cast on. In this post, I’ll show you how to do it!
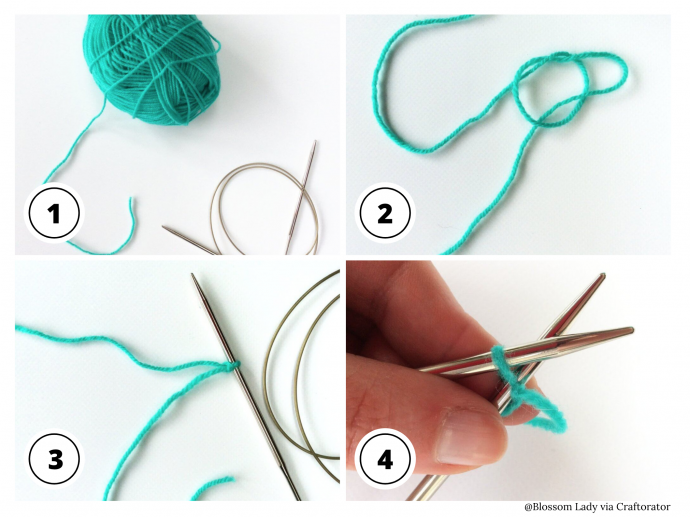
1. Take a length of yarn from your ball of yarn.
2. Make a slip knot
3. Insert the needle into the upper loop and tighten the slip knot onto the needle. This is the first stitch. Make sure to leave enough on the tail of the yarn to weave in later. It is also possible not to use a slip knot and just loop the yarn around the needle for your first stitch, thus avoiding the knit in the corner of your work. For the sake of this tutorial, however, I’m going with the slip knot version.
4. Take your second needle and insert the tip into the stitch with the needle under your main needle. Insert at an angle so your needles cross.
Knit-on (continued)
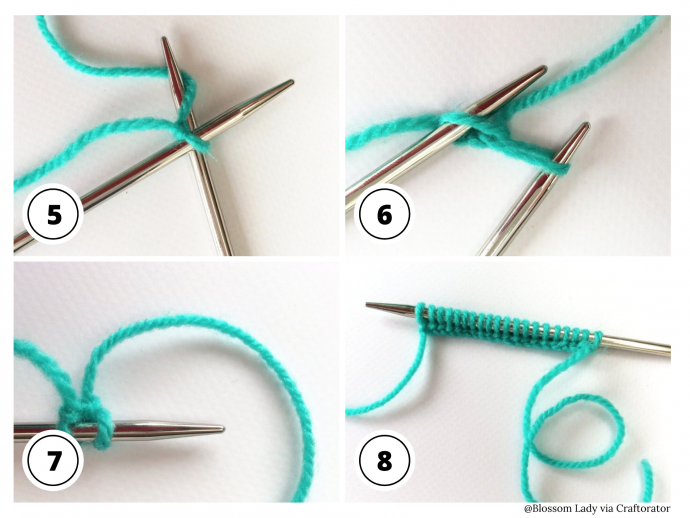
6.Take the bottom needle and bring it back through the stitch pulling the yarn with it in a loop.
7.Now transfer the new loop from the bottom needle to the other needle and tighten the yarn. You have now cast on a stitch!
8.Repeat steps 4-7 until you have reached the desired amount of stitches on your needle.
Two-color
This cast-on is useful for brioche projects. It also lends itself very nicely for starting double-knitting projects. I also sometimes use it just to have a nice two-tone edge to my project, because I find it very decorative on its own.
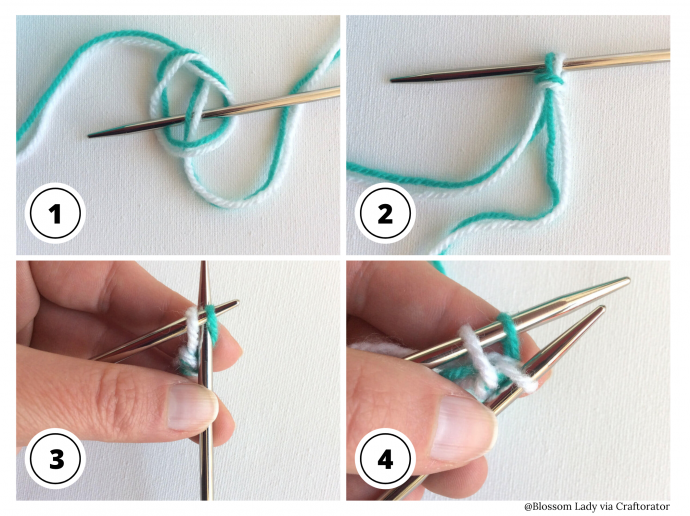
1 & 2. Start by making a slipknot holding both colors of yarn together to make the first stitch on the needle. Make sure you leave about 15 cm (6 inch) of yarn at the beginning, shorter lengths I find a bit tricky to weave in correctly.
3 & 4. Place the tip of the right needle between the two loops on the needle, make a yarn over with color 1 and pull up a loop.
Two-color (Continued)
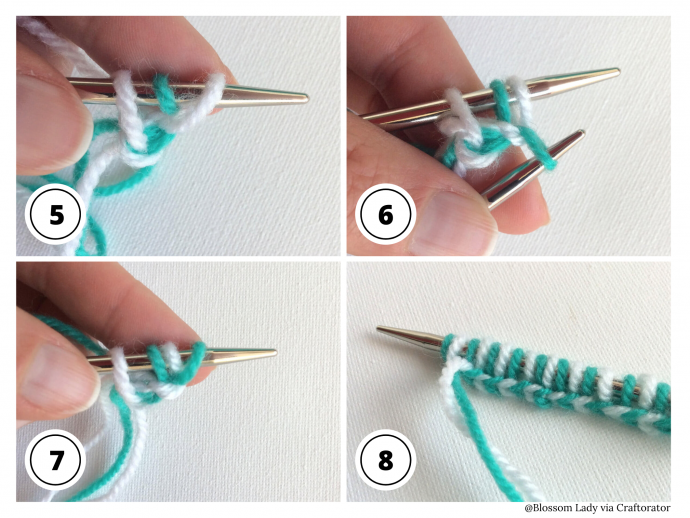
6. Now place the tip of the right needle between the front two stitches on the left-hand needle, make a yarn over with color 2 and again pull up a loop.
7. Again put this loop twisted on the left-hand needle.
8. Repeat steps 2 to 5, alternating the two colors, until the required number of stitches has been cast-on. The slipknot that you started with, can now be dropped. This way you avoid a very noticeable knot in your work.
No comments
Write a comment