How to Do Entrelac Knitting

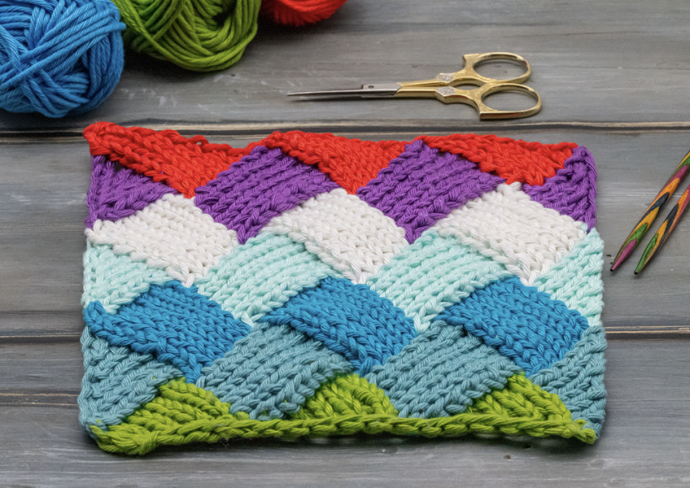
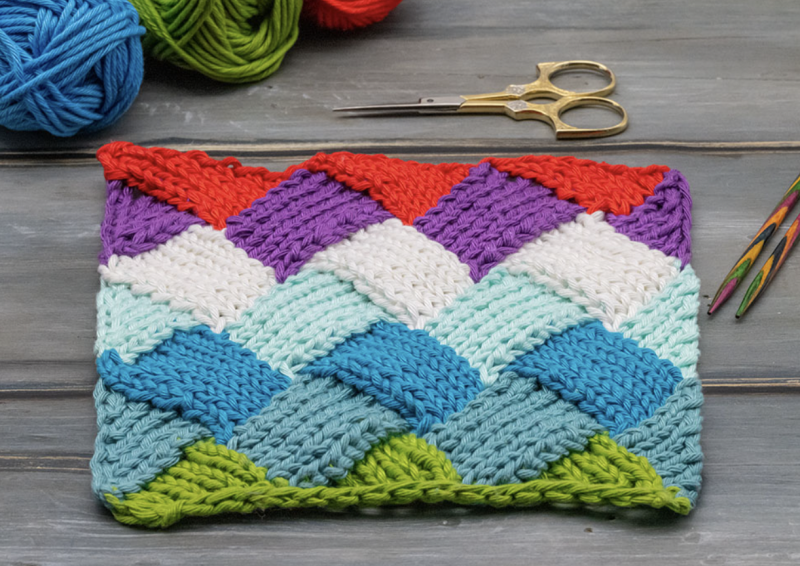
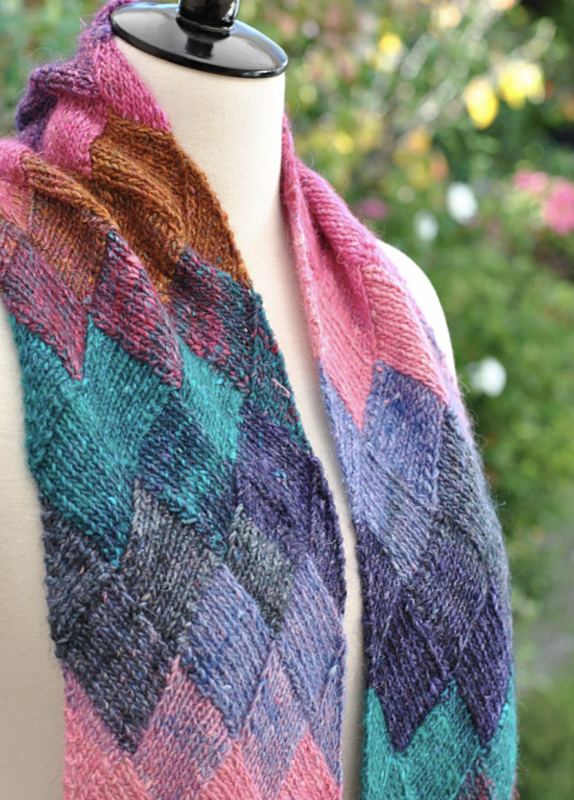
Have you ever seen a beautiful scarf or hat with woven-in squares in many different colors? And now you are wondering how to knit the Entrelac knitting pattern? Then you have come to the right place, because this tutorial is all about that.
Entrelac knitting is a wonderful technique that you should try at least once. It creates a unique block pattern that can be spread out from the center or worked in rows. It's fairly versatile and works well for all types of projects. Entrelac is amazingly versatile and can be used for anything you can imagine, from felted bags to hats, mittens, cowls, sweaters and scarves. I have even seen a pattern where the heel is turned with entrelac. Your non-knitting friends will never figure out how the scarf was knit. And that's pretty cool.
Instructions
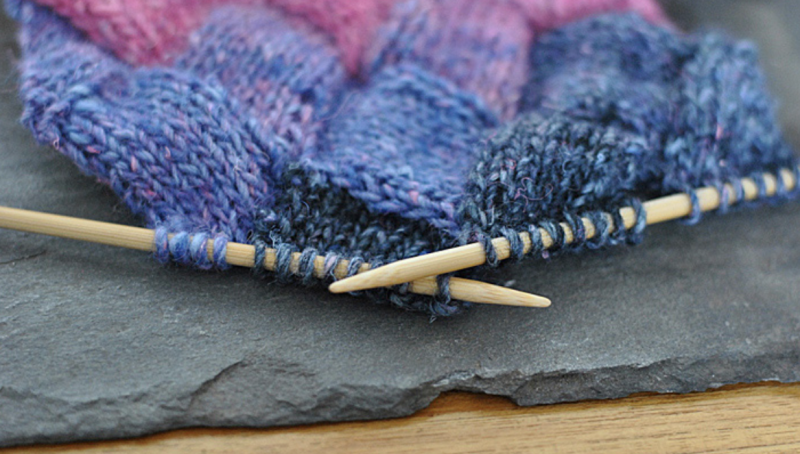
Entrelac is best thought of as a general technique, rather than a fixed pattern. Therefore, you will find many variations. This is the version that I think gives the best results. But they all have one thing in common. Entrelac is always knitted in layers and always consists of rectangles.
How large the individual rectangles are is up to you. They can be as small as 4 stitches and as large as you like. For this tutorial, I will be working with 6 stitches.
Step 1: starting the base triangles
Cast on a multiple of 5 stitches with a long-tail cast-on.
Tip: This cast-on method lets you skip knitting the first row. If you use another method, knit one row before beginning the short rows.
Row 1: Purl 2. Turn.
Row 2: Knit 2. Turn.
Row 3: Purl 3. Turn.
Row 4: Knit 3. Turn.
Row 5: Purl 4. Turn.
Row 6: Knit 4. Turn.
Row 7: Purl 5. Do not turn.
Repeat rows 1-7 across all the cast-on stitches until you reach the end. This forms the base triangles and groupings of stitches. Turn your work.
Note: If you want to start with a different multiple of stitches, add more short rows, increasing the number of knits and purls like above and stopping when you purl the same number as your multiple.
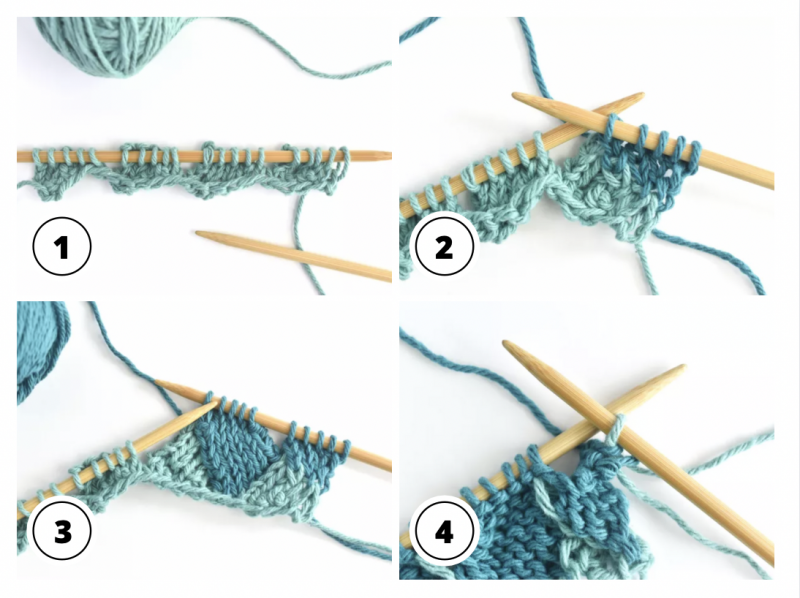
Step 2: Right Triangle
If you want to use two colors as shown here, add your second color at the beginning of this section, which starts with a triangle.
Row 1: Knit 2. Turn.
Row 2: Purl 2. Turn.
Row 3: Knit 1, M1, SKP. Turn. (With each SKP you will add a stitch from the left to the right.)
Row 4: Purl 3. Turn.
Row 5: Knit 1, M1, Knit 1, SKP. Turn.
Row 6: Purl 4. Turn.
Row 7: Knit 1, M1, Knit 2, SKP. Do not turn.
Step 3: Left-Leaning Square
Now it's time to make the squares for this section.
Row 1: Use your right needle to pick up 4 stitches knitwise along the edge of the base triangle, spacing the new stitches evenly. Knit 1 (from the next set grouping of stitches). You should have 10 stitches on your right needle. Turn.
Row 2: Purl 5. Turn.
Row 3: Knit 4, SKP. Turn.
Repeat rows 2 and 3 until all the stitches from the second base triangle are knitted into the square.
You just finished the first left-leaning square. Repeat these steps along each base triangle.
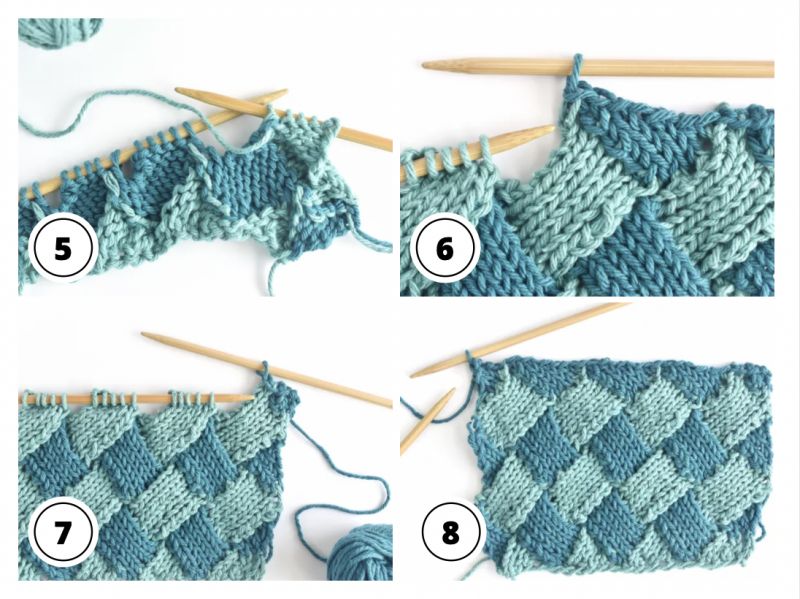
Step 4: Left Triangle
At the end of the section, add another triangle.
Row 1: Use your right needle to pick up 4 stitches knitwise along the edge of the base triangle. Turn.
Row 2: Purl 2 together, purl 3. Turn.
Row 3: Knit 4. Turn.
Row 4: Purl 2 together, purl 2. Turn.
Row 5: Knit 3. Turn.
Row 6: Purl 2 together, purl 1. Turn.
Row 7: Knit 2. Turn.
Row 6: Purl 2 together. Do not turn. If you're using more than one color, change colors as you purl these last two stitches together.
You should be ending with the wrong side of the work facing you, with one stitch on the right and the rest of the groupings on the left needle.
Step 5: First Right-Leaning Square
This step of entrelac knitting has only squares and when looking at them on the right side of the work, they lean to the right.
Row 1: Use your right needle to evenly pick up 4 stitches purlwise along the edge of the left triangle from the previous section. Turn.
Row 2: Knit 5. Turn.
Row 3: Purl 4, purl 2 together. Turn.
Repeat rows 2 and 3 until all the stitches from the section two square are knitted into the square.
You finished the first right-leaning square. The rest of this section is almost the same!
The rest of the squares in this section start with one additional stitch (because in the last step, you started with an active stitch).
Row 1: Use your right needle to evenly pick up 5 stitches purlwise along the edge of the square from the previous section. Turn.
Row 2: Knit 5. Turn.
Row 3: Purl 4, purl 2 together. Turn.
Repeat rows 2 and 3 until all the stitches from the section two square are knitted into the square. Then repeat this process for each square in the section.
Repeat steps two and three until your work is as large as needed. End with step six.
Step 6: Right Cast-Off Triangle
The rest of the squares in this section start with one additional stitch (because in the last step, you started with an active stitch).
Row 1: Use your right needle to evenly pick up 5 stitches purlwise along the edge of the square from the previous section. Turn.
Row 2: Knit 5. Turn.
Row 3: Purl 4, purl 2 together. Turn.
Repeat rows 2 and 3 until all the stitches from the section two square are knitted into the square. Then repeat this process for each square in the section.
Repeat sections two and three until your work is as large as needed. End with section four.
To finish off your entrelac piece, you need to knit triangles that fill in the gaps, while binding off your stitches.
Row 1: Knit 2. Turn.
Row 2: Purl 2. Turn.
Row 3: Knit 1, M1, SKP. Turn.
Row 4: Purl 3. Turn.
Row 5: Cast off 5 stitches. Do not turn.
Where can I get the scarf pattern?
I need a video class on how to do this. Is there one available?
JoAnne