Knitting Embellishments: Beading. Part 1

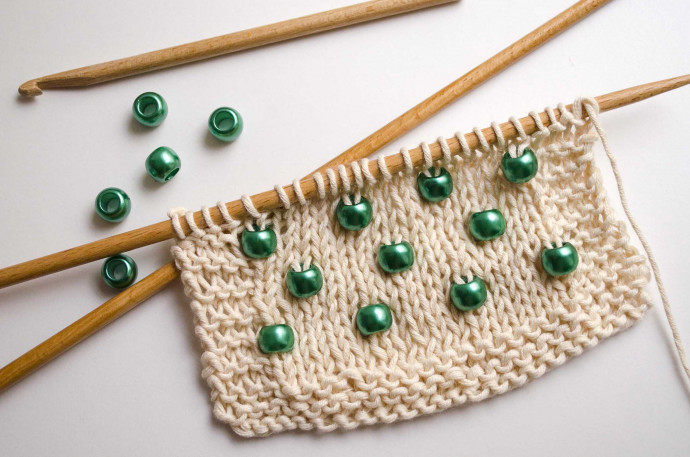
Beading is one of my favorite embellishments. It is simple to do and a basic sweater design can be made glamorous by a row of beading around the cuff or edge of the collar. There are two most commonly used types of beading – slip stitch beading and knitted-in beading. Whichever you use, there are a couple of things to bear in mind when buying the beads. Firstly, the hole in the bead must be large enough for the yarn to pass through and secondly, the bead must not be too heavy for the yarn. Using a heavy bead on a fine yarn will cause the stitches, and possibly the whole garment, to stretch.
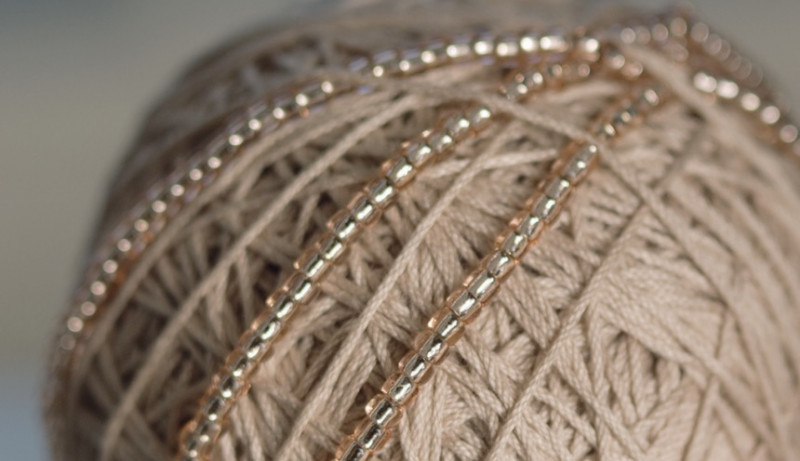
Threading beads onto yarn
Step 1. Whichever beading technique you are going to use, the first step is to get the beads onto the yarn.
Thread a sewing needle with a short length of sewing cotton and knot the ends. Put the tail end of the yarn through the loop of cotton.
Step 2. Pick up the beads with the needle, slide them down the thread and onto the yarn.
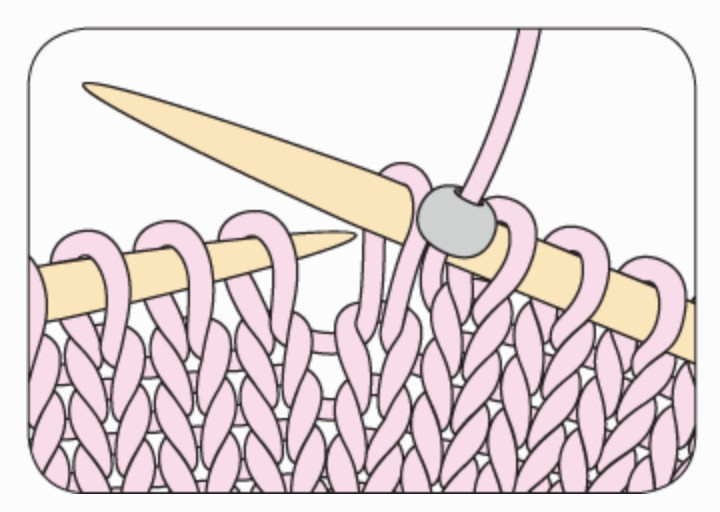
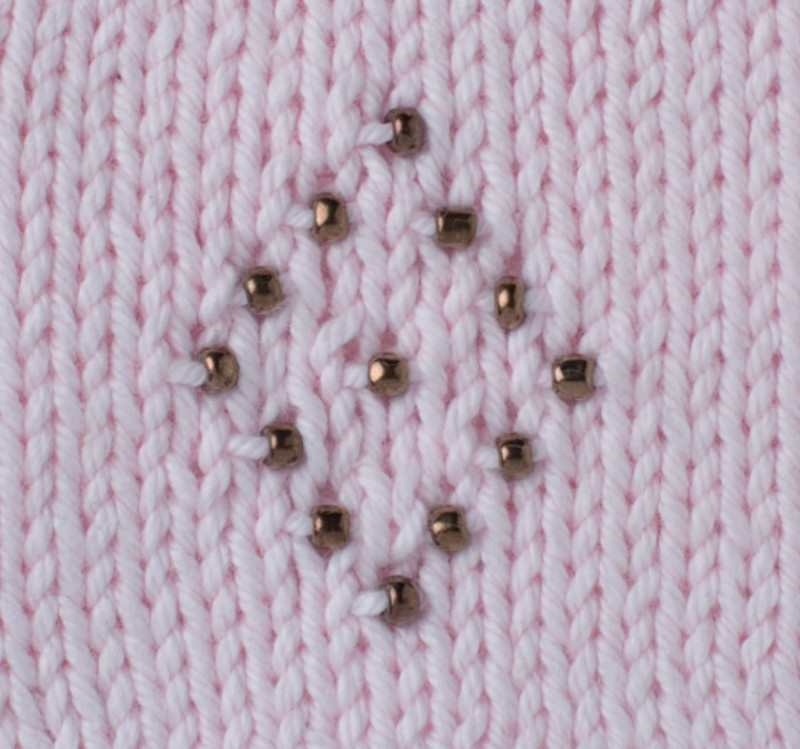
Slip stitch beading
This is the simplest and most often used beading technique, though beads can only be placed on every alternate stitch and row. Generally slip stitch beading will not affect your tension , so you can add beads to an existing plain pattern. It is usually worked on stocking (stockinette) stitch.
1) Knit to the position of the bead. Bring the yarn forward between the needles and slip a bead down the yarn to sit right in front of the work. Slip the next stitch purlwise.
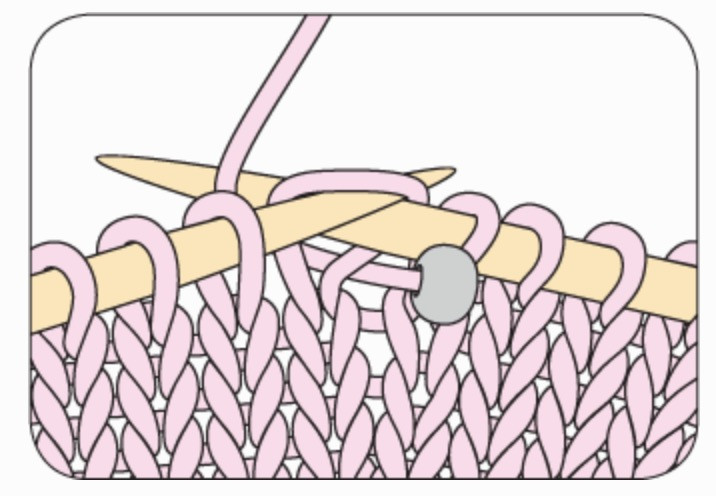
2) Take the yarn between the needles to the back of the work, making sure the bead stays in front of the slipped stitch. Knit the next stitch quite tightly.
Purling beads
Beads can be placed on a purl row by taking the yarn to the back, sliding the bead down, slipping the next stitch knitwise, then taking the yarn to the front again.