How to Crochet the Cupcake Stitch

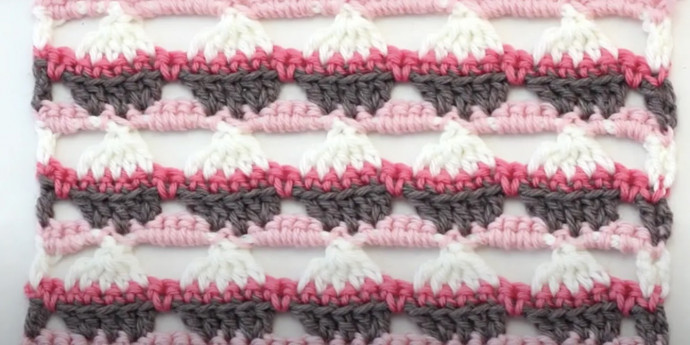
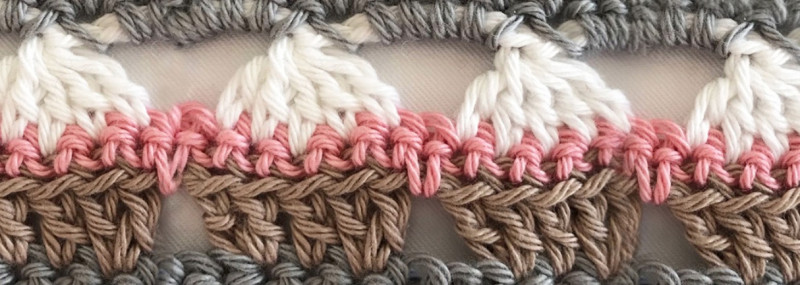
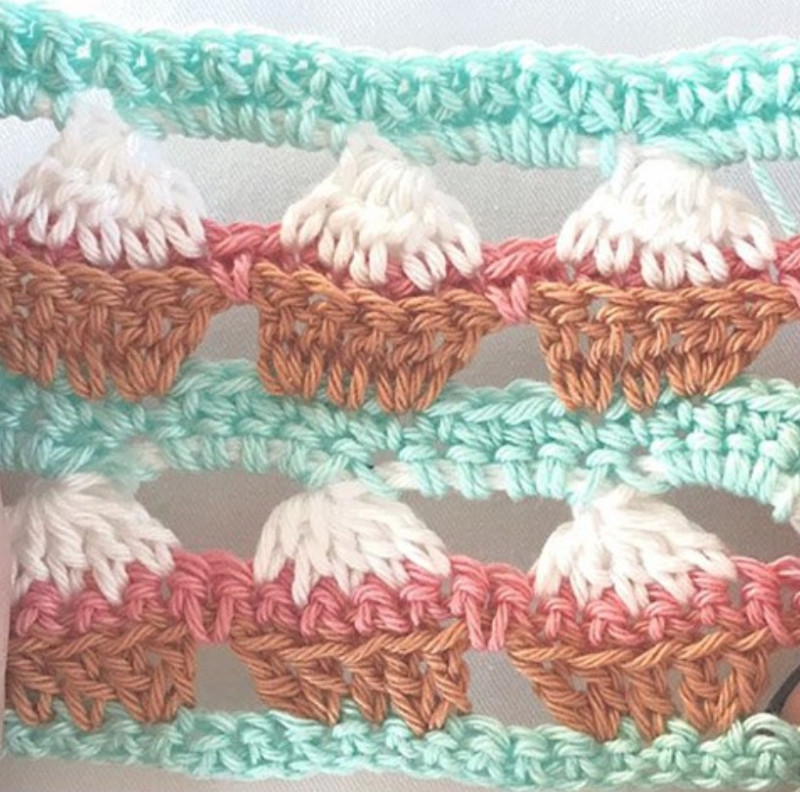
This cupcake stitch tutorial is a piece of cake! Using a fabulous recipe of basic crochet stitches to create the sweetest motif in your crocheted fabric, the cupcake stitch is wonderful for embellishing shawls, cardigans, hats and blankets with afternoon-tea-worthy crafts that looks good enough to eat (but don’t do it)! Learning a new crochet stitch or technique is always such fun, don’t you agree? Discover an easy photo tutorial that will guide you through all the necessary steps needed to learn the deliciously sweet Cupcake Stitch! Enjoy!
The cupcake stitch crochet is brilliant and doesn’t require professional skills to master it technically. This stitch is a really sweet way to create a different and unique design on your crochet project. It can be used to make beautiful hats, blankets, decorations and even borders to complete your projects. This gorgeous stitch looks well in a combination of soft color and even in solid colors. Possibilities are endless!
Instructions
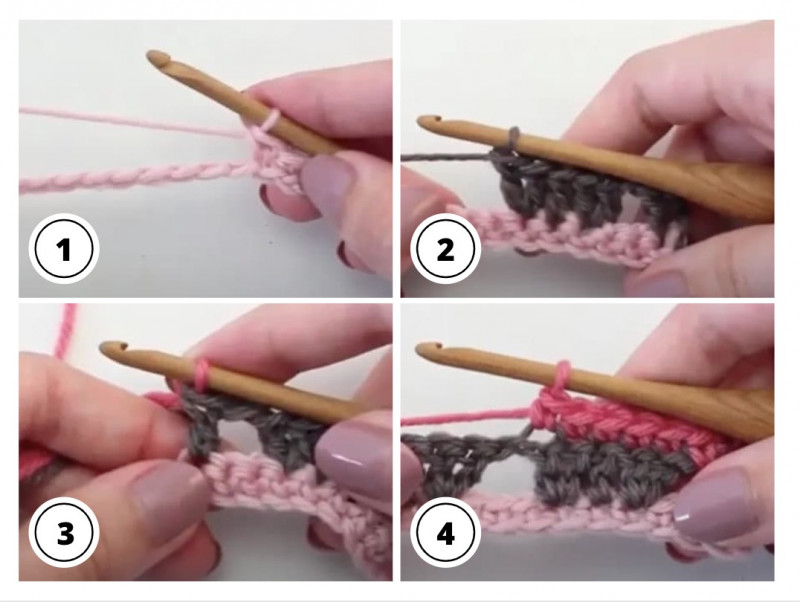
Step 1. To start!
Chain in multiples of 6 + 4 in the color you would like to use for your bakery shelf.
Step 2. For the bakers shelf row.
Row 1: skip first chain, and then sc along to the end of the row. As you sc the last chain of your row, switch color to the shade you'd like to use for your cupcake case .
Step 3. For the cupcake case row.
Row 2: ch 2, turn your work. Chain 1 dc in the same stitch as ch 2. Chain 1. Skip 2 stitches. Crochet 2 dc in the next stitch. 1 dc in the next stitch. 2 dc in following stitch.
Step 4. Ch 1, skip 3 stitches, 2 dc in next stitch, 1 dc in next stitch, 2 dc in next stitch. Ch 1. Repeat. At the end of row 2: ch 1. Skip next two stitches. 1 dc in the last stitch. Change colors for your cupcake sponge row.
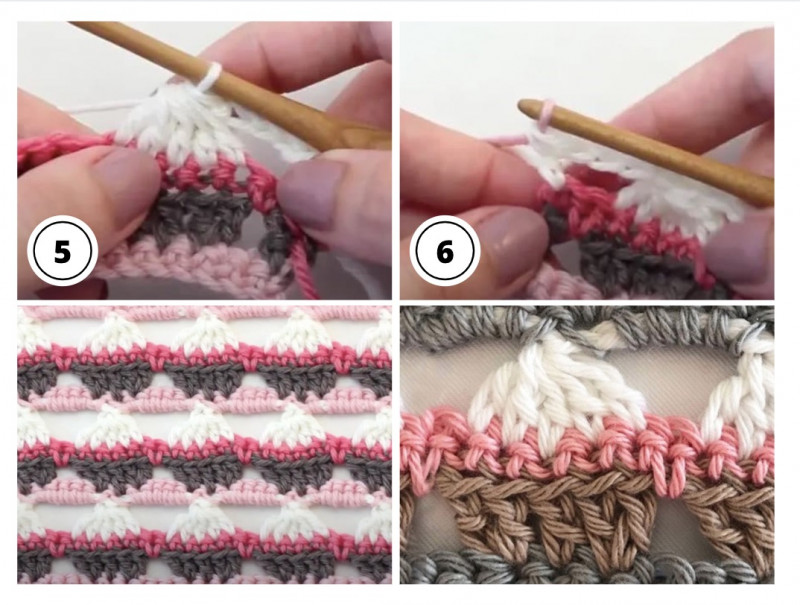
Step 5. For cupcake sponge row.
Row 3: ch 1, turn your work. Crochet one front loop sc. Crochet 1 sc in ch 1 space. Crochet 1 front loop sc in the next 5 stitches. Repeat to the end of row 3.
Step 6. At the end of row 3: ch 1 in that chain 1 space. Front loop sc in last stitch, changing to the color you would like to use for your icing.
Step 7. For the cupcake icing row
Row 4: ch 2, turn your work, 1 dc in the same stitch as your chain 2. Ch 4. Skip the next stitch. Crochet a 5 dc cluster. Yo. Pull through all 6 loops at the same time.
Step 8. At the end of row 4: ch 4, dc in the last stitch, changing back to bakery shelf color you used on row 1.
Step 9. Finish row 4: Ch 5. Skip the next stitch and repeat your 5 dc cluster. Repeat to end of the row.
Step 10. Repeat steps for 1 - 4 to create the next shelf of cupcakes in your fabric. See, piece of cake!
Just have fun and enjoy learning this pretty and amazing stitch!