I love knitting, but sometimes there are a few things that make the process more bothersome than it needs to be. Instead of just dealing with it, do something about it. We all need a little insider intel every now and then. There are lots of different knitting tools and accessories, that make a knitter’s life easier and the process itself more delightful. Not only they are useful, but they are also beautiful – all those hand-made stitch markers, elegant knitting needles, exquisite yarn bowls. The list goes on and on! However, we don’t always have them at close hand – things get lost, break, or are just not suited for our budget. That’s when creative hacks can help. Below I am sharing with you 6 knitting tricks, that I personally use and find very helpful. Enjoy!
Yarn Stitch Markers
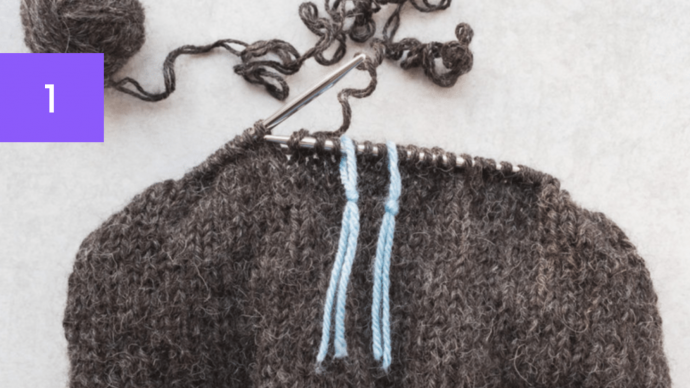
Whether you don’t want to spend any extra money on the markers or you have run out of them (they tend to disappear one by one, just like hairpins) you can replace them with your DIY yarn markers, that are super easy to make. Just take some leftover yarn, cut 4-6 inches, fold the yarn in half and make a loop to hang on your needle. That’s it, you have just made a stitch marker! You can make as many markers as you need at any time of the day or night. They are free (except the cost of the leftover yarn, but I’m personally glad, I can make at least some use of it). Besides, if you take a different yarn color, you can make a color-coding system with your markers. You can also replace stitch markers with paper clips, but be careful with them – they can catch the yarn.
Needle Caps
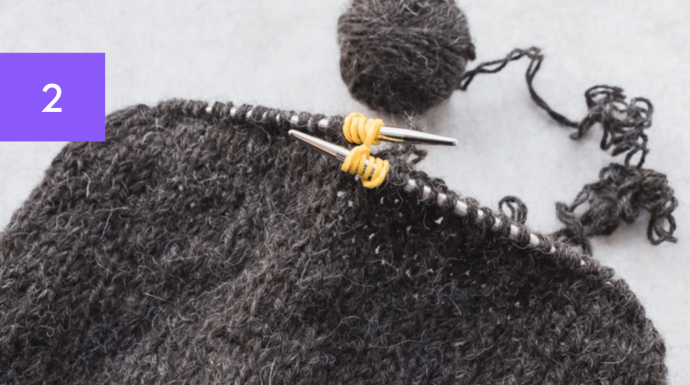
Needle caps are there to protect the stitches from slipping off the needles when you aren’t knitting. They are also a safety net when you are casting on stitches on the circular needles or double-pointed needles. I must say, I have never owned them… If you have rubber bands in the house you can get by. So the idea here is very simple – take one rubber band and wrap it around your needle. It will secure the stitches and keep them in place. It’s better to take the small elastics, the big ones make to many unnecessary loops on the needle.
How to Avoid Too Long or Too Short Tail
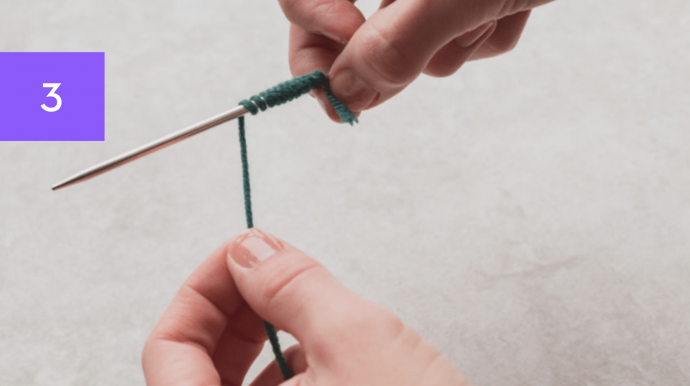
Estimating how much yarn you need for your cast on can be tricky, particularly if you have a lot of stitches to cast on. The tail tends to be either to short and there is not enough yarn or too long and you have to cut it off and let the yarn go to waste. Usually, you unravel and start again. And again… There is a good way to measure how much yarn you’ll need before you start your cast on. Take the tail of your yarn and wrap it around your needle 10 times – that’s how much yarn you will need for 10 stitches. So one wrap is about one stitch. If you need 20 stitches – wrap the yarn around the needle 20 times. If you need to cast on a significant amount of stitches, then it is better to measure how much yarn you need for say 10 stitches (or 20, 30…), secure that place with your fingers, unravel and double the length – that’s where you should start casting for 20 stitches, triple the length – that’s for 30 stitches, etc. Add about an extra 4 inches for the tail and start casting!
Determining Needle Size
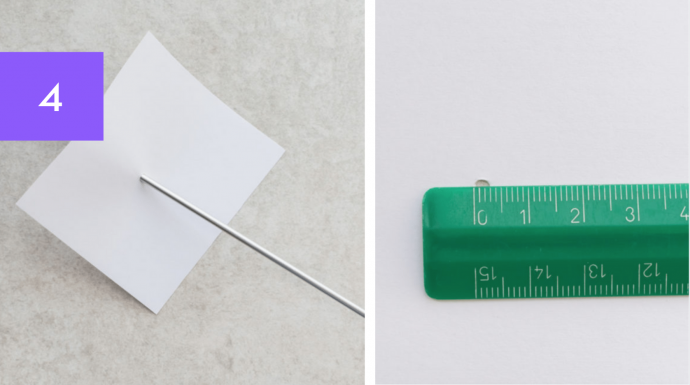
Unfortunately, not all needles are marked with their size. That’s when the gauge ruler comes to the rescue – you take your mystery needle and try to find the matching hole with the corresponding number. If you don’t have the ruler at hand you can try this trick. Take a little piece of paper, an ordinary ruler and your needle. Carefully poke a hole through the paper (please, don’t poke your finger) and measure the hole’s diameter. The number you get is the size of the needle in millimeters! If you are used to US sizes, you can use a metric conversion chart to determine the size. You can use one at the Craft Yarn Council’s homepage.
Turn Nail Clippers Into Special Cutters
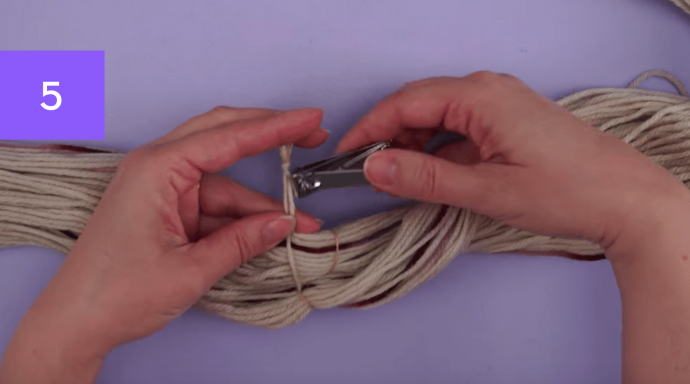
The tiny blades on nail cutters are perfect for snipping small pieces of yarn and — bonus! — they’re super easy to travel with, especially when flying.
Use Your Hand as a Rough Ruler
Sure, it’s not precise. But if you need a rough measurement for your knitting, you can always use your hand. All you need to do is measure your pointer finger once to get an approximate length, then use it as an estimate for all your projects going forward.
I hope these tips were helpful and will make your knitting life a little easier!

Thank you for the tip on how to measure so you do not have to long or to short a tail when casting on. I don't know how many times I have had to cast on again because the tail was to short or to long