How to Crochet the Tunisian Knit Stitch Photo Tutorial

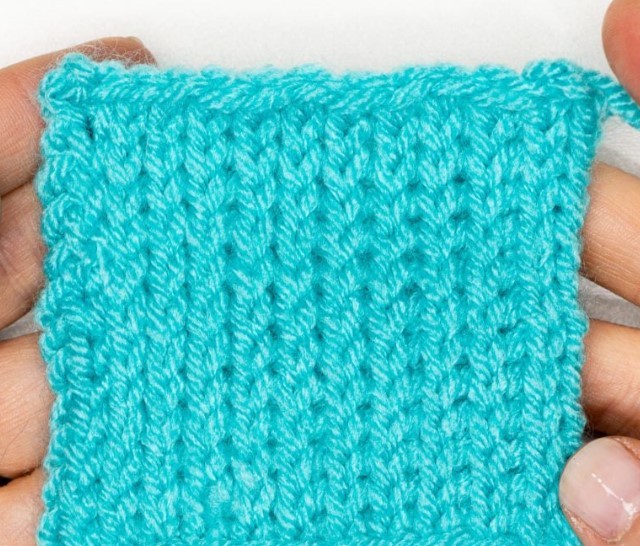
The Tunisian Knit Stitch is a versatile stitch to learn for those wanting to learn how to do Tunisian Crochet. The Tunisian Knit Stitch is used in a wide variety of projects, creates a plush, dense fabric that is just lovely and have a really relaxing rhythm to the stitches. The Tunisian Knit Stitch is one of my favourite Tunisian Stitches because it looks just like knitting! I absolutely love this stitch!
Learn how to crochet the Tunisian Knit Stitch with this photo tutorial.
Materials
- worsted weight yarn
- 6,0 mm tunisian hook
Abbreviations
- CH = Chain
- ST(s) = Stitch(es)
- TKS = Tunisian Simple Stitch
- YO = Yarn Over
Instructions
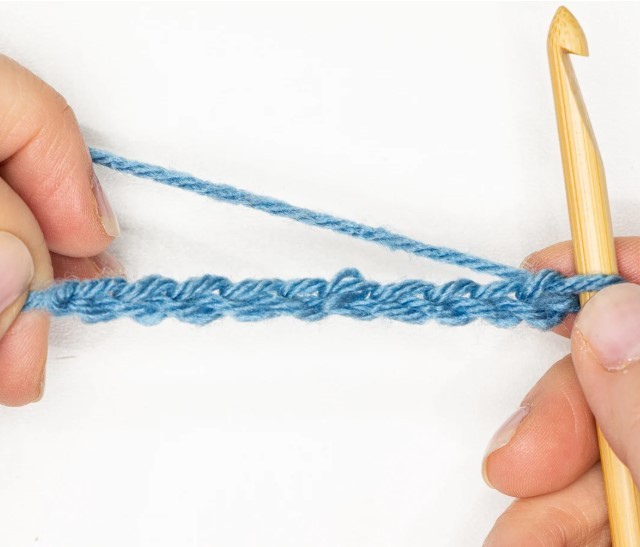
Creating your foundation chain: CH your desired number of STs, keeping in mind that the CH on your hook will count as a ST. For my example, I did a CH 10.
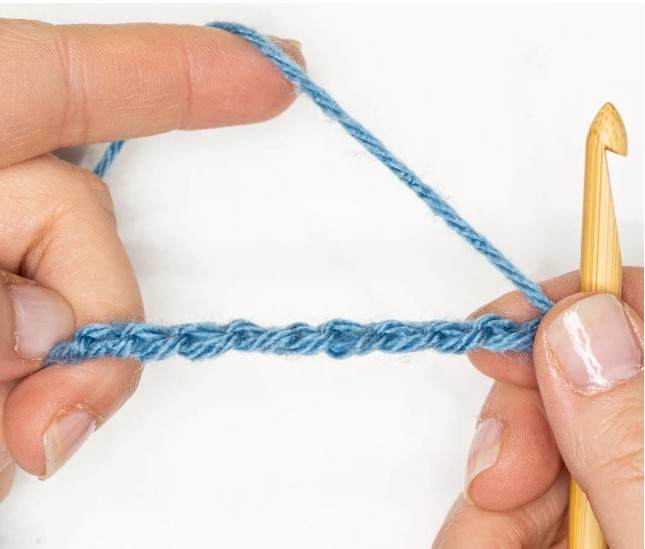
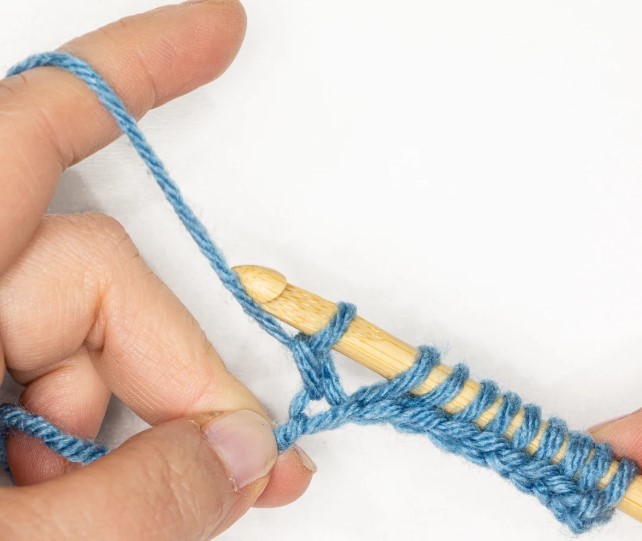
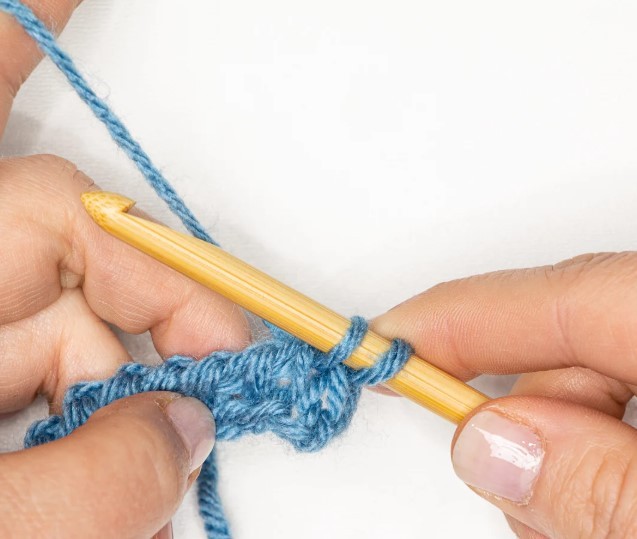
Row 1 – Forward Pass: Turn your chain so you are working into the back bump of your chain. Insert your hook into the back bump of the 2nd chain from the hook. Yarn over (YO) hook and pull up a loop. Insert your hook into the back bump of the next chain, YO and pull up a loop. Repeat this until you have a loop on your hook from every chain you created.
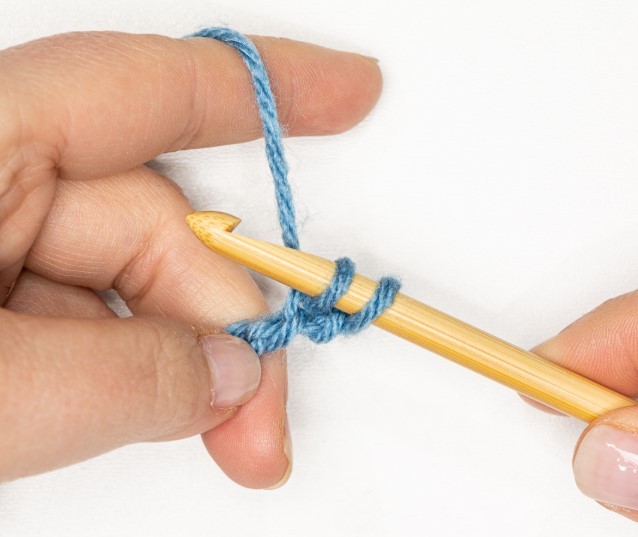
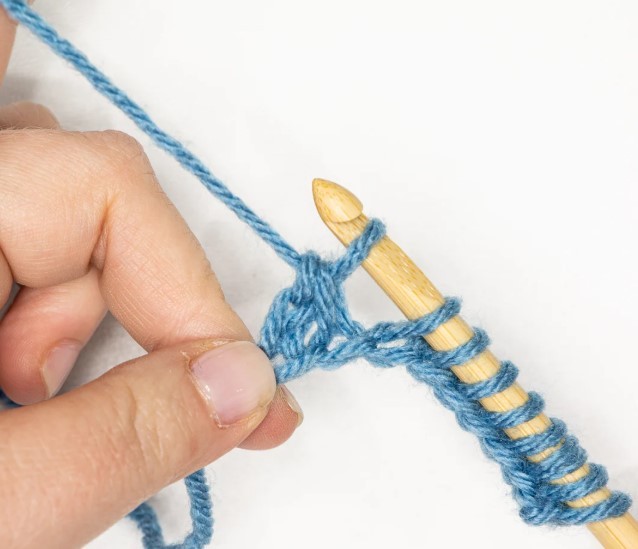
First Row / Row 1 – Return Pass: YO and pull through first loop only (this is a CH 1). *YO and pull through two loops* Repeat the instructions in ** until the end of your row and only one loop remains on your hook.
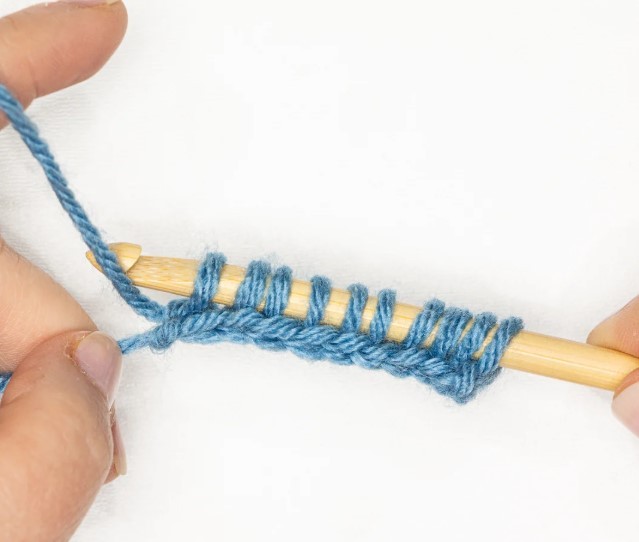
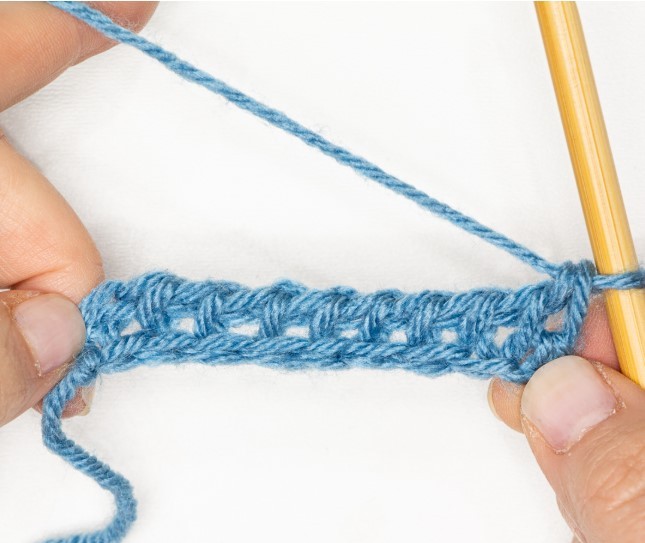
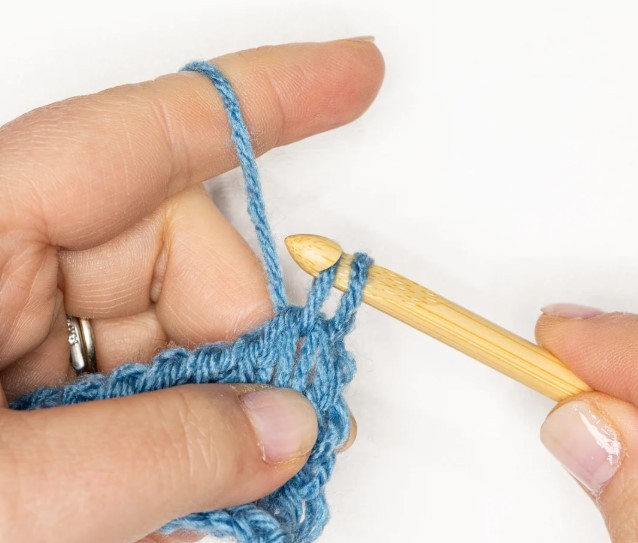
Row 2 – Forward Pass: Insert hook from right to left through the 2nd stitch, between the vertical bar on the front of your hook and the one on the back of the fabric. YO and pull up a loop. *Insert hook between the front and back vertical bars of the next stitch, YO and pull up a loop.* Repeat ** until the end of your row.
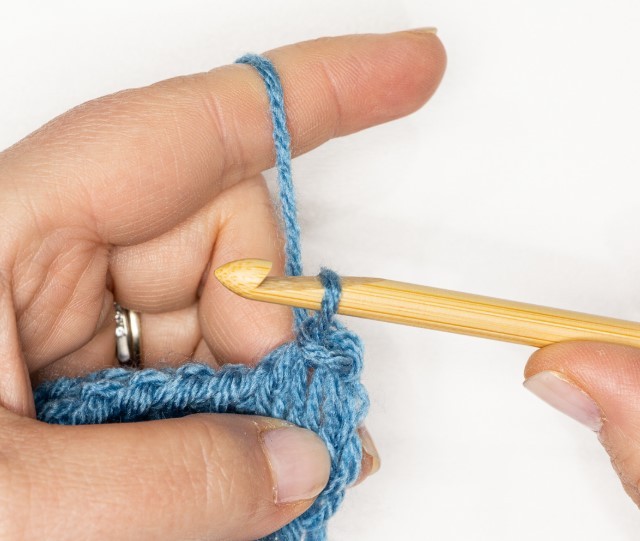
Row 2 – Standard Return Pass: YO and pull through first loop only (this is a CH 1). *YO and pull through two loops* Repeat the instructions in ** until the end of your row and only one loop remains on your hook.
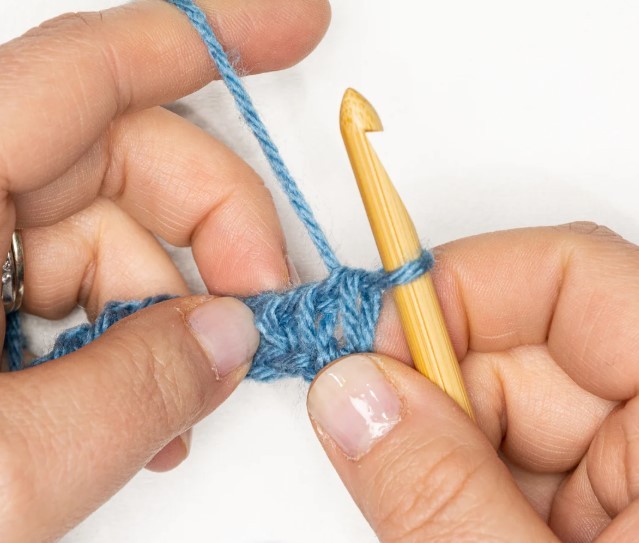
Binding off: Insert your hook from right to left, under the 2nd vertical bar from your hook. YO and pull up a loop. Pull that loop through the loop on your hook. *Insert your hook under the next bar, YO, pull up a loop and pull that loop through the loop on your hook.* Repeat the instructions in ** until the end of your piece. Fasten off and weave in ends.
If you find that you have a lot of curling happening with your fabric, try blocking your work. That will usually take care of it. Alternatively, you could try again, using a larger hook size.