How to Do an Invisible Decrease Photo Tutorial


If you like to crochet amigurumi, you may have noticed (and dislike) the little bump that is formed when you’re working your single crochet decrease stitches in your projects. The standard way of executing a single crochet decrease stitch often leaves a gap or a bump on your project and then you aren’t left with a nice even fabric that you were hoping for. But, there is a better way of doing a decrease stitch that can do wonders for your amigurumi projects: the invisible decrease. Here, I’ll show you how to do an invisible decrease in your crochet projects. It is something that I use in all my amigurumi projects and I think once you get the hang of doing an invisible decrease, that you’ll make it part of your amigurumi toolbox of skills.
Instructions
When you come to the part in your crochet pattern/project where it calls for a SCDEC/Single Crochet DEC/decrease, follow these steps.
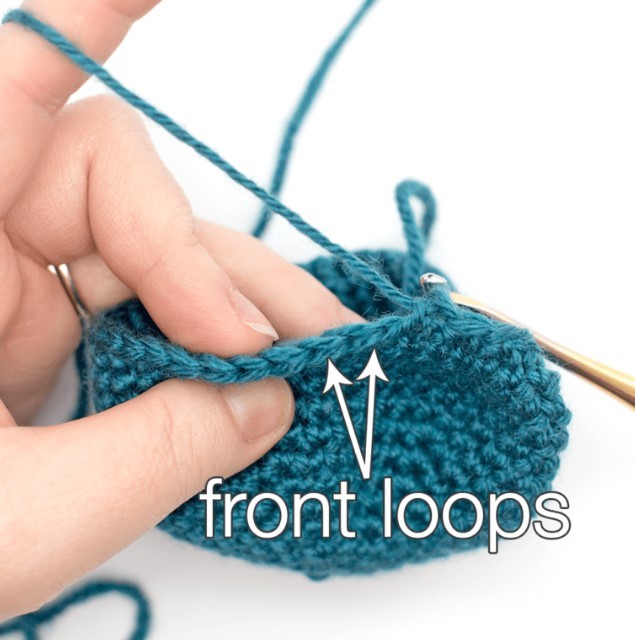
1. Insert your hook under the front loop only (FLO) of the first stitch. You should have two loops on your hook.
2. DO NOT YARN OVER. Insert your hook under the front loop only (FLO) of the next stitch. You should have 3 loops on your hook now.
3. Yarn over and pull through the first two loops on your hook. You should have two loops remaining.
4. Yarn over and pull through the remaining two loops on your hook. Invisible decrease completed.
That’s it! Super easy right? The invisible decrease is almost imperceptible when done in your amigurumi projects. The crochet invisible decrease is a total game changer.