Tapestry Crochet: Tapestry Crochet Guide for beginners


Master Tapestry Crochet with this complete guide to Tapestry Crochet. This tapestry crochet tutorial will guide you through all the steps to become a pro with Tapestry Crochet. Before you know it you will be creating crochet color graphic masterpieces!
How to change colors in Tapestry Crochet
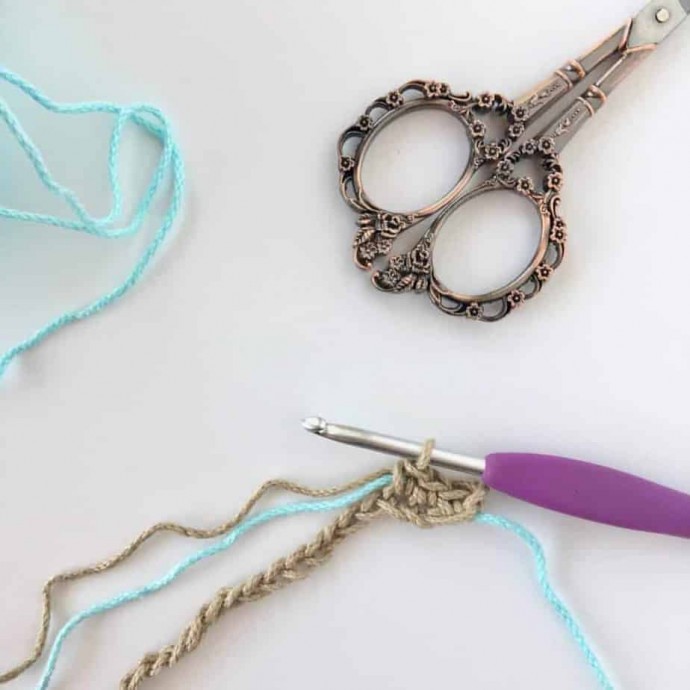
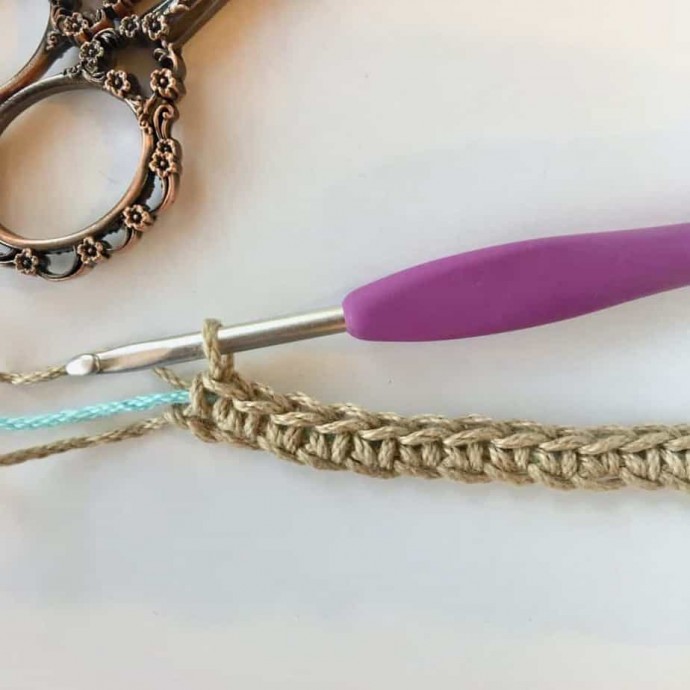
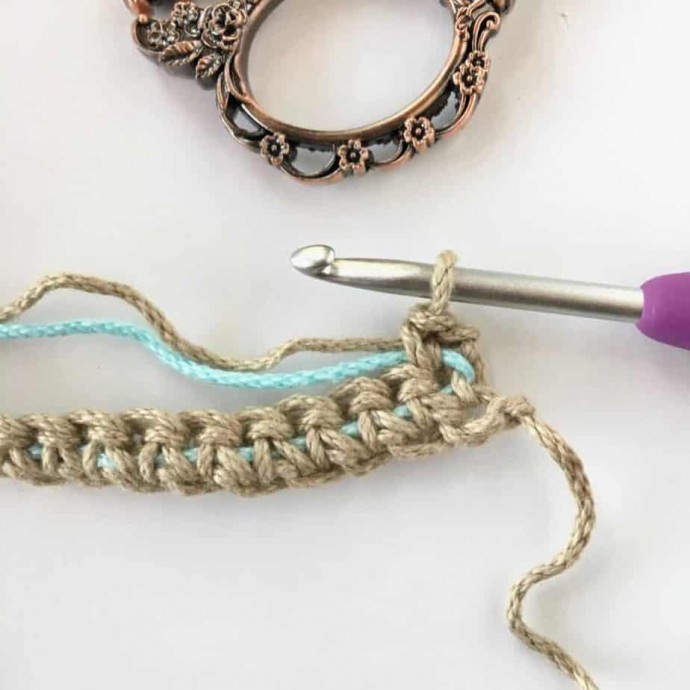
Begin carrying all colors you will be working with to begin row. You will be working your single crochet stitches over the non-working yarn colors. This will give your work a consistent thickness throughout the project.
Keep the carried yarn to the back of your work when working the right side of your work and to the front when working the wrong side. If working in the round, you will always carry in the back of your work.
Keep your tension even but tight in order to keep the carried yarn colors hidden.
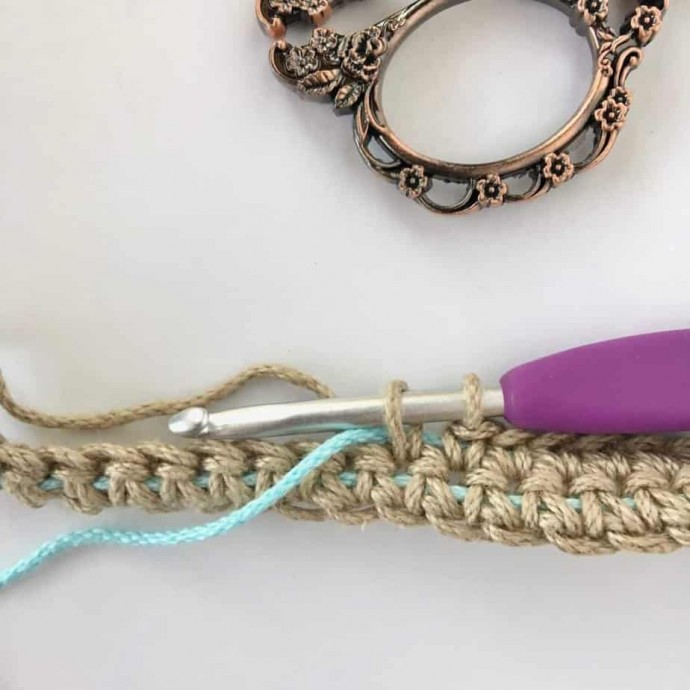
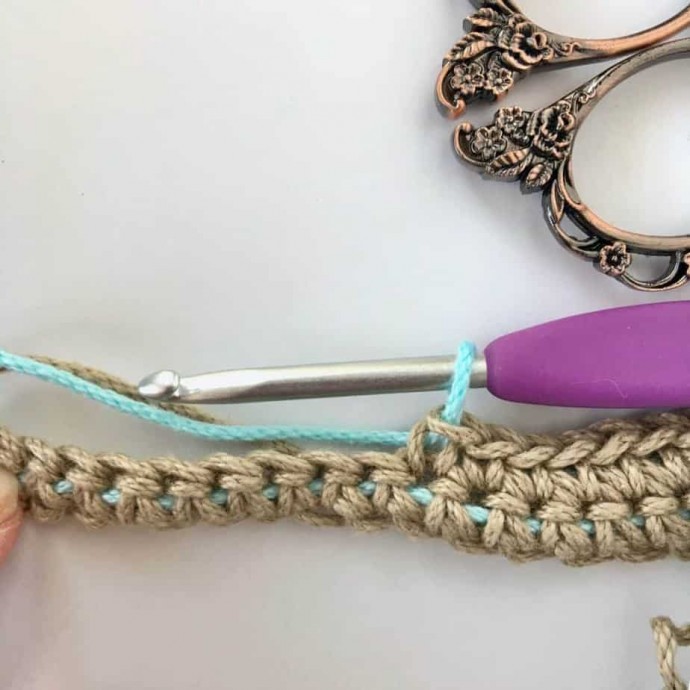
Change colors in the middle of a stitch. Do not complete the last stitch before a color change — complete the stitch with the new color. Leaving 2 loops on your hook, yarn over and complete the stitch with the new color.
If you see carried yarn through your stitches from the front, gently pull on the carried yarn before changing colors to tighten the stitches and minimize color “bleed” through.
When working row by row or flat, the way you begin each row in will vary slightly depending on whether you are on the right side or the wrong side of your work.
On the right side, hold the carried yarn behind the work before you crochet over it with the first yarn.
On the wrong side, hold the carried yarn in front of your work before crocheting over it.
When you are working in rounds, you will always be working on the right side of the work so you will always have the carried yarn behind your work throughout the project.
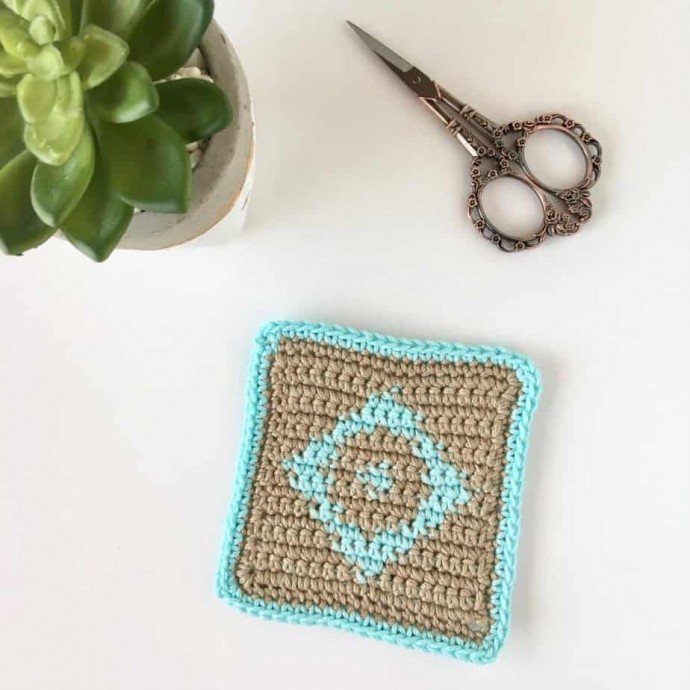
How to read Graphs in Tapestry Crochet
Each block in the graph would represent 1 single crochet stitch. The color of the block tells you what color that single crochet stitch would be.
As you can see in the graph, the numbers on the sides of the chart alternate sides. This is a graph that would be worked flat or row by row for a right handed crocheter. Row 1 is worked from the right towards the left, turn for row 2 and so on back and forth.
The numbers at the bottom and the top correspond to the number of stitches in the row. Row 1 would have 17 Taupe single crochet stitches. You would make a foundation chain of 18 (17 + 1 for turning ch1). Starting in the 2nd ch from the hook, work 17 taupe single crochet stitches for row 1. Turn for row 2 and work 8 taupe stitches, 1 aqua stitch and then 8 taupe stitches to finish row 2. Turn. And then continue throughout the graph.
Use the “yarn under” technique instead of the “yarn over”.
Typically when working a single crochet, you would yarn over. Your hook goes under the yarn and you grab the yarn from underneath before pulling through and completing your stitch.
If you use the ”yarn under,” your hooks goes over the yarn and grabs the yarn from above it and then pull through. Using this technique will minimize the slant of your work and create a more crisp and professional image.