Loops & Ridges Baby Blanket Crochet Tutorial

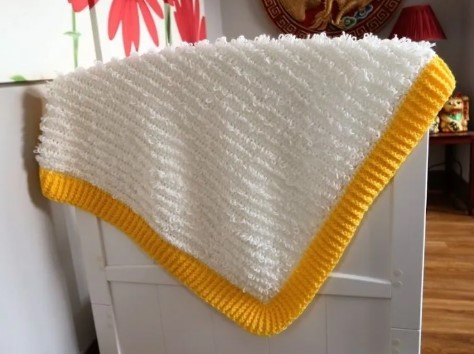
Today I am sharing with you a cute fluffy baby blanket with you all: Loops & Ridges Baby Blanket.
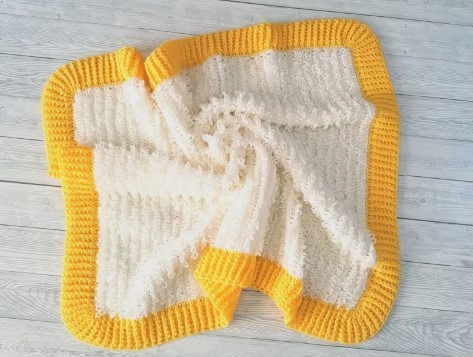
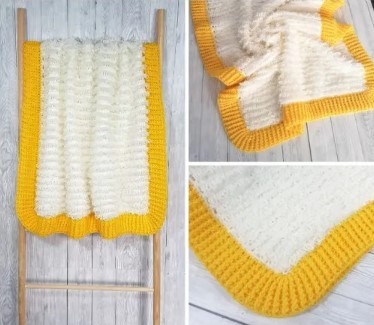
This baby blanket has a textured loopy blanket framed by a plain, solid border. The size of the double loop stitch used on the blanket can be adjusted in size and the rib border can be made narrower or thicker.
Learn how to crochet the Loops & Ridges Baby Blanket with this tutorial.
Materials
- light worsted yarn
- 7 x 100g in off-white
- 5mm & 4.5mm crochet hooks
- tapestry needle
- scissors
Project Size/ Gauge
- 115cm by 90cm
- 8rows X 12sts = 10cm x 10cm area in double loop stitch
Abbreviations
- st(s) – stitch(es)
- ch(s) – chain(s)
- sl st – slip stitch
- sk – skip
- flp st – front side loop stitch
- dc – double crochet
- bpdc – back post double crochet
- fpdc – front post double crochet
Notes
- ch1 at the end of the row does not count as a stitch
- ch3 at the beginning of the row counts as a double crochet
- stitches contained within ** are the repeat section for that row
- if you want a tighter texture, replace the double crochet rows with rows of single crochet stitches
- the loops will be created on the wrong side, the side that is away from you
Instructions
The Blanket
Start with white and a 5mm crochet hook
Starting Chain: ch94
With off-white and a 5mm hook, chain 94.
Row 1: dc in 5th ch from hook, dc in each ch until the end of the row, ch1, turn = 91
Row 2: sc in 1st stitch, dlp st in each stitch until you have 1 st left, sc in last st, turn
Row 3: ch3, dc in 2nd st and in each st until the end of the row, ch1, turn
Row 4: sc in 1st stitch, dlp st in each stitch until you have 1 st left, sc in last st, ch1, turn
Repeat rows 3 & 4 until your blanket measures approximately 100cm long.
Don’t fasten off, change hooks to a 4.5mm one, and continue from the corner where you finished your last row.
Turn the blanket with the right to face you (the loops are facing you).
Crocheting Along with The Top Of The Blanket: ch1 (does not count as a stitch), sc in each stitch until you have 1st left on that side, make 3sc in that last st.
Crocheting Along The Side Of The Blanket: *2sc around the dc post, 1sc in the sc row*, repeat from * until you have reached the bottom of the blanket
Crocheting Along The Bottom Of The Blanket: 3sc in the first st of the row to form the corner, sc in each st along the base until you have 1st left, 3sc in the last st to for the other corner.
Crocheting Along The Side Of The Blanket: *2sc around the dc post, 1sc in the sc row*, repeat from * until you have reached the top of the blanket, sl st into the first sc you have made to close the round. Fasten off and weave in all the ends.
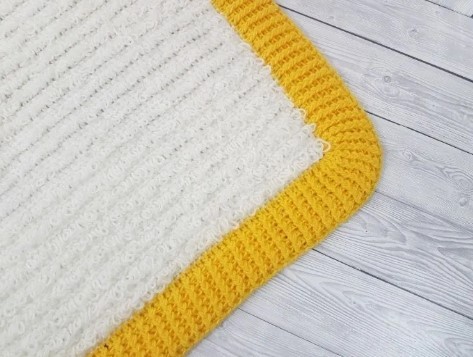
The Border
Round 1:
Step 1: Start in the first sc of the 3sc made in the corner, join the yarn and ch3, 2dc in the same st, 3dc in each of the next 2sts (this is your corner and the clusters will fan out to form the round corner border)
Step 2: dc in each stitch across the edge until you reach the 3sc you have made in the following corner
Step 3: *3dc in each of the next 3sts, dc in each stitch across the edge until you reach the 3sc you have made in the following corner*, repeat from * until you reach the end of the round, sl st into the top ch of the ch3 you made at the beginning of the round.
Round 2: ch1, *fpdc in the dc post below, bpdc in the following dc post below*, repeat from * until you reach the end of the round, sl st into the first fpdc you made in the round
Rounds 3 & 4: ch1, *fpdc around the fpdc post below, bpdc around the bpdc post below*, repeat from * until you reach the end of the round, sl st in the fpdc that you made at the beginning of the round.
Enjoy your newly-made Stripes & Ruffles Baby Blanket.