Crochet Tutorial: How to Make an I-Cord

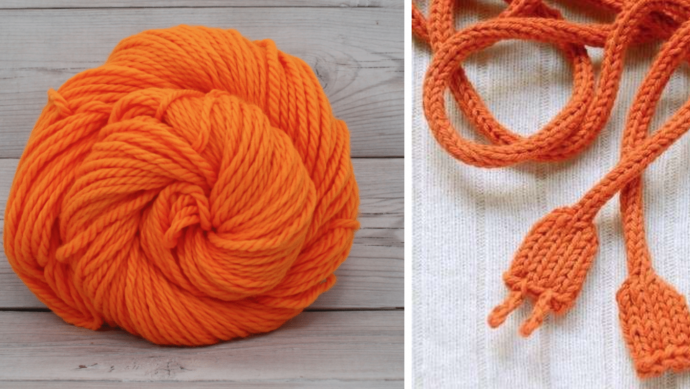
You may have heard of an I-cord in knitting, a small tube knit in the round with just a few stitches, but did you know you can make one in crochet, too? These seamless tubes are great for making straps, drawstrings, ties, and decorative piping trim for your crochet projects. I-Cords are great to use as a purse strap, a lanyard, a bag handle, the arms on a doll or any other rope or cord. Today I'll show you how to make a 2-stitch I-Cord in 12 easy steps, and I will also tell you some useful tips to make a perfect i-cord.
How to crochet an I-cord
Start with yarn and an appropriately sized hook. I-Cords are flexible by natures, so if you'd like your finished I-Cord to be stiff, consider using a hook 1 or 2 sizes smaller than what is recommended for your yarn. Put a slip knot on your hook and chain twice.
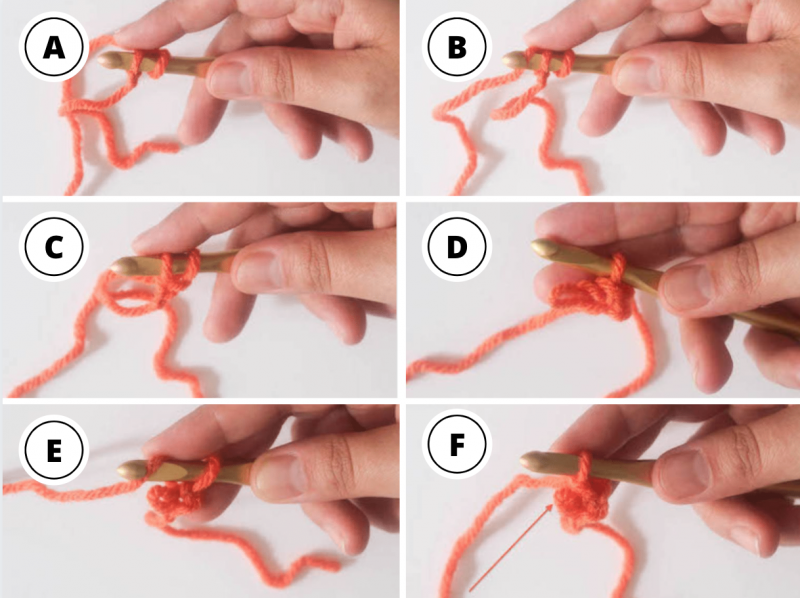
A. Skip 1 chain and insert your hook into the next chain. You will now have 2 loops on the hook.
B. Wrap the yarn over …
C. ... and draw up a loop. You will have 2 loops on the hook.
D. Remove the second loop from the hook. Be careful not to let this loop unravel while it's off the hook.
E. Wrap the yarn over …
F. …and draw up a loop. Remember not to pull the yarn through too tightly, or it will unravel the loop that's off the hook. Now you can see the loop has gotten a little bit smaller.
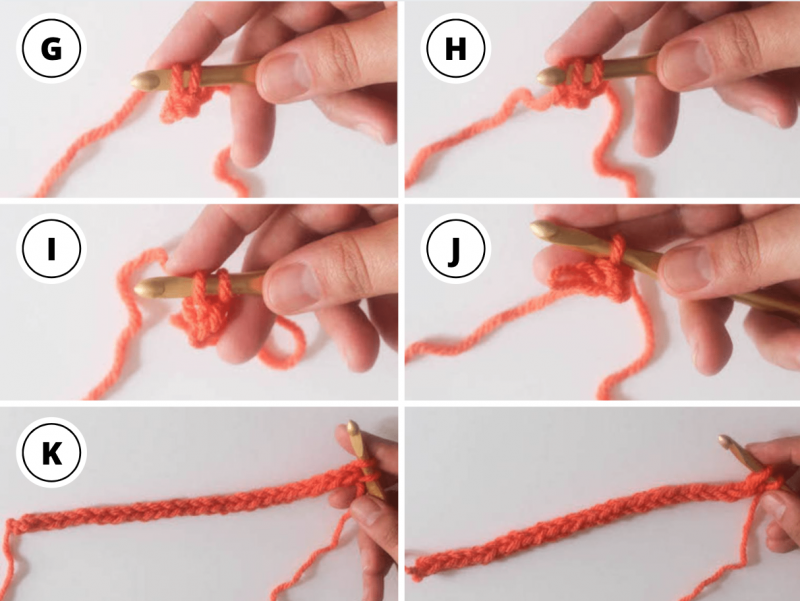
G. Return the second loop to the hook.
H. Wrap the yarn over...
I. ...and draw up a loop. You'll have 2 loops on the hook.
J. Continue to repeat Steps D-I until your I-Cord is the desired length. Always remember to avoid pulling the working yarn too tightly to keep your second loop from unraveling when it is off the hook.
K. Once you've reached the desired length, yarn over and draw through both loops. Weave in the ends with a yarn needle to finish. Your I-Cord is reversible and looks like a chain on both sides.
You can use the same process to make an I-Cord with as many as 4 stitches. With more than 4 stitches, the back of your I-Cord will likely lose its tubular closing because the stitches are too far apart.
Finishing a crocheted I-Cord
The easiest way to end the final row is to cut the yarn leaving a long end, draw the end through all 3 loops on the hook, and pull tight. This will draw the end into a point.
To maintain the tubular shape to the end, wait till you have all 3 loops on the hook, then sl st through each loop in turn, fasten off, and use the yarn end to stitch the first and last sl sts together into a circle.
For finishing, it depends on what you want to do with the i-cord: use the yarn ends with a yarn needle to stitch it to something else, or hide the ends by weaving them up through the middle of the tube.
I-Cord Tips
When you get to your fourth or fifth row, you will probably think ‘this doesn’t look right’. You will probably think the back looks totally different to the front, and it’s not making a nice even cord. But stick with it, and when you’ve done about ten rows, roll the cord a little between your fingers and you will find, rather miraculously, the cord evens itself out into a nice round shape.
Have not heard of I-Cord. I could use that on one of my purses.
Hi Norma! Yes, exactly! 😌🌷
why was yarn sent to me. I didn’t order it
I refusing it
Hello Gina! I never send anything to anybody, that’s a mistake