How to Knit Socks: 2x2 Rib Stitch

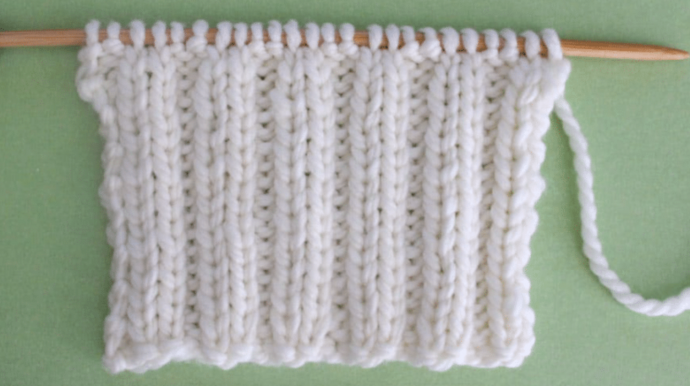
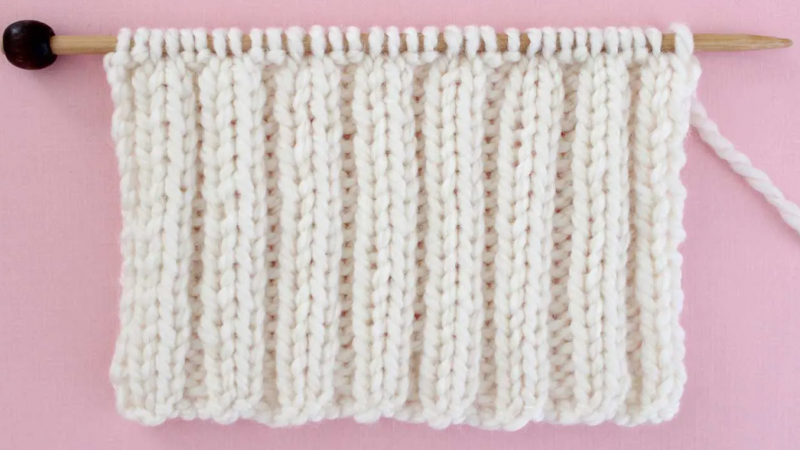
Hello, dear knitters! In the second lesson of the series of lessons, aimed to teach you how to knit socks from scratch we’ll take a close look at 2×2 Rib stitch. The 2×2 Rib stitch forms vertical stripes: One column of knits (they look like a series of “v”s), next to another column of purls (a vertical stripe of little bumps).
Feel free to use any size yarn and needles for practice. My 2×2 Rib Stitch sample was created with size 7 US knitting needles and worsted weight yarn, along with a tapestry needle and scissors.
The 2×2 Rib stitch forms vertical stripes: One column of knits (they look like a series of “v”s), next to another column of purls (a vertical stripe of little bumps). It is reversible, as it always lies flat.
To knit the 2×2 Ribbing, we have to alternate 2 knit stitches and 2 purl stitches every time (always knitting the knits and purling the purls), meaning, we knit what we see: when you see the bump, you purl; when you see the “v”, you knit. And to get the pattern in one row only, so that you can repeat it indefinitely, you must cast on multiples of four.
This stitch is elastic and pretty convenient for knitting socks (and also cuffs, a close fitting sweater or cardigan, hats and also men’s scarves and cowls; the bigger the size of the needle and the thickness of the yarn, the less elasticity you will get.)
Now let’s take a quick look at 2 basic techniques, used for 2x2 Rib Stitch: knit and purl.
4-STEPS TO DO A BASIC KNIT STITCH
STEP 1:
Hold the knitting needle with the cast-on stitches in your left hand. Hold the knitting needle without any stitches in your right hand. With the yarn in the back of your work, insert the right needle into the front of the first stitch. You’ll insert your needle to the left of that stitch and through. Your right knitting needle will be underneath your left needle.
STEP 2:
Wrap your yarn around the right needle from back to front, so that it rests between the two needles.
STEP 3:
Slide the right needle down and bring the point forward through the stitch, bringing the yarn with it.
STEP 4:
Slip the old stitch off the left needle. Make sure you only slip that first stitch off of the needle, don’t let any of the others off the needle yet. Now the new stitch is on your right needle. Repeat these four steps for each stitch on your left needle.
4 STEPS TO PURL STITCH IN KNITTING
STEP 1: Hold the knitting needle with the stitches on it in your left hand. Hold the knitting needle without any stitches in your right hand. With the yarn in the front of your work, insert the right needle from back to the front of the first stitch, or you can think of it as straight into it. Your right knitting needle will be resting over your left needle.
STEP 2:
Starting with your yarn in the front, wrap your yarn around the right side of your right needle counter-clockwise direction, finishing with your yarn in the front of your needles again.
STEP 3: Slide the right needle down and bring the point from front to back of the stitch, bringing the yarn with it.
STEP 4:
Slip the old stitch off the left needle. Now the new stitch is on your right needle. Repeat these four steps for each stitch on your left needle.
2X2 RIB STITCH
The 2x2 Rib Stitch is a 2-Row repeating pattern of knit and purl techniques.
K = Knit Stitch
P = Purl Stitch
Cast On: Multiples of 4 (i.e.: 4, 8, 12, 16, 20, 24…).
Row 1: *K2, P2*. Repeat from * to * until the end of the row, and keep repeating this row until you reach the desired length.
For symmetry (if you want to start and finish with 2 knits or 2 purls), cast on multiples of four and add 2 more stitches. In that case, to get the pattern correctly, you need to knit 2 rows (always following the principle “you knit what you see”), and after the first row, you will knit the opposite of what you knit on the previous row, as follows:
Row 1: *K2, P2*. Repeat from * to * until the end of the row.
Row 2: *P2, K2*. Repeat from * to * until the end of the row.
These 2 rows create the pattern, repeat them until the desired length is reached.
And that’s everything for today’s lesson.
Time to grab your needles and start practicing! Happy knitting!