How to Crochet the Embossed Triangle Stitch Photo Tutorial

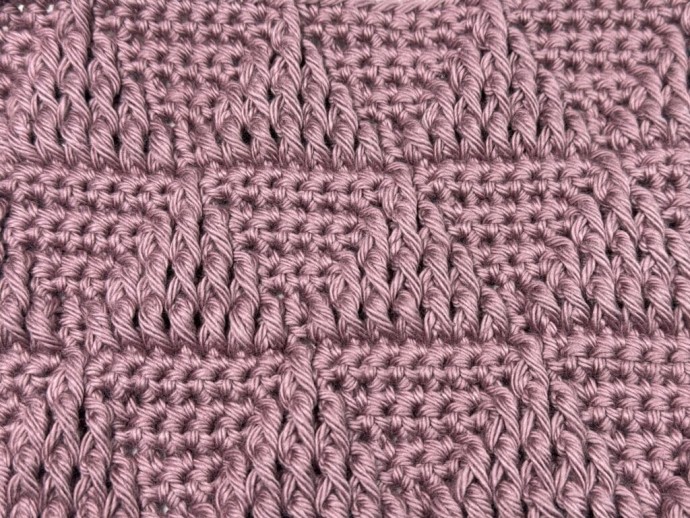
The Embossed Triangle Stitch pattern is a beautiful crochet pattern that would work wonderfully in projects like blankets and bags, possibly even a cardigan!
The thing I love most about this stitch design is how the triangles seem to be pushed up out of the fabric. This is where its embossed name came from!
The pattern as a whole is fairly easy to work. All you will need to know are single crochet stitches and front post double crochet stitches. And while it is a daily long repeat when it comes to the pattern, you will find that you catch on fairly easily to how the pattern is worked. You may not need to follow the written instructions too carefully by the time you get to the second row of triangles.
Learn how to crochet the Embossed Triangle Stitch with this photo tutorial.
Stitches and Abbreviations:
- Ch – Chain Stitch
- Dc – Double Crochet
- Fpdc – Front Post Double Crochet
- Rpt – Repeat
- Sc – Single Crochet Stitch
- Sl St – Slip Stitch
- Yo – Yarn Over
Pattern Notes:
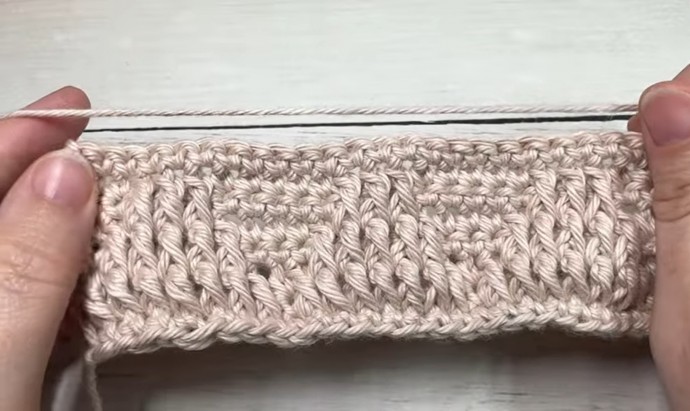
This stitch is worked in rows in this tutorial and it may be worked in one colour or many. I will be working this pattern in a solid colour.
To begin make a slip knot and make a foundation chain. For this stitch you will need a multiple of eight chains, plus two (8 + 2) for your foundation chain.
For example, ch 26.
Pattern Instructions:
Row One: Sc in the 2nd ch from your hook and in each ch across. Ch 1, turn.
Row Two: Sc in the 1st st and in each st across. Ch 1, turn.
Row Three: Sc in the 1st st, *fpdc in the next st 2 rows below 7 times, sc in the next st; Rpt from * across. Ch 1, turn.
Row Four: Sc in the 1st st and in each st across. Ch 1, turn.
Row Five: Sc in each of the 1st 2 sts, *fpdc around the post of the fpdc 2 rows below 5 times, sc in each of the next 3 sts; Rpt from * across ending with an sc in each of the final 2 sts. Ch 1, turn.
Row Six: Sc in the 1st st and in each st across. Ch 1, turn.
Row Seven: Sc in each of the 1st 3 sts, *fpdc around the post of the fpdc 2 rows below 3 times, sc in each of the next 5 sts; Rpt from * across ending with an sc in each of the final 3 sts. Ch 1, turn.
Row Eight: Sc in the 1st st and in each st across. Ch 1, turn.
Row Nine: Sc in each of the 1st 4 sts, *fpdc around the post of the fpdc 2 rows below, sc in each of the next 7 sts; Rpt from * across ending with an sc in each of the final 4 sts. Ch 1, turn.
Row Ten: Sc in the 1st st and in each st across. Ch 1, turn.
Row Eleven: Fpdc around the post of each of the 1st 4 sts 2 rows below, sc in the next st, *fpdc around the post of the next st 2 rows below 7 times, sc in the next st; Rpt from * across ending with a fpdc around the post of the next st 2 rows below 4 times. Ch 1, turn.
Row Twelve: Sc in the 1st st and in each st across. Ch 1, turn.
Row Thirteen: Fpdc around the post of each of the 1st 3 sts 2 rows below, sc in each of the next 3 sts, *fpdc around the post of the next st 2 rows below 5 times, sc in each of the next 3 sts; Rpt from * across ending with a fpdc around the post of the next st 2 rows below 3 times. Ch 1, turn.
Row Fourteen: Sc in the 1st st and in each st across. Ch 1, turn.
Row Fifteen: Fpdc around the post of each of the 1st 2 sts 2 rows below, sc in each of the next 5 sts, *fpdc around the post of the next st 2 rows below 3 times, sc in each of the next 5 sts; Rpt from * across ending with a fpdc around the post of the next st 2 rows below 2 times. Ch 1, turn.
Row Sixteen: Sc in the 1st st and in each st across. Ch 1, turn.
Row Seventeen: Fpdc around the post of the 1st st 2 rows below, sc in each of the next 7 sts, *fpdc around the post of the next st 2 rows below, sc in each of the next 7 sts; Rpt from * across ending with a fpdc around the post of the next st 2 rows below. Ch 1, turn.
Row Eighteen: Sc in the 1st st and in each st across. Ch 1, turn.
And that’s it!
Well, that’s a lot – but for the rest of the pattern you will repeat rows 3-18 for as long as you would like. Fasten off, weave in your ends.


