Lattice Stitch Photo Tutorial

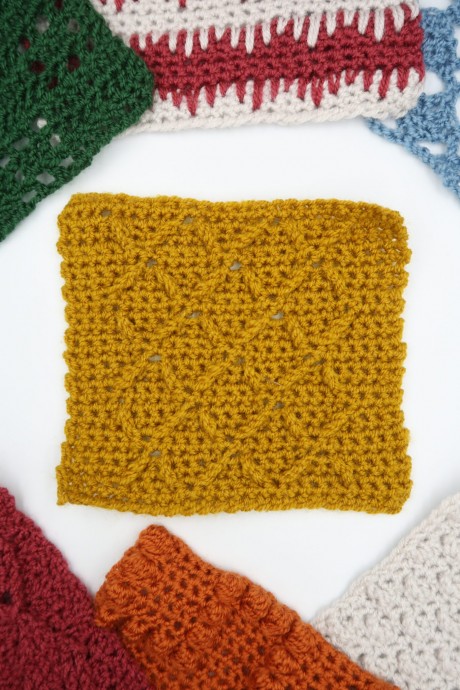
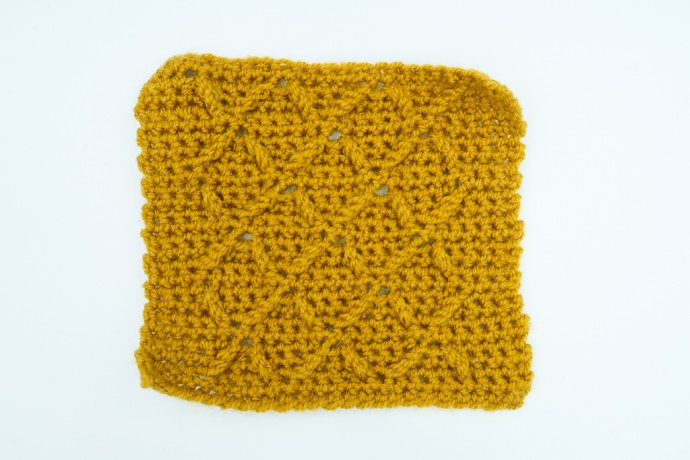
The Lattice stitch is a beautiful textured crochet stitch. It creates a thick yet not stiff fabric. The wrong side is plain and not particularly attractive, it is best used in projects where it is hidden such as pillows, rugs, or garments. Learn how to make the Lattice stitch with this photo tutorial.
Size
The patterns are written for a 15cm by 15cm / 6” by 6” square.
Stitch Multiple
The pattern needs a multiple of 6 number of stitches; your starting chain will be a multiple of 6 + 1 for an extra turning chain.
Gauge
The gauge for this pattern is 17 st by 16.5 rows in stitch pattern for a 10 cm by 10 cm square (4” by 4”).
Abbreviations
st = stitch
ch = chain
sc = single crochet
fptr = front post treble crochet
skip = miss
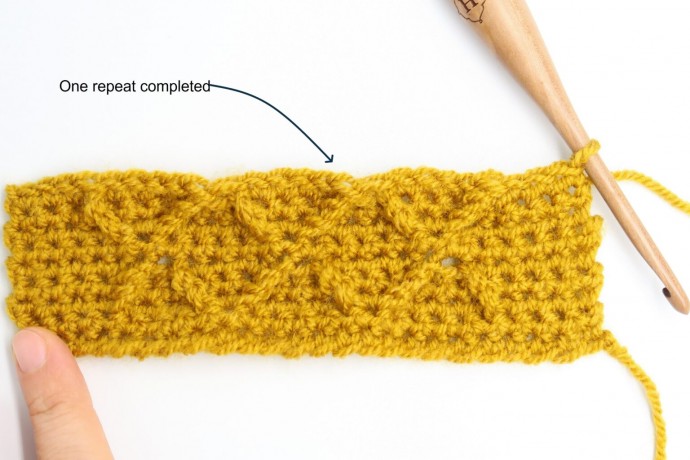
Lattice Crochet Stitch Pattern
With your 5mm / US H-8 hook ch 25,
Row 1: Sc in 2nd ch from hook, sc across, turn. <24 st>
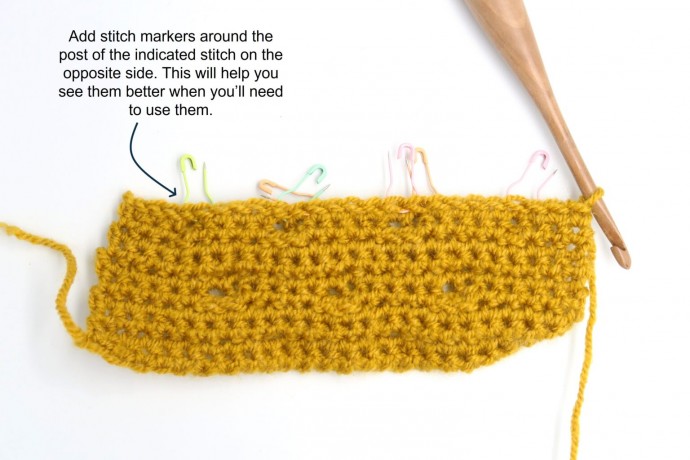
Row 2: Ch 1, sc 4, place marker around post of last sc made, [sc 5, place marker around post of last sc made, sc, place marker around post of last sc made] until last 8 st, sc 5, place marker around last sc made, sc 3, turn.
Note: Place the stitch markers on the other side so it will be easier to see them when you’ll need them.
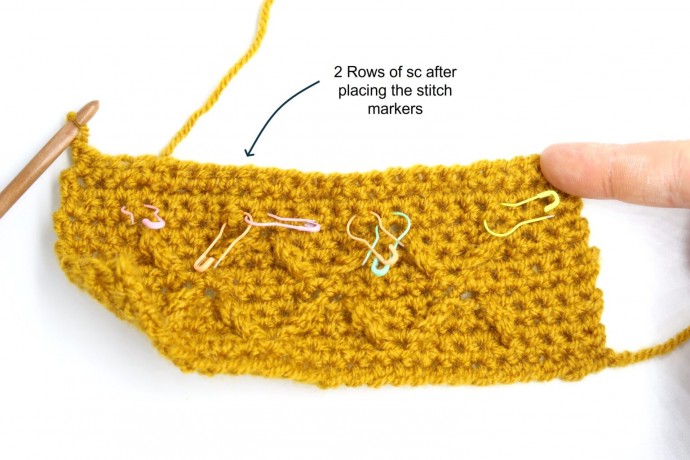
Row 3 – 4: Ch 1, sc across, turn.
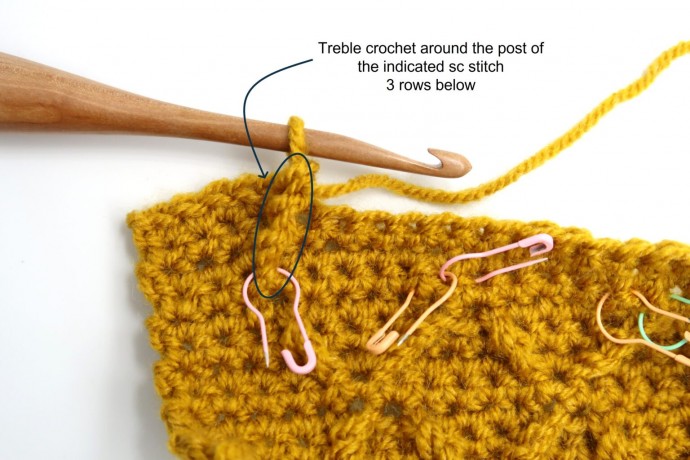
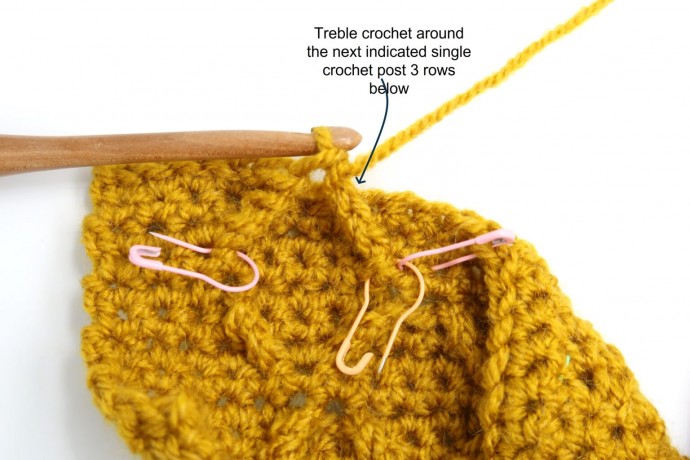
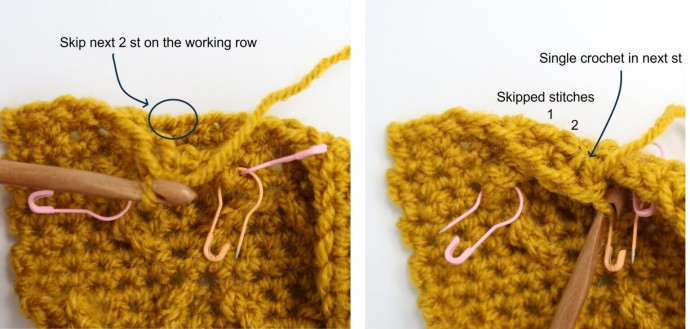
Row 5: Ch 1, sc 5, fptr around first marked sc 3 rows below, fptr around next marked sc 3 rows below, skip next 2 st on previous row behind post sts, [sc 4, [fptr around next marked st 3 rows below] twice, skip next 2 st on previous row behind post sts] to last 5 st, sc 5, turn.
Row 6: Ch 1, sc 6, [place marker around post of last sc made, sc in next st, place marker around post of last sc made, sc 5] until end of row.
Row 7 – 8: Ch 1, sc across, turn.
Row 9: Ch 1, sc 3, fptr around first marked sc 3 rows below, skip next sc, sc 4, [[fptr around next marked sc 3 rows below] twice, skip next 2 sts, sc 4] to last 4 st, fptr around next marked sc 3 rows below, skip next st, sc 3, turn.
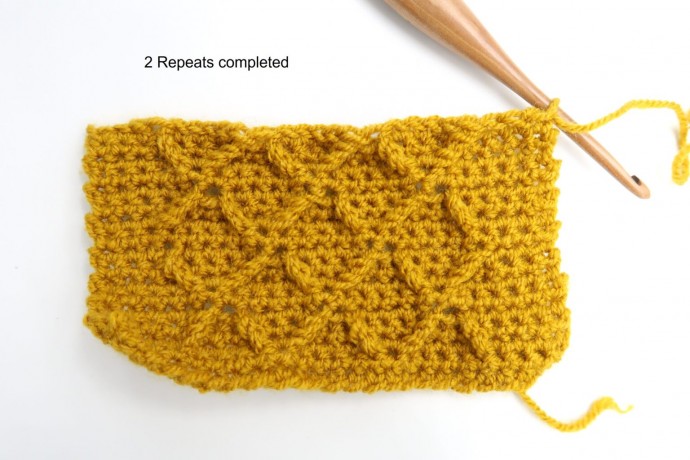
Repeat Row 2 – 9 until you reach 15cm / 6″.
Final Row: Ch 1, sc across, turn. Fasten off and weave in the end.